-
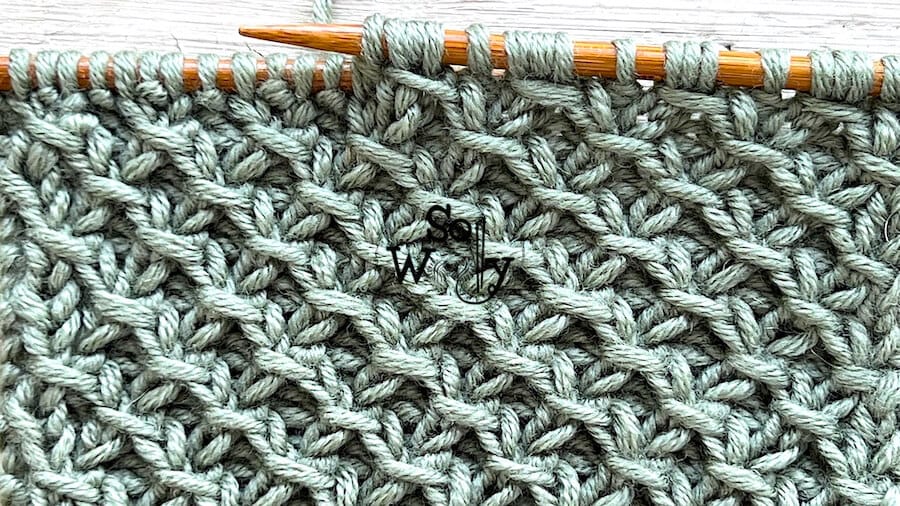
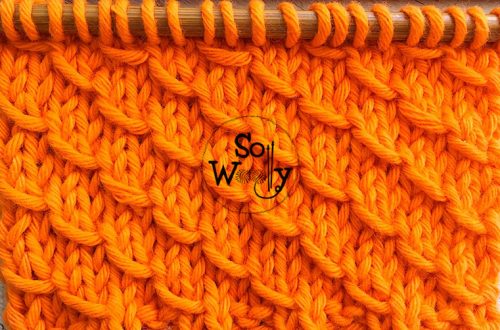
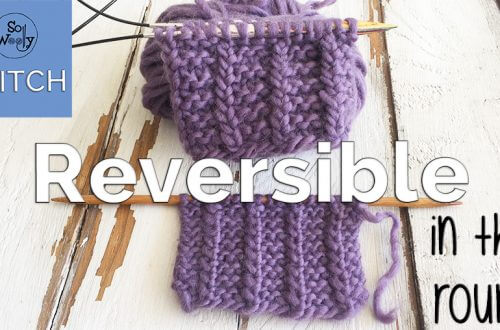
How to knit the Cross stitch pattern in just 4 rows
In today’s tutorial, I will show you how to knit a super pretty Cross Stitch, step by step. A few months ago we saw how to knit a variant of the Cross Stitch in which we learned to cross stitches without using a cable needle. The truth is that both stitches have a spectacular texture, which makes them perfect for knitting accessories, such as hats, gloves and mittens, socks, etc. However, you can also use them for sweaters, cardigans or cardigans, and even blankets. In addition, the Cross Stitch we see today is not difficult to knit: It is done in four rows, two of which are formed with knit…
-
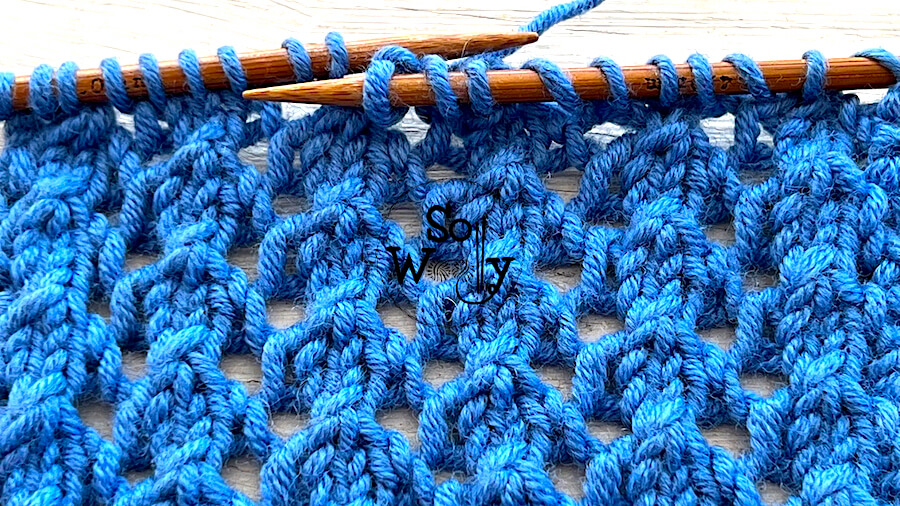
How to knit a One-row stitch pattern for Scarves + Video
Today, I’m sharing how to knit a spectacular one-row knitting pattern! It’s fun to knit and pretty easy to memorize 😉 In fact, it involves three steps that are repeated from the beginning to the end of the project, that is, you only have to repeat row 1 all the time. Yay! In addition, it’s identical on both sides of the fabric, which makes it perfect for knitting scarves and infinity cowls. This one-row knitting pattern has a gorgeous texture to it, which is achieved with these two techniques: A left-leaning increase, and a left-leaning decrease, both of them already been implemented in other tutorials. Honestly, it’s precisely this combination…
-
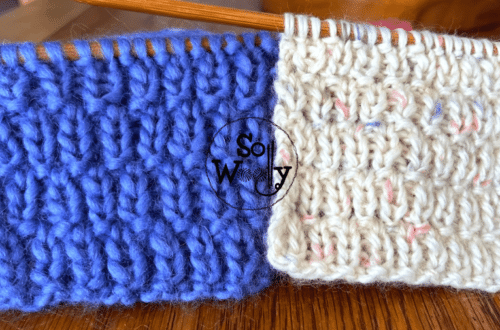
How to knit with two colors: Tweed stitch
In this tutorial, I’m showing how to knit with two colors, while teaching the Tweed stitch. Honestly, it’s so easy, that you don’t even have to purl! Actually, the two-color Tweed stitch is a four-row repeat pattern, two of which are plain knit rows… it couldn’t be easier. It’s a stitch pattern ideal for beginners; no previous experience in knitting with colors will be needed, you’ll see! However, if you are a beginner in the colorwork technique, I’d suggest you keep reading 😉 How to knit with two colors: Helpful Tips I will not tire of repeating… First of all, use contrasting colors; it’ll help you to “read” your knitting…
-
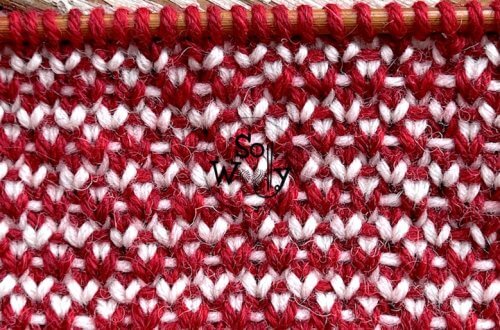
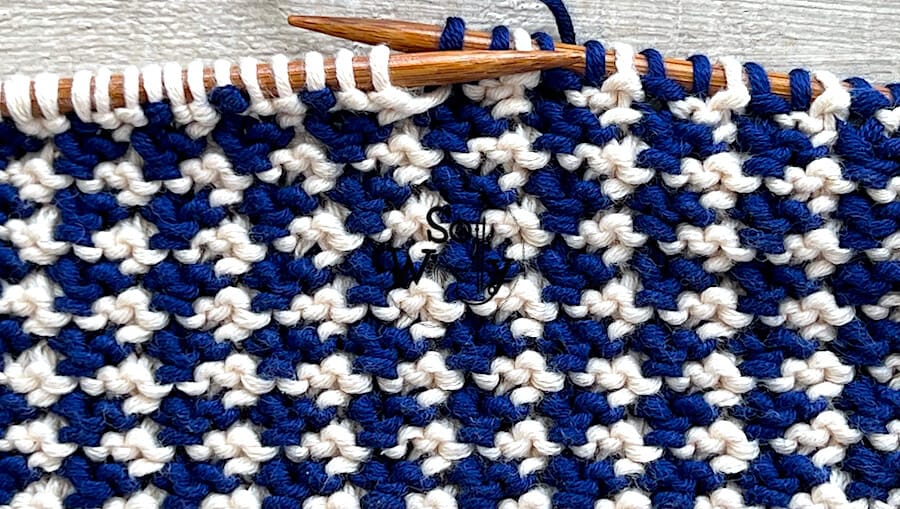
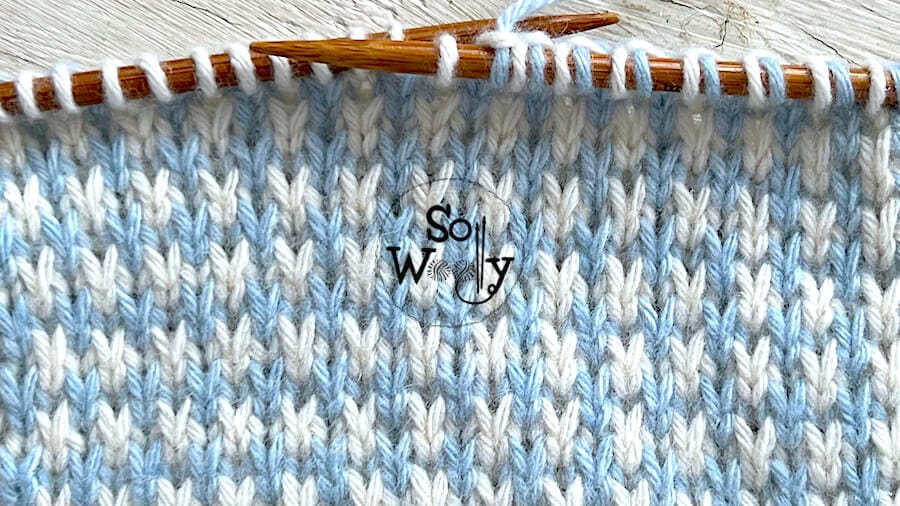
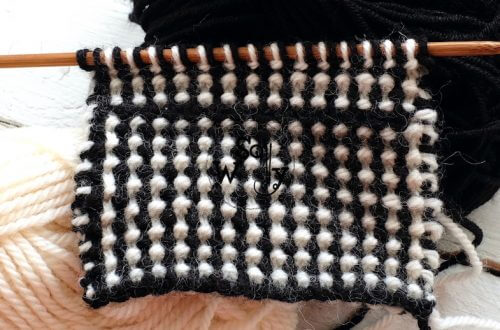
How to knit with two colors: The Bird’s Eye stitch
In this tutorial, I’ll show you how to knit with two colors; we’ll learn how to knit the Bird’s Eye stitch. It’s a four-row repeat pattern, super easy to do: The even rows are plain purl rows; the odd rows include the same two steps. As a matter of fact, some knitters believe that knitting with colors can be difficult, but the Bird’s Eye stitch will prove them wrong 😉 Actually, in the past, we’ve practiced a couple of two-color stitch patterns that are also an easy way to introduce you to this wonderful technique: The first one I shared (using two different swatches) is the Two-color Slip-stitch pattern: Honestly,…
-
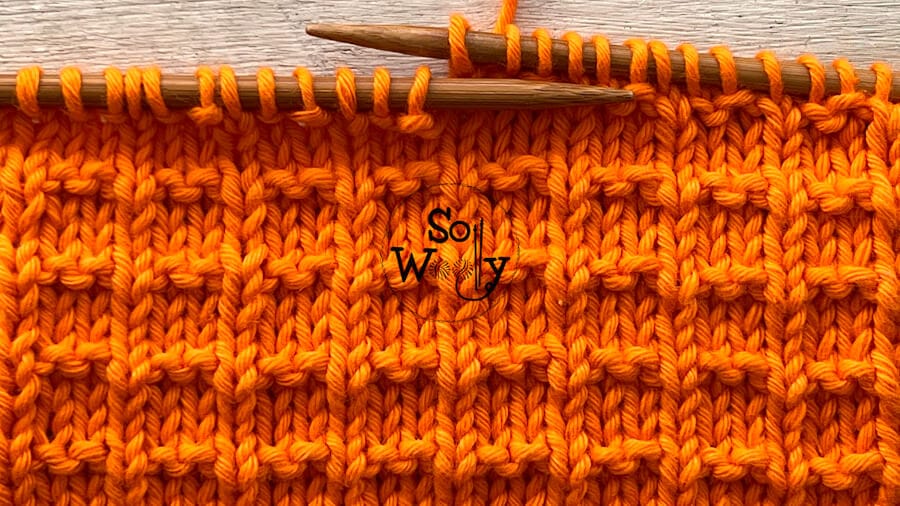
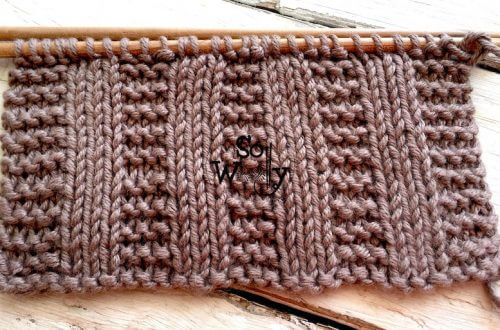
How to knit the Tweed stitch with knits and purls only!
Today, you’ll learn how to knit the Tweed stitch, with knit and purl stitches only. Because I know that not every knitter is a fan of slipping stitches… So, when I shared the classic Tweed stitch a while ago, some of my Woollies didn’t try it. Naughty, naughty little Woollies 😉 This is why today I’m sharing a pretty variant that only requires knit and purl… no slipped stitches at all! And it’s known around the world as “Harris Tweed”, an ancient Scottish clothing tradition. Actually, its check pattern design makes it ideal not only for scarves and cowls, but for blankets, cushions, placemats, and table runners, for example… your…
-
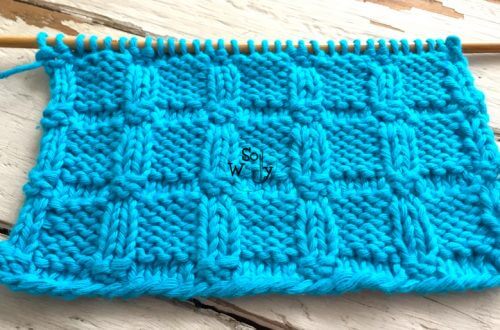
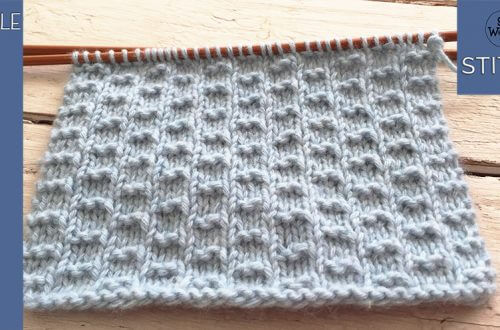
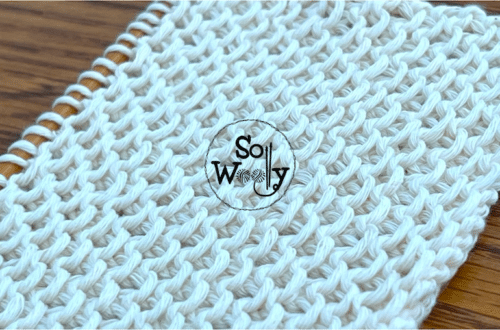
How to knit the Waved Welt stitch (knit and purl pattern)
In this post, you’ll learn how to knit the Waved Welt stitch, another member of the Chevron pattern collection 😉 The Waved Welt stitch is easy to do; if you can knit and purl, you can do it (there is no need to slip stitches, increase or decrease)…yay! One of the reasons why I’ve chosen to show you this one is because the edges don’t curl or bend. This happens because of the frequency of knit and purl stitches per row. However, it’s possible that the undulation remains raised, so the steam iron could be your best friend here if you want your garment to be absolutely flat. Another advantage…
-
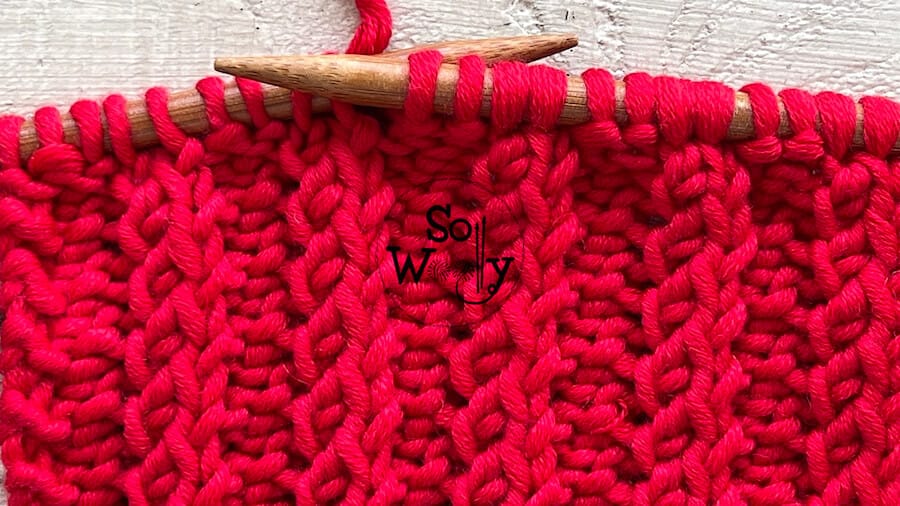
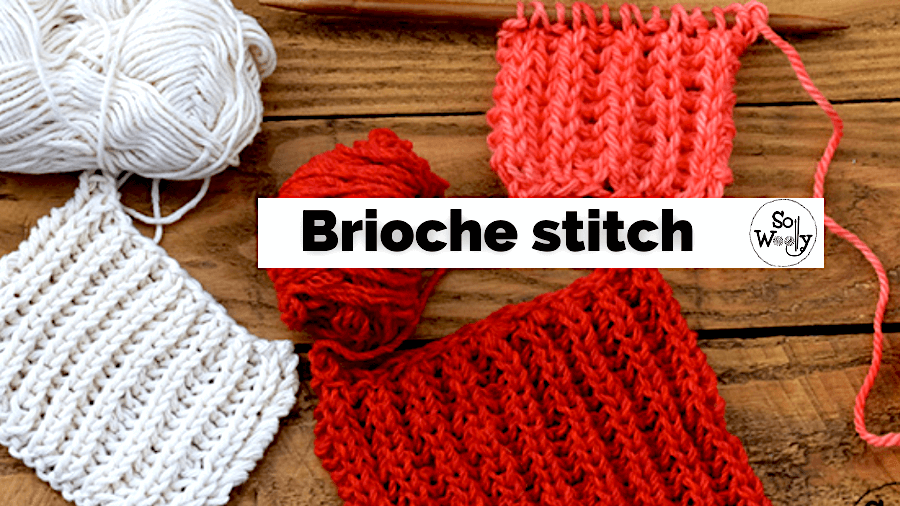
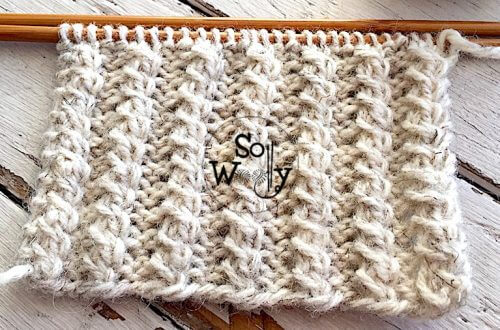
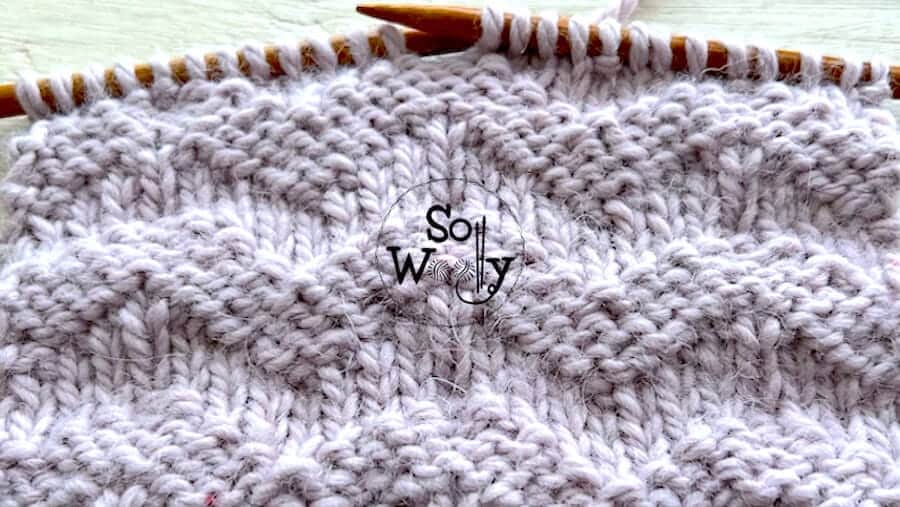
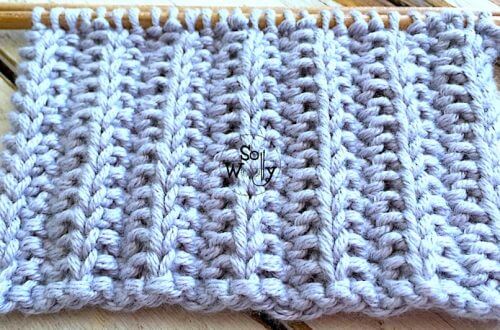
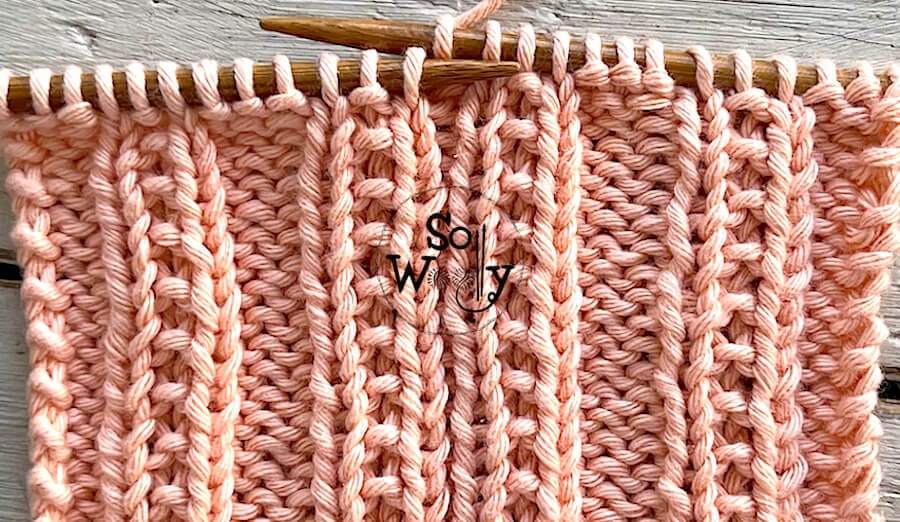
How to knit the Broken Brioche Rib stitch
In this tutorial, you’ll learn how to knit the Broken Brioche Rib Stitch, step by step. But no worries, it’s not as complicated as real Brioche, nor as time-consuming as good ribs 😉 It involves only two steps that are repeated all the time, so it is also super easy to memorize. Honestly, I’m secretly in love with this kind of pattern, which explains why we practiced a couple of lovely variants recently: The first one is the Pearl Brioche stitch, which looks very pretty and isn’t difficult at all. And the second is the Half Brioche stitch, which also has a great texture to it, and is even easier…
-
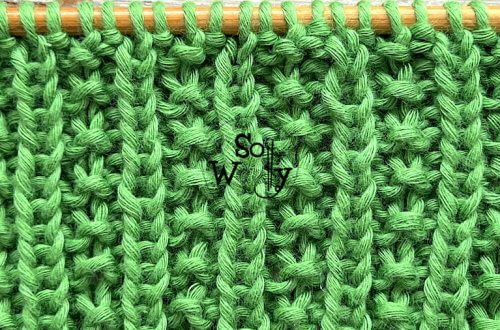
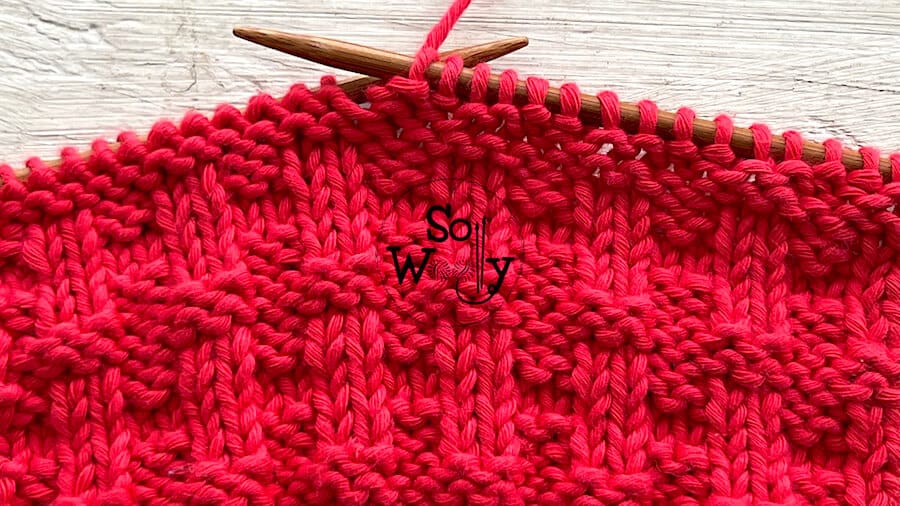
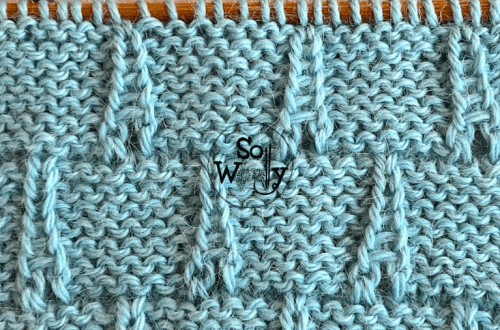
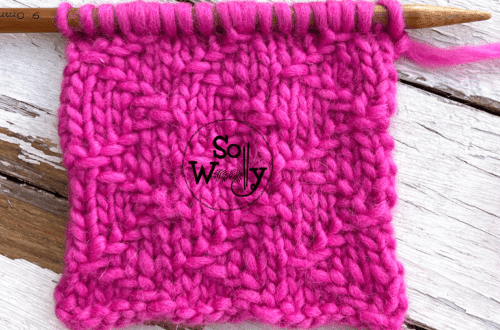
How to knit an Easy Two-row repeat pattern
In today’s tutorial, I’m sharing how to knit an easy two-row repeat pattern, great for scarves. The only techniques required are knit and purl stitches, so there is no need to increase, decrease, slip, or cross stitches… exactly as my doctor prescribed 🙂 So it is ideal not only for those who have experience but also for beginners. Why? Well, if you are a veteran, I’m sure you’ll agree with me that from time to time we need something easy that allows us to watch our favorite series while making a lovely garment. I’m a natural multitasker, just like you! And if you are just starting to knit, this kind…
-
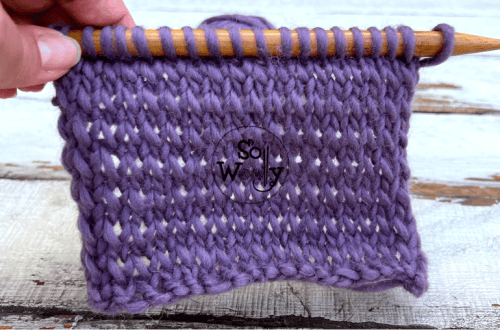
How to knit the Fancy Openwork stitch pattern
Today, you’ll learn how to knit the Fancy Openwork stitch, which as you know is absolutely gorgeous 🙂 It’s a four-row repeat pattern, two of which are plain purl rows… easy-peasy! In fact, when working the odd rows, the only two techniques used are: yarn over, and knit three stitches together. And the same steps will be repeated throughout those two rows, so it’s also quick to memorize. The Fancy Openwork stitch is a pretty versatile pattern: Use wool (or any of its blends), for Autumn-Winter clothing and accessories. Or use cotton or linen, or their blends, for Spring-Summer garments. In addition, it’s a great pattern for scarves, cowls, tops,…
-
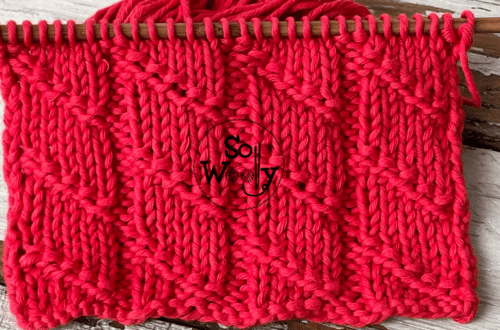
How to knit the Double Andalusian stitch pattern
In this tutorial, you’ll learn how to knit the Double Andalusian stitch pattern (a second version…Olé). We practiced another version of the Double Andalusian knitting pattern some time ago, very similar to this one, except that the little horizontal ridges are diagonal 😉 And most recently, I shared how to knit the simple Andalusian stitch, another lovely pattern! What these variations have in common is that all of them look pretty, they are super easy to do, and they combine only knit and purl stitches, which make them ideal for beginners. Additionally, the Double Andalusian stitch is great for a wide range of projects: From baby stuff, cushions, and placemats,…