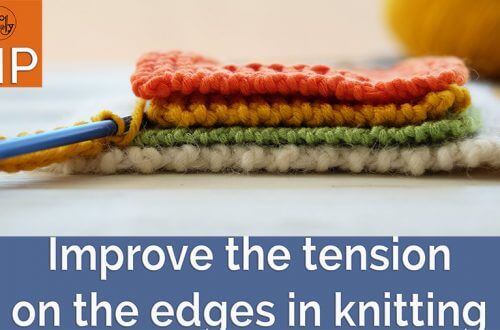
4 knitting techniques and tips to bind off different stitches: Fisherman’s Rib, No curl Stockinette, among others
In this tutorial, you’ll learn four techniques to bind off different kinds of knitting patterns, such as the classic Fisherman’s Rib, the Tweed stitch, and the “No curl Stockinette stitch”.
You’ll also see how to bind off working each stitch as it presents, because some of you have told me that it’s still difficult to distinguish the knit stitch from the purl stitch.
All the stitches that I’m using for this tutorial have been published here, on this web, and on my You Tube channel: SoWoolly
Learning these techniques is important, because not every stitch pattern looks nice if we bind off the traditional way: whether binding off knitwise, or binding off purlwise.
I think that after making an effort knitting a project, where time and money have been invested, we should try to finish it the best way possible, for a more professional look, don’t you agree?
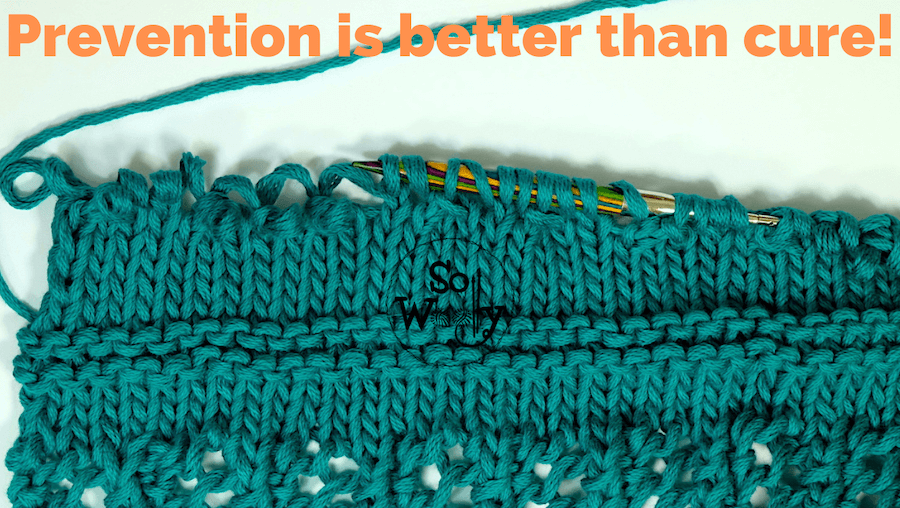
One of the most common issues for many knitters is a tightened edge after binding off. Some of us pull the stitches too hard and as a result, the edge shows shortened or shrunk. Too much tension!
The easiest trick to solve this problem is to use a larger needle for binding off (or casting off).
That being said, let’s get started 😉
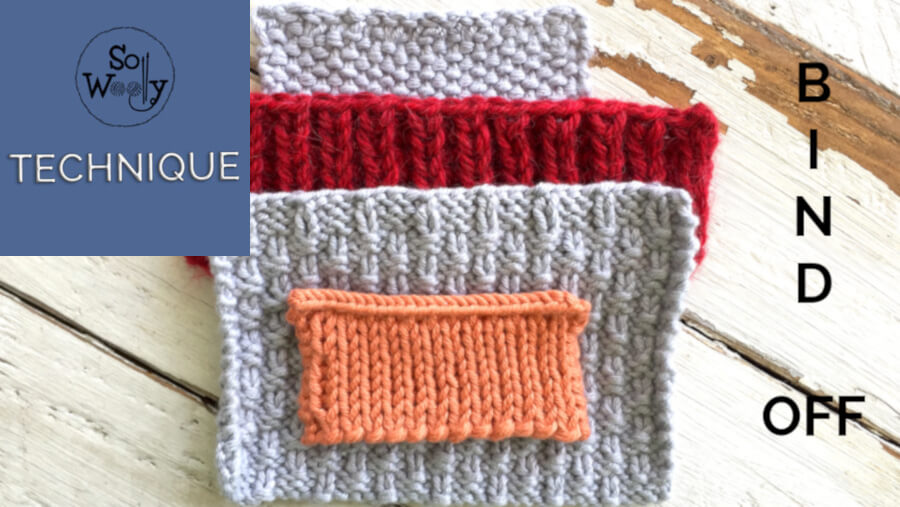
4 knitting techniques and tips to bind off different stitches
Bind off working each stitch as it presents
This is a pretty recurrent phrase in the instructions of many stitch patterns which combine knitting and purling.
It simply means that we need to do what we see, and then, bind off: If we see a knit stitch (it looks like a “v” or the link in a chain), we knit that stitch and bind off (passing the first stitch from right to left, from the right-hand needle over the second one).
If we see a purl stitch (it looks like a knot or a hyphen), we purl that stitch and bind off (again, passing the first stitch from right to left, from the right-hand needle over the second one).
To explain this technique I chose the Pearled stitch, a reversible pattern that mixes knitting and purling.
The key is to know how to recognize the difference between a knit and a purl stitch. If we are able to distinguish them at a glance, we don’t need written instructions.
This technique has the advantage that a cast off edge stays stretchy enough to retain the natural width of the knitted piece.
When finished, cut the yarn leaving a 4 in (10 cm) tail, so you can weave in ends later, pass it through the last loop, and close it.
How to bind off the “No curl Stockinette stitch” version
This pattern creates a double sided fabric, so if we bind off knitwise, the fabric will open as a fan.
Working on the right side of the work (odd rows), knit the first 3 stitches, and pass the first stitch from the right-hand needle (always viewed from right to left) over the other two.
There are 2 stitches left on the right-hand needle.
From now on, bind off as follows:
*Knit 1, and pass the first stitch on the right hand-needle over the other two*.
Repeat from * to *, until there are 3 stitches left on the right-hand needle. Pass the first stitch from the right-hand needle over the other two.
There are 2 stitches left on the right-hand needle, pass the first one over the the second.
Cut the yarn leaving a 4 in (10 cm) tail, so you can weave in ends later, pass it through the last loop, and close it.
How to bind off the Tweed stitch
This pattern features slipped stitches, so the fabric behaves differently.
After trying several different techniques, I eventually found the best way to bind off this stitch:
Working on the right side of the work (odd rows), K1, Purl two stitches together, and pass the first stitch from the right-hand needle, over the last one.
And then we repeat the following:
*Purl 1 , pass the first stitch from the right-hand needle, over the other one, purl 2 stitches together, and pass the first stitch from the right-hand needle, over the last one*.
Repeat from * to * and when there is 1 stitch left on the right-hand needle, slip it to the left-hand needle, and purl them together.
Cut the yarn leaving a 4 in (10 cm) tail, so you can weave in ends later, pass it through the last loop, and close it.
How to bind off the original Fisherman’s Rib stitch
This one is easier to bind off: Knit the first stitch (selvedge), and then we’ll see a column of “v” (Every time we see the “v” column we know that we have to knit that stitch but inserting the needle in the stitch from the row below).
Now pass the first stitch from the right-hand needle over the last one.
Then, we’ll see a column of double knots or hyphens, so we have to purl that stitch (as usual), and pass the first stitch from the right-hand needle over the last one.
From here, repeat the last two steps, as follows:
*Knit 1 from the row below, pass the first stitch from the right-hand needle over the last one, purl 1, and pass the first stitch from the right-hand needle over the last one.
When there is 1 stitch left, Knit 1, pass the first stitch from the right-hand needle over the last one, and close it as explained above.
Click here to watch the video tutorial (English and Continental style):
4 knitting techniques and tips to bind off different stitches
And that is all for today, my little Woolly.
I hope this helps!
Thank you for watching, hugs, and happy knitting 🙂
Carolina – So Woolly
PS: I just realized that in another tutorial, I shared how to knit the Herringbone stitch and how to bind off (another kind of peculiar pattern).