-
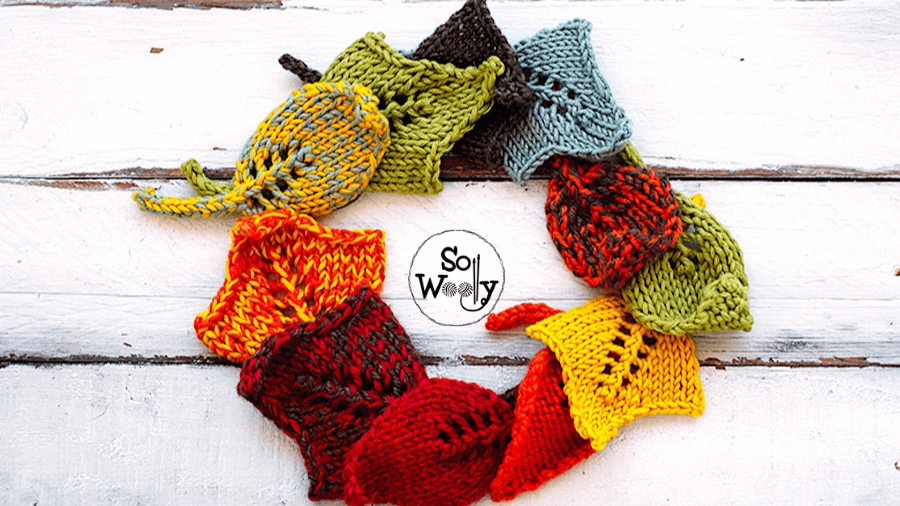
How to knit Autumn Leaves: Beech and Maple
How to knit Autumn Leaves? This is today’s free pattern! I’m sharing how to knit them in two different shapes: Beech and Maple. Why? Well, because Autumn is my favorite season, and this year I would love to do an arrangement for my coffee table, using knitted leaves. In fact, I tried to reproduce all the beautiful colors, combining sometimes two different tones at a time, to get this seasonal feeling. I think I’ll knit a couple of 3D pumpkins, to add to this Fall knitting project… Honestly, they are easy and quick to do, just a couple of grams of yarn is all…
-
How to knit the Drizzle stitch pattern (English & Continental style)
In today’s tutorial I’m sharing how to knit the Drizzle Stitch, step by step. Honestly, I have to confess that when I saw it, I fell in love (among other things, because it forms a tiny pattern, a lovely design that will show up even in the smallest garments. It’s an adorable four-row repeat pattern, two of which are plain purl rows. In fact, one of the things that I like the most about the Drizzle stitch is that despite having slip stitches, the fabric does not tighten or shrink, as sometimes happens. Probably, it’s because of those alternating purl rows; they make the fabric “rest and relax”, let’s say.…
-
How to knit the Diamond Brocade stitch pattern
In this post, you’ll learn how to knit the Diamond Brocade stitch, another classic of the knitting world. I think it’s an elegant knitting pattern, the diamonds show slightly raised, due to the combination of knit and purl stitches. However, it’s pretty easy to do, and although it’s not reversible, the so-called “wrong” side of the work, looks special too… Furthermore, the Diamond Brocade stitch lays flat, so I’d choose it for a blanket, without a doubt. Having said that, in case you are thinking about knitting a blanket, I’d add a nice edge in Seed stitch, on each side of the project (to match the diamonds ;). The good…
-
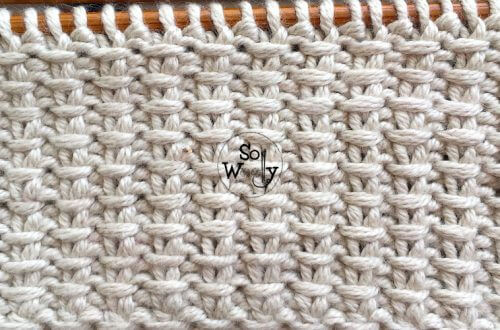
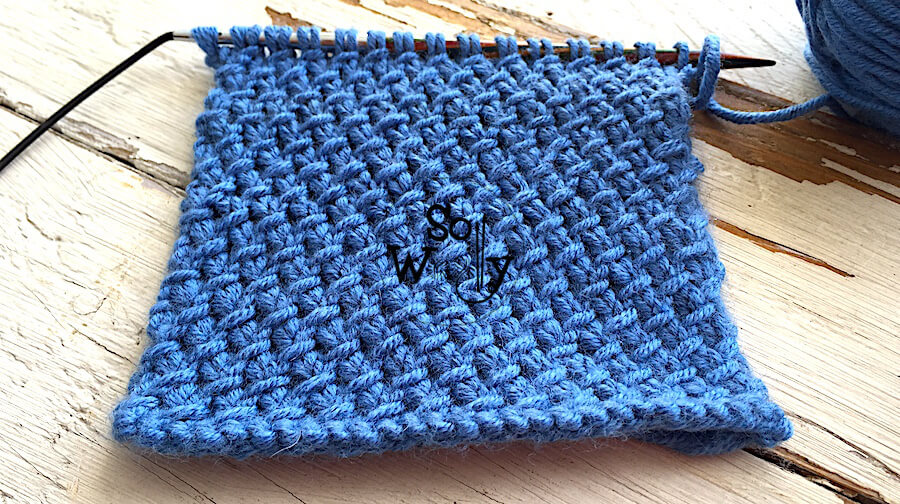
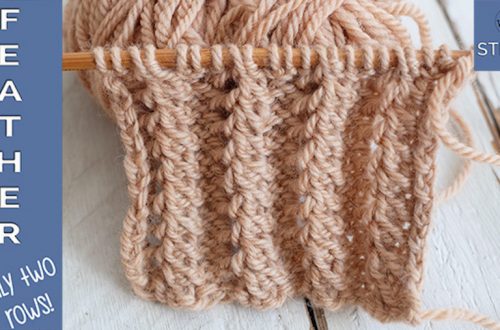
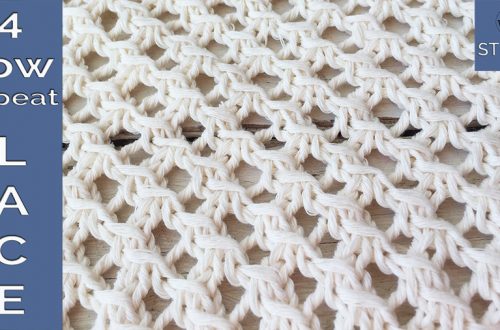
How to knit a Super Easy One-Row Repeat pattern
Today, I’m sharing a super easy one-row repeat knitting pattern, perfect for a lot of projects, such as scarves, blankies, infinite cowls, wraps, or throws…you name it! Why? First and foremost, it lays flat; it doesn’t roll up or bend on any side, so it’s not necessary to add an edge. It’s a reversible pattern, almost identical on both sides. Furthermore, it’s a vertical pattern, great for long garments; it forms both, embossed columns of “v” and pleats, for a slim and elegant design. In addition, it’s an easy-peasy one-row repeat pattern. It’s made of plain knit + purl stitches (no increases nor decreases are needed). Finally, in the video…
-
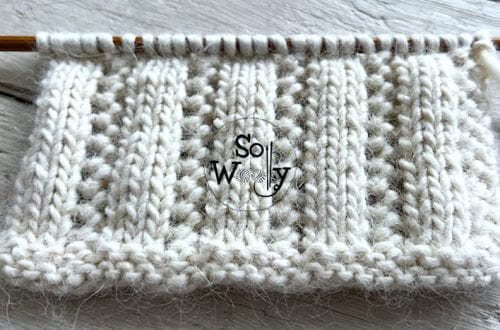
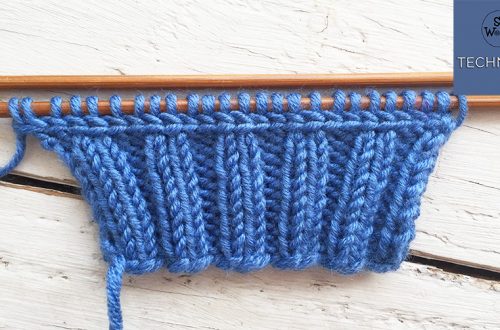
How to knit the Fisherman’s Rib with knit stitches only (no purling!)
In today’s tutorial, you’ll learn how to knit and bind off the Fisherman’s Rib using only knit stitches (no purling required, yay!!!). Similar to the original one, we practiced a while ago, this version is simply brilliant! Why? Well… this pattern features everything we knitters love: First of all, it’s a one-row repeat pattern: We’ll start with a setup row which will be done just once, and from there, there is only one row to repeat until the project is finished. Secondly, it’s pretty easy to knit: There are only two steps to memorize. Could not be easier! In third place, it’s a totally reversible pattern (identical on both sides).…
-
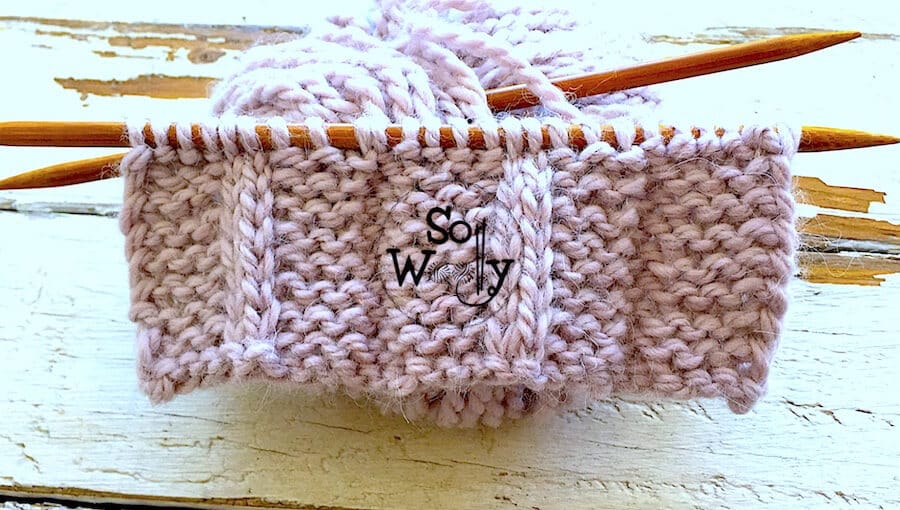
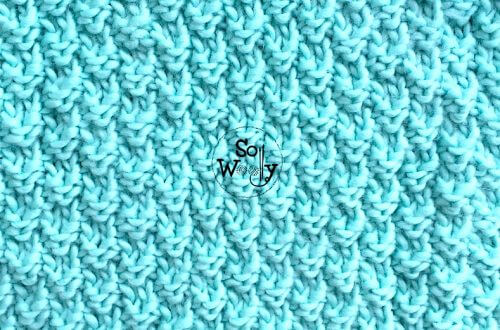
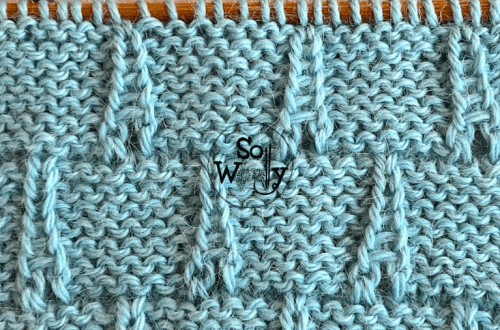
How to knit the Purl Twist stitch pattern, step by step
In this tutorial, you’ll learn how to knit the Purl Twist stitch, a four-row repeat pattern with a twist… And it has nothing to do with knitting or purling through the back loop 😉 In fact, I’m showing you how to cross stitches without using a cable needle; a simple way to do right-leaning, almost diagonal stitches, without a lot of effort. Additionally, the Purl Twist stitch creates a lovely fabric, which has a rich texture to it, similar to a wicker basket (like the Jute stitch pattern). Therefore, it’s a great pattern for accessories, such as hats, gloves, socks, etc., and also, for sweaters, cardigans, even a blanket. However,…
-
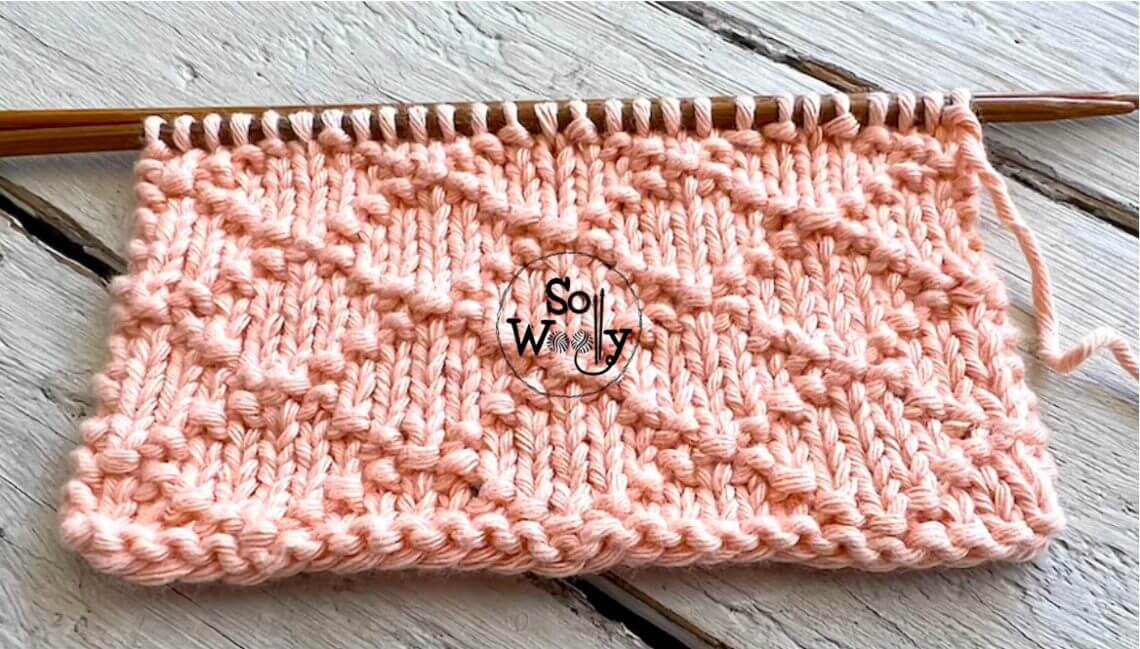
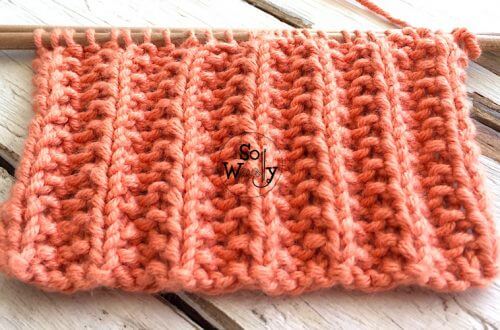
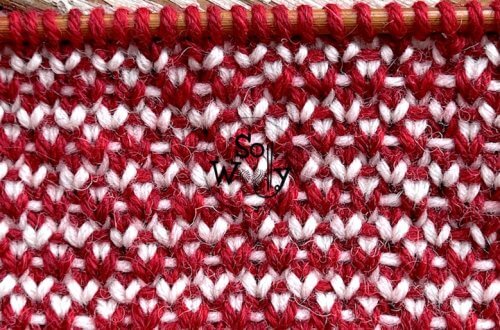
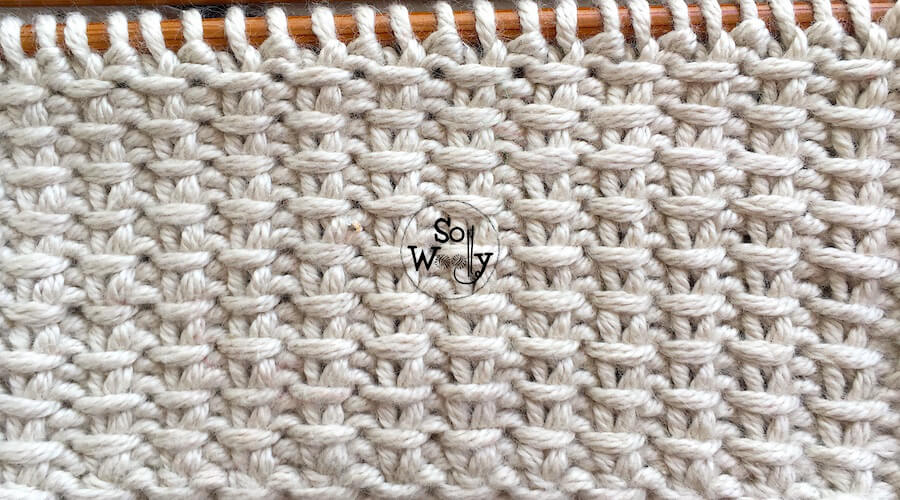
How to knit the Jute stitch: A two-row reversible pattern
In this tutorial, you’ll learn how to knit the Jute stitch. It’s one of those “most searched for” stitches (similar to the Horizontal Slipped stitch we practiced a while ago). Why? Well, first of all, it’s a two-row repeat pattern, which makes things a lot less complicated. Secondly, it’s a reversible stitch; although its two sides are different, both look adorable! Furthermore, it’s a unisex pattern: It can be used for women’s, men’s, and children’s garments. On the other hand, to test if it lays flat or not, I’ve used two different qualities and thicknesses: For the video tutorial, the swatch is made out 100% wool and 10,5 US size…
-
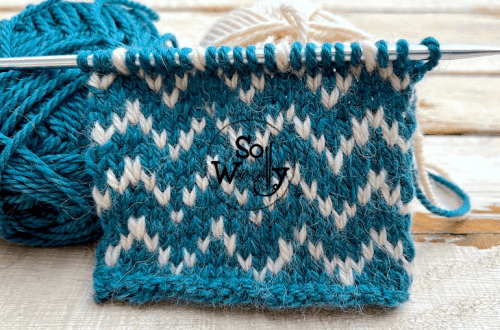
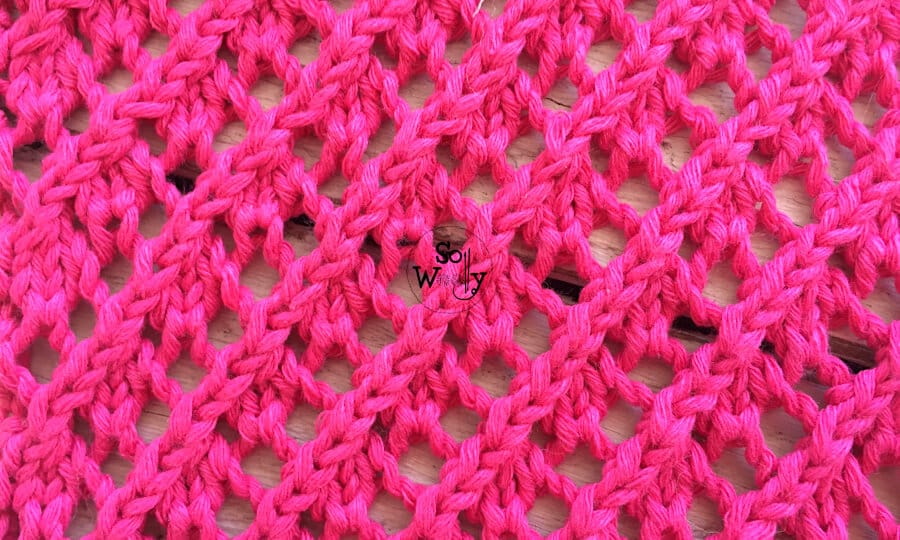
Tilted Tiles knitting stitch pattern: Diagonal Lace, step by step
In today’s tutorial, you’ll learn how to knit the Tilted Tiles stitch. A lace pattern, which forms little diamonds, along with diagonal embossed lines. Therefore, the Tilted Tiles is an elegant and delicate pattern, for tops as well as cardigans or sweaters. In addition, it’s a lovely stitch for knitting a scarf, rectangular shawl or wrap. To put a cherry on top, knit an edge on each side of the piece, using Seed, Irish Moss, Bumpy, or just the classic Garter stitch. However, before we get started with today’s pattern, I’m sharing some of the best tips and tricks when you absolutely, positively just have to knit lace stitches: First…
-
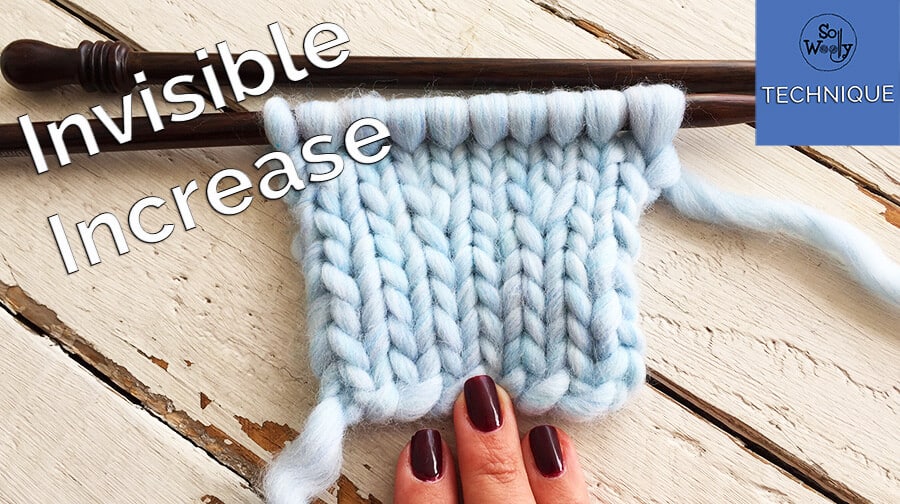
Invisible increases when knitting Stockinette stitch
In today’s tutorial, I’m sharing an increase technique that I just discovered, easy to do and practically undetectable, ideal for knitted pieces made in Stockinette (Stocking) stitch (sometimes the increases can be decorative, but often we would prefer them to be invisible (like my boyfriend 😉 In a previous tutorial, we practiced my favorite increase when knitting Garter stitch, so this time, we’ll see how to do increases that are smooth, virtually unnoticeable, and can be used for any kind of stitch where you get the “v” (the little chain) typical of the Stockinette, because we need one of the sides of the stitch (I call them the “legs” of…
-
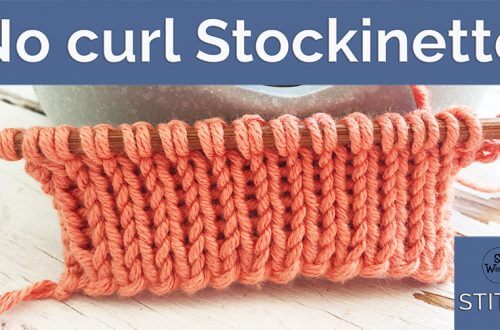
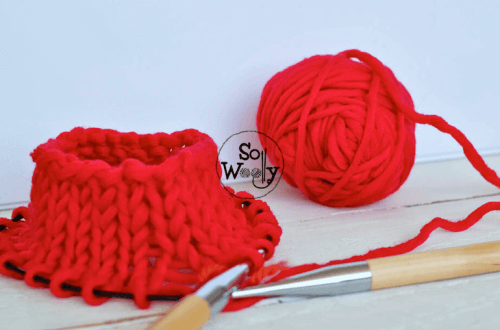
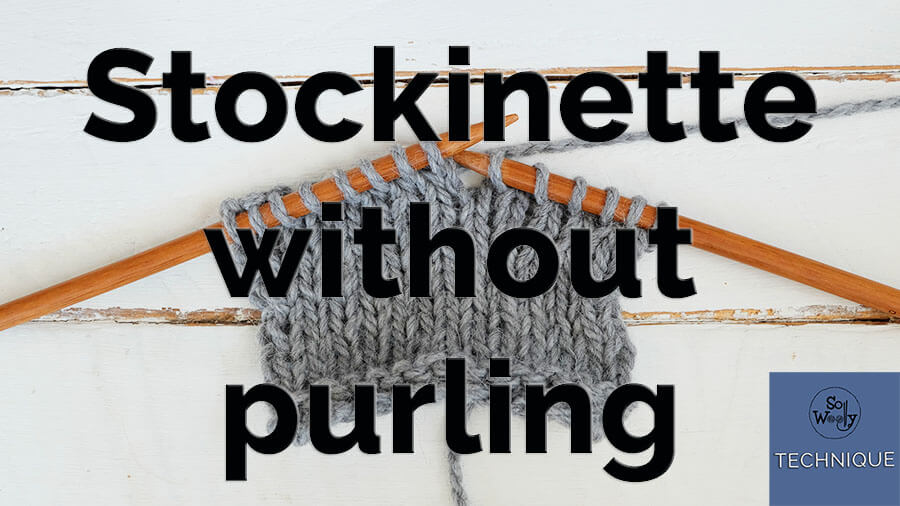
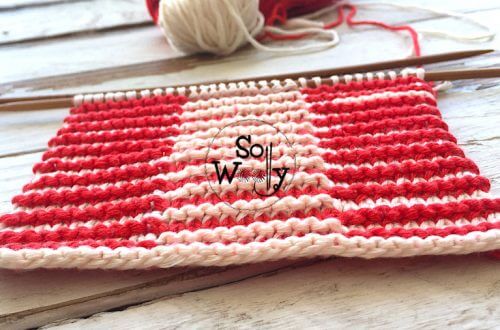
How to knit the Stockinette stitch without purling
In today’s tutorial, you’ll learn how to knit the Stockinette stitch without purling: The trick is to knit every stitch on every row when knitting the Stocking stitch. This knitting trick will help you whether you need to knit faster or even if you aren’t a big fan of purling ;), and it will look the same, both, on the right and wrong side of the work. It’s really easy, but you’ll need to repeat the second row a few times (3-4 times), until you get used to it, because we’ll be knitting backwards. One more thing before we start: Please note that when knitting the Stockinette stitch without purling,…