Top knitting Tips and Tricks
The best tips and tricks in knitting, explained step by step. Great advice for beginners and experts.
-
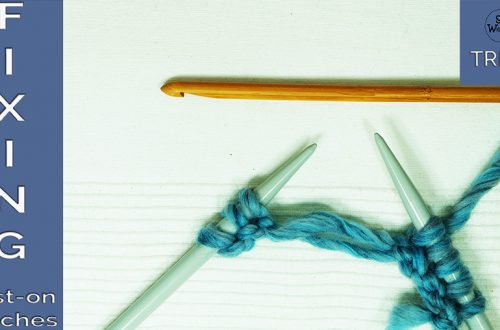
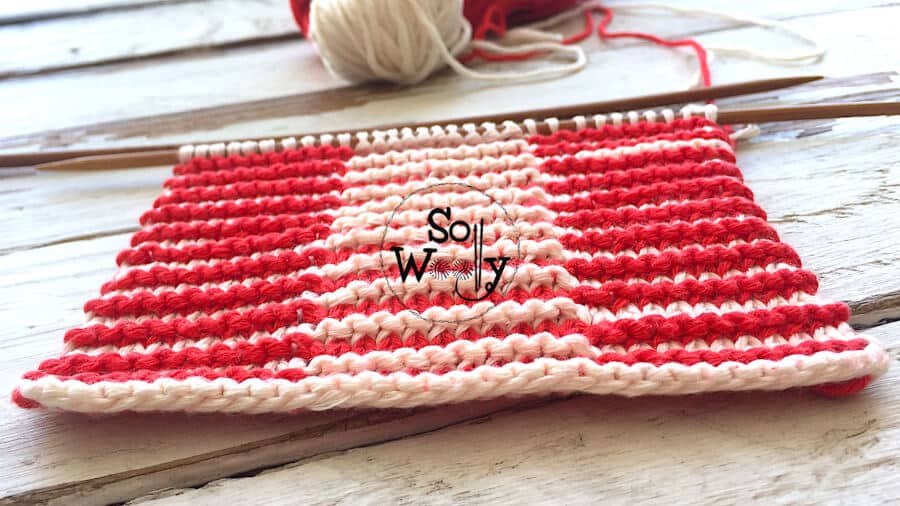
How to knit the Chained Cast on
In today’s tutorial, you’ll learn how to knit the chained cast-on, another way to start your knitting projects! Although I normally use the long tail cast-on or the knitted cast-on, it’s my favorite cast-on method when knitting in the round. It gives a touch of elegance to the edge of the hat, gloves, or sweater. Additionally, it’s pretty stretchy! The chained cast-on is not only adorable but really simple, the only extra thing you’ll need is a crochet hook. Not to worry though, you don’t need to be an expert in crochet… I’m not either! So, it’s time to learn this new technique. Grab your needles, a crochet hook, and…
-
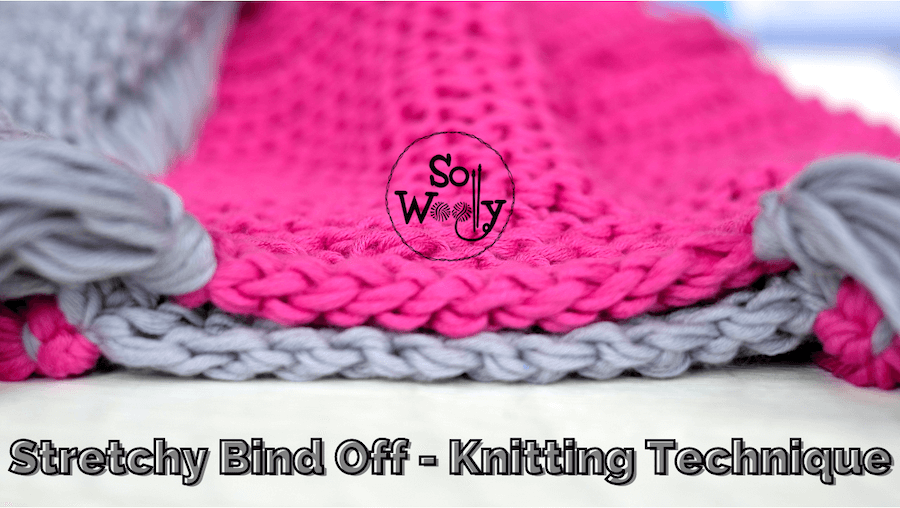
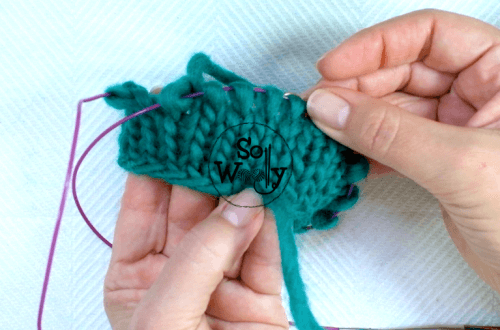
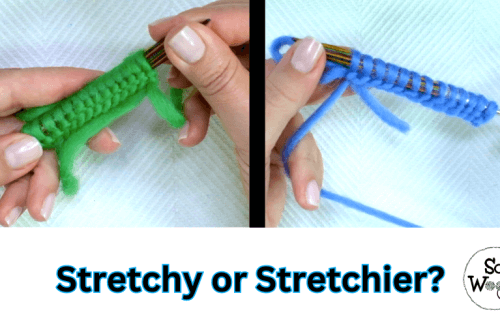
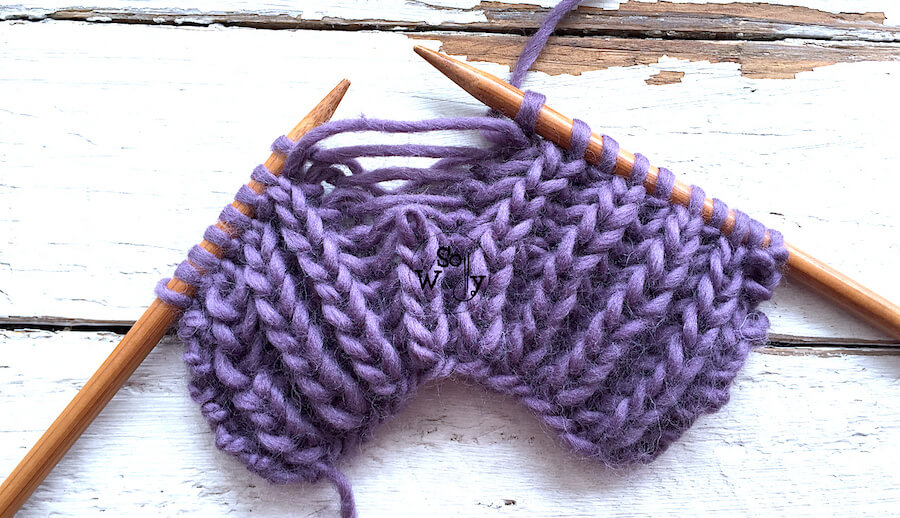
How to do a Stretchy Bind Off (Knitting Technique)
In this tutorial, you’ll learn how to do a stretchy bind-off, step by step. It’s a useful knitting technique, for several reasons: First of all, it will help you with the tension of the stitches. I’m aware that for some knitters, binding off when using the knitting needles is a real pain in the backside. In fact, there are many ways of finishing your knit work, including the 3 needles bind-off technique, but it’s also true that some knitters don’t get the results they’re looking for 😉 Either they end up having a too tight finish, or just the opposite, it’s too loose. Honestly, with this technique, you’ll have total…
-
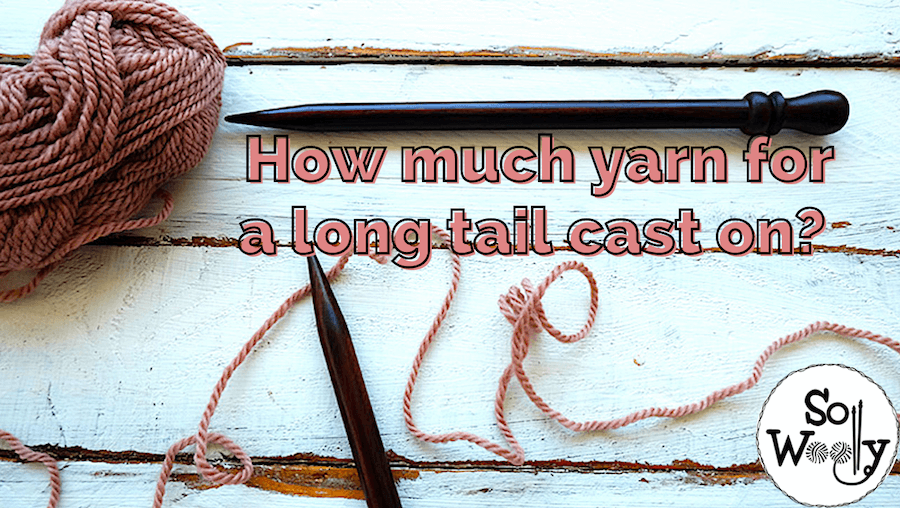
How Much Yarn For the Long Tail Cast-On + Video
How much yarn should I leave for a long tail cast on? Ask yourself just how many times you have pondered that very question… The Long Tail method is my favorite kind of cast-on methods. Why? Well, because the edge of the fabric is more consistent and stretchy… it looks lovely. However, contrary to the “Knitted Cast On method”, the goal is to use your eyes and grey matter to estimate how much yarn to leave at one end. Hands up if you have ever cast on say 80 lovely little stitches, only to realize in horror after 60 that there is simply not enough yarn to continue? Then you…
-
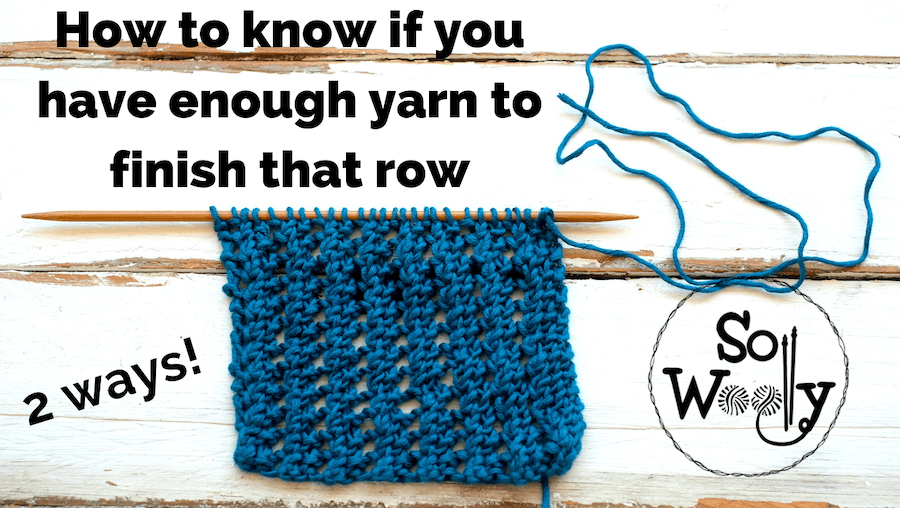
Tips For Knitters: How to Know If You Have Enough Yarn to Finish that Row+ Video
In this tutorial, you’ll learn two ways of knowing if you have enough yarn to finish that row you’re working on, even if you’re binding off (or casting off). This tutorial is part of the Practical Knitting Help collection, where you’ll find clear solutions for everyday knitting problems. I’m sure you know the feeling of not having enough yarn to complete one row or one round. Especially if you don’t want to join the new ball in the middle of the back of your sweater! But it could be worse… How do you feel if you are unsure whether your project can be finished or not?!!! Probably you have seen…
-
Tips for knitters: How to use rubber bands in your knitting
Today’s post is all about a couple of ways to use rubber bands to help improve your knitting. Why? Well, I’m excited to say that over the next weeks, I intend to post a new series of tutorials in a special playlist on my YouTube channel “So Woolly” in order to help you, my little Woolly. I’ve called it: “Things I wish I knew when I started knitting”. Had I known everything that I am about to share with you, I would have avoided a lot of stress and more grey hairs than I care to mention. In fact, these tips and tricks were earned through blood sweat, and tears,…
-
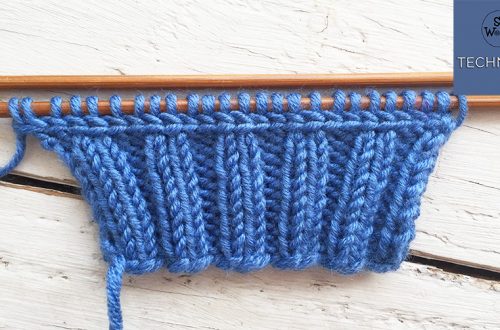
Symmetry in the Chevron stitch/3 needle bind off (no seaming)
Several months ago, we practiced the Reversible Chevron stitch, and in this tutorial, I’m sharing three new things: On one hand, you’ll learn how to knit the Ribbed Chevron stitch, ideal for scarves, blankets, and rectangular shawls or wraps (both sides look almost identical, and it stays flat! Yay!). On the other hand, you’ll see what to do to make both extremes of the garment look the same when knitting a stitch that creates picks (or a pointy edge). In other words, how to get symmetry in your Chevron stitches… yeap, it’s possible! Last, but not least, you’ll learn how to bind off and seam two knitted pieces at the…
-
How to create Illusion or Shadow knitting, step by step
In this tutorial, I’m sharing a pretty special technique: How to knit a fabric that creates a shadow effect or an optical illusion, through texture and color. Even if at first it appears complicated, shadow knitting is actually really easy to do (the only stitches required are knits and purls). Its also endlessly adaptable, the strips can be made as wide as you like, and as many as you need. This is why this kind of fabric is a great option when knitting blankets, cushions, place mats, table runners, bags, or even a scarf for the smaller members of the family. Before anything else, I’d like to give you some…
-
How to Fix Mistakes When Knitting the Fisherman’s Rib + Video
Today, you’ll learn how to fix the Fisherman’s Rib so that unravelling isn’t the option anymore! You can explore more practical fixes in the Practical Knitting Help collection. What makes it complicated is that we are working with stitches from the row below. Then, if we dropped stitches, or even worse, our needles went off, repairing that fabric takes a little more effort than when working basic knit-purl stitch patterns. So, as many of you have requested it, today, I’m sharing how to fix the Fisherman’s Rib stitch so anyone can repair annoying errors and take things back to normal. In the video tutorial, I’m showing 2 common mistakes: what…
-
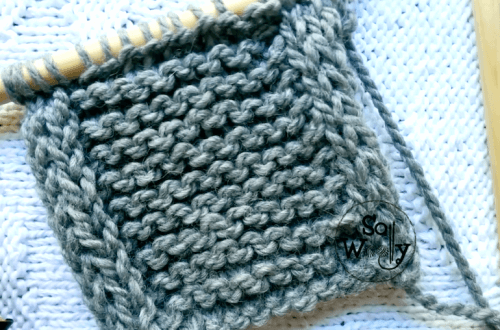
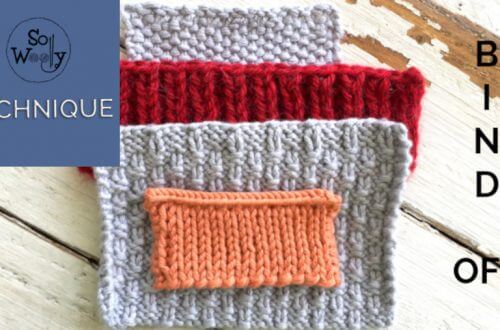
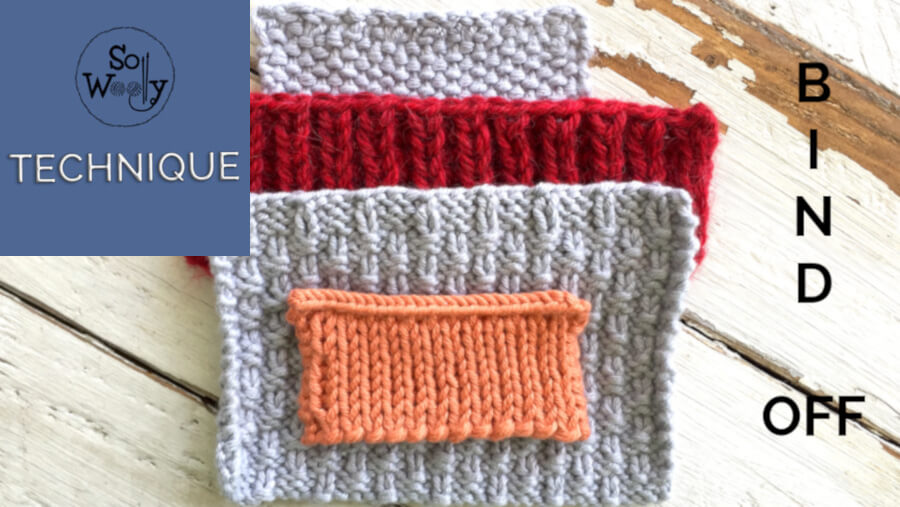
4 knitting techniques and tips to bind off different stitches: Fisherman’s Rib, No curl Stockinette, among others
In this tutorial, you’ll learn four techniques to bind off different kinds of knitting patterns, such as the classic Fisherman’s Rib, the Tweed stitch, and the “No curl Stockinette stitch”. You’ll also see how to bind off working each stitch as it presents, because some of you have told me that it’s still difficult to distinguish the knit stitch from the purl stitch. All the stitches that I’m using for this tutorial have been published here, on this web, and on my You Tube channel: SoWoolly Learning these techniques is important, because not every stitch pattern looks nice if we bind off the traditional way: whether binding off knitwise, or…
-
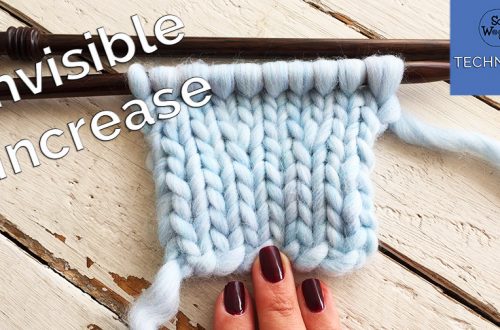
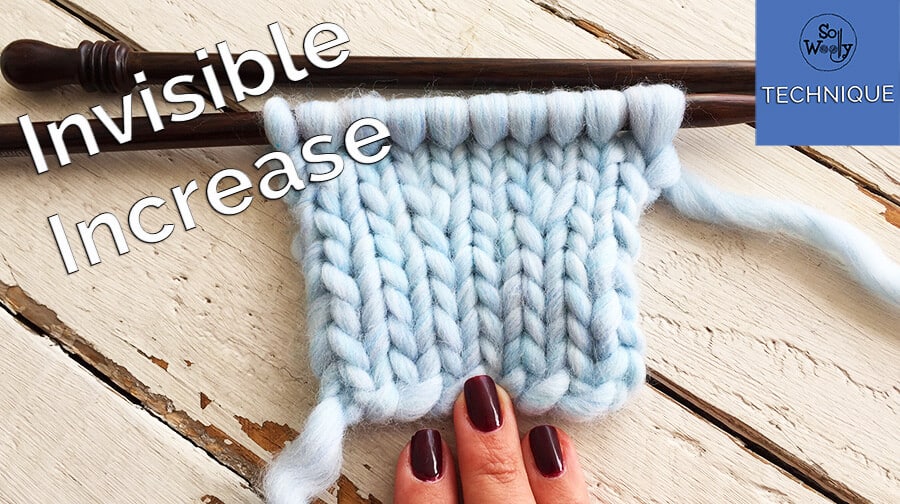
Invisible increases when knitting Stockinette stitch
In today’s tutorial, I’m sharing an increase technique that I just discovered, easy to do and practically undetectable, ideal for knitted pieces made in Stockinette (Stocking) stitch (sometimes the increases can be decorative, but often we would prefer them to be invisible (like my boyfriend 😉 In a previous tutorial, we practiced my favorite increase when knitting Garter stitch, so this time, we’ll see how to do increases that are smooth, virtually unnoticeable, and can be used for any kind of stitch where you get the “v” (the little chain) typical of the Stockinette, because we need one of the sides of the stitch (I call them the “legs” of…