How to Knit the Amazing Wicker Stitch Pattern + Video
Today, I’m sharing how to knit the amazing Wicker stitch… YAY! (I know we knitters love this sort of texture).
This pattern is part of the Cable Stitch Patterns collection, where you’ll find classic, reversible, and distinctive cable designs.
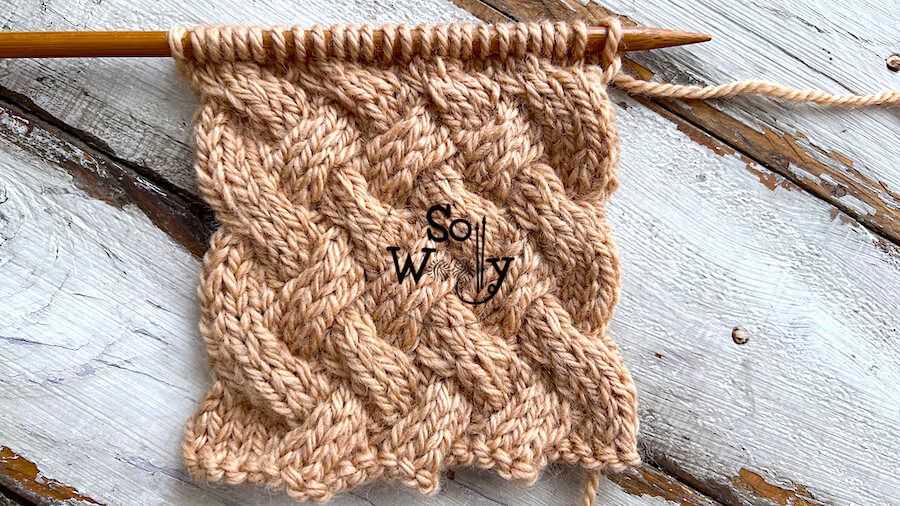
It’s an eight-row repeat pattern, easier than the Braided Basket stitch, because “the cables” are made out of six stitches, so the crossing is more flexible.
The Wicker stitch creates a larger pattern, ideal for bigger pieces, such as blankets, bags, or even a whole sweater.
However if you choose to knit any sort of garment that should stay flat, don’t forget to add a nice edge on each side of the piece: The Seed stitch, the Irish Moss, and the last pattern I shared specially for edges or borders, among others, are good options 😉
Before I forget, I’d like to make a couple of suggestions in order to succeed when knitting then Wicker stitch:
Firstly, think of using larger needles than the recommended on the label (one or two sizes up will make the fabric more flexible).
Secondly, when finished, don’t forget to block your work. It will relax the fibers (take into account that when we cross stitches, we add tension to the fabric).
Ok, enough chatting. Grab your needles, and some yarn, and let’s get busy!
Abbreviations
CO: Cast on
st: Stitch
RS: Right side of the work
K: Knit
P: Purl
BO: Bind off
WS: Wrong side of the work
N.B.:
The odd rows form the right side of the work.
The edge (selvage) stitches will be knitted on every odd row, and purled on every even row.
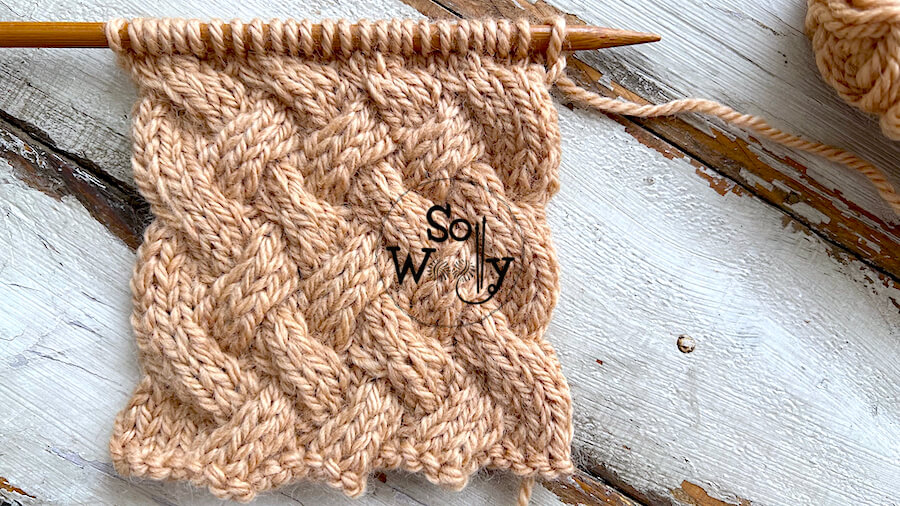
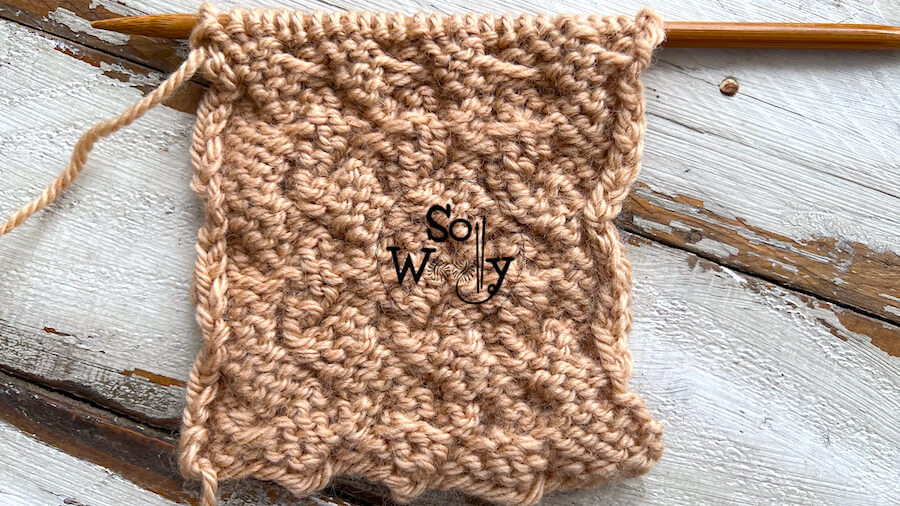
How to knit the Wicker stitch pattern
CO multiples of 6 + 2 st (edge st); i.e.: 6 * 3 = 18 + 2 = 20 st (at least 14 st).
1º and 5º rows (RS): K across
3º row: K1 (edge), K3, *slip 3 st onto a cable needle and hold at the back of work, K3 from left-hand needle, K3 from the cable needle*. Repeat from * to *, to last 4 st, ending with K3, K1 (edge).
2º, 4º, 6º and rows: P across
7º row: K1 (edge), *slip 3 st onto a cable needle and hold at front of work, K3 from left-hand needle, K3 from the cable needle*. Repeat from * to *, to last st, K1 (edge).
8º rows: P across
These eight rows create the pattern. Repeat them until the desired length is reached.
When finished, BO purlwise after row 3 (WS).
This is the other side of the work:
If you enjoy knitting cables, you’ll find more inspiration in the Cable Stitch Patterns collection.
Enjoy the video tutorial:
Hugs, and happy knitting!
Carolina – So Woolly
“As an Amazon Associate, I earn from qualifying purchases.”