How to Knit the Mock Wasp Nest Stitch [3D Knits & Purls]
You loved the Wasp Nest Stitch. I know — because you told me. 😊
✨ Want to knit this without ads or scrolling?
👉 Click on this line if you want to download the printable PDF pattern
That gorgeous 3D texture, those little honeycomb-like cells, the richness of the fabric… it’s one of those stitches that people fall in love with immediately.
But I always hear the same thing: “Carolina, I love it, but I’m a bit nervous about the cable needle.”
Ready to start knitting?
In the video tutorial below, I’ll show you how to work this super simple 8-row Mock Wasp Nest stitch step by step:
So I went back to my notebook. And I found a way!
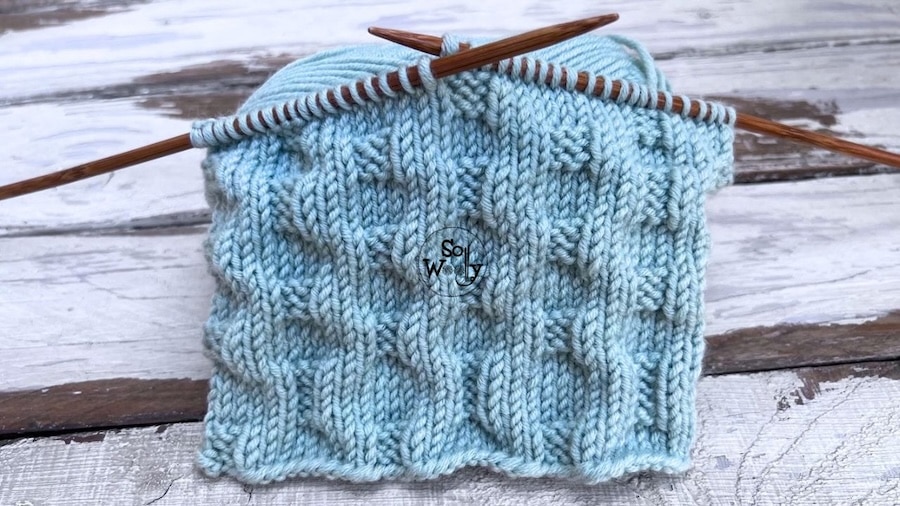
This is the Mock Wasp Nest Stitch — and it creates almost the same stunning 3D texture as the original, using nothing but knit and purl stitches. No cable needle. No crossing stitches. No extra tools (and no increases or decreases).
Eight rows — and rows 1 and 3 are the same, rows 5 and 7 are the same, and rows 2 and 6 are simply worked as the stitches present themselves. That leaves only rows 4 and 8 — which are plain knit rows.
So really? You have three things to memorize. That’s it.
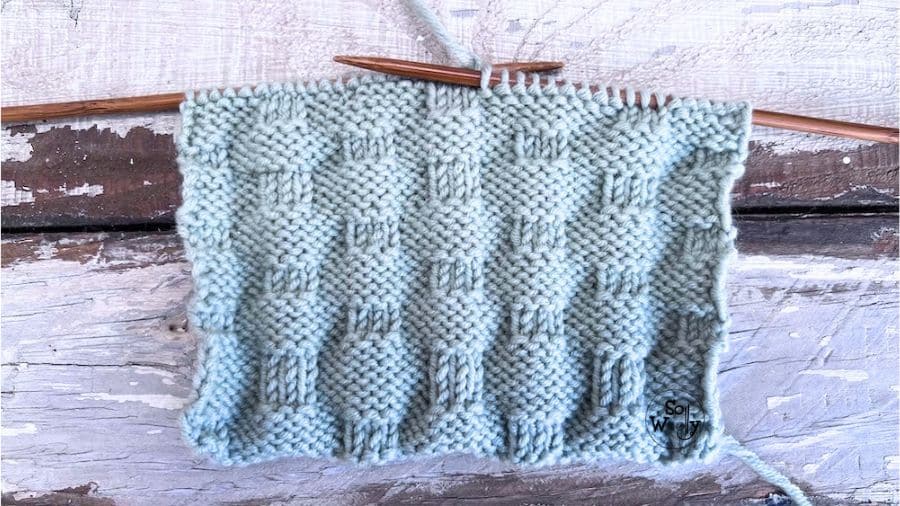
The wrong side isn’t identical — but it’s not ugly either. In fact, it looks like a beautiful basket weave pattern with its own 3D quality. Two gorgeous textures for the price of one.
How The Mock Wasp Nest Stitch Is Different
Two Sides, Two Stories:
The right side gives you that eye-catching wasp nest effect — bold, dimensional and deeply satisfying to knit.
Flip it over and you’ll find something equally beautiful: a 3D basket weave texture that stands completely on its own.
Which side is the “right” side? That’s entirely up to you.
One thing to keep in mind: the sides tend to curl slightly, so if you’re knitting a scarf, blanket or any flat project, I’d recommend adding a simple garter stitch or seed stitch border.
The bigger the project, the more spectacular the texture — so don’t be afraid to cast on generously!
Where to Use the Mock Wasp Nest Stitch
- Blankets
- Scarves and wraps
- Sweaters & Cardigans
- Cushions
- Place mats
- Infinity cowls
A 3D Texture Made With Knit and Purl Stitches
The beauty of Mock Wasp Nest stitch is that you don’t need cables, complicated decreases, or any special techniques to create its three-dimensional texture.
It’s all about how the knit and purl stitches are grouped together.
Small sections of knit stitches naturally sit differently from sections of purl stitches, and when you arrange them in this particular sequence, they create little raised squares and rectangles across the fabric.
Those changes in direction and height catch the light differently, which is what gives the stitch its lovely embossed, almost sculpted appearance.
So although you’re simply knitting and purling, the finished fabric looks much more elaborate than the techniques used to make it.
Simple stitches, clever arrangement, beautiful texture.
My Best Tip For Knitting The Wasp Nest Stitch
Pay Attention to Your Tension
This stitch is made entirely with knit and purl stitches — and just like the Basket Weave Stitch, tension is everything if you want that 3D texture to look crisp and well defined.
My little trick? After every purl stitch, give your yarn a gentle tug.
When you work a purl stitch, the yarn moves from the front to the back of your work before you knit again — and it’s very easy to leave a tiny bit of extra yarn there. That tiny loop might not seem like a big deal at the moment, but once several rows start stacking up, those loose loops can make the texture look untidy.
So just remember:
Purl → gentle tug → keep knitting
Not so hard that you tighten the stitches — just enough to take up that little bit of excess yarn so everything sits neatly and evenly.
Simple. But it makes a huge difference. Trust me 😊
✨ Want to knit this without ads or scrolling?
👉 Click on this line if you want to download the printable pattern (PDF file)
Materials
For this swatch I used:
US 7 (4.5 mm) bamboo knitting needles (lightweight, smooth and easier to hold) #ad
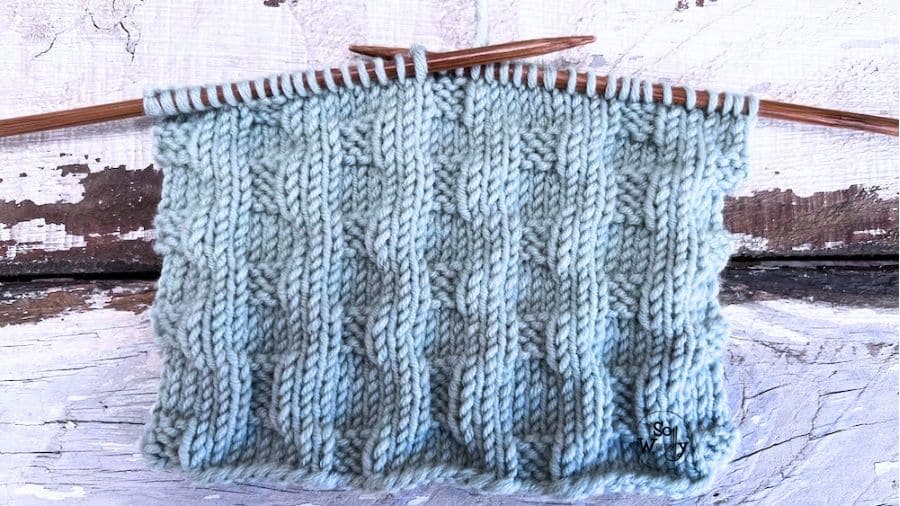
And 100% Merino wool yarn (smooth, soft, structured and machine washable) #ad
This is the other side of the work:
“As an Amazon Associate, I earn from qualifying purchases.”
Abbreviations
CO: cast on
st (s) = stitch (es)
RS: right side of the work
K: knit
P: purl
WS: wrong side
BO: Bind off
How to Knit The Mock Wasp Nest Stitch
Stitch Multiple
CO multiples of 12 plus 3 (no edge sts included).
For example: 12 * 2 = 24 + 3 = 27 sts. If you like to have edge/selvage sts, add 2 to your calculation.
Instructions
Rows 1 & 3 (WS): K3, *P9, K3*. Repeat from * to * to end
Row 2 (work each st as it presents): *P3, K9*. Repeat from * to * to last 3 sts, P3
Row 4 and 8: K across
Rows 5 and 7: P3, *P3, K3, P6*. Repeat from * to * to end
Row 6: (work each st as it presents): *K6, P3, K3*. Repeat from * to * to last 3 sts, K3
Repeat rows 1 – 8. When finished, BO purl-wise after row 4 (WS).
💌 Before you Leave: Join the So Woolly Community
If you enjoyed this tutorial, join me for personal notes, thoughtful lessons, and calm knitting guidance — delivered straight to your inbox.
No overwhelm. No pressure. Just clarity and steady progress.
A big hug, and happy knitting,
Carolina – So Woolly
PS: You can explore more designs like this in the Textured Stitch Patterns collection.