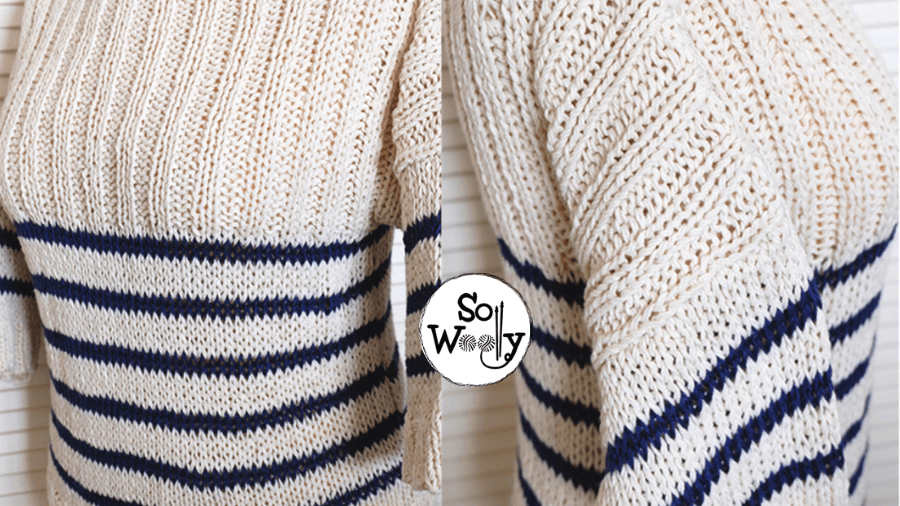
How to knit a Sweater made to measure
In this tutorial, you will learn how to knit a Sweater, with straight needles, and tailored exactly to your measurements.
However, it’s a very easy and flexible pattern: You can do it in a single color, with a sleeve length that you prefer, and using a stitch pattern that you love (my sweater has 3/4 length sleeves, but in the video tutorial I’ll show you how to do long sleeves too).
It’s an à la carte basic sweater that’s also suitable for beginners.
If you haven’t made a sweater yet, this project is ideal for you.
Actually, the only techniques required are Knit and Purl stitches, and how to bind off working each stitch as it presents 😉
So, no more chatting, and let’s get started!
Materials for size L (42 inches of hip circumference)
2 x straight needles US 10.5 (7 mm) #ad
And
2 x straight needles US 11 (8 mm) #ad
For 3/4 sleeve length:
600 gr. of cotton yarn nº 3 or light / DK / 8 ply (550 gr. in color “A”; 50 gr. in color “B”) #ad
I’ve worked with 2 strands at once, to add thickness and durability to the garment.
For other sizes:
Size Hip Circumference Grams
XS 32 460 gr
S 34 490 gr
S/M 36 525 gr
M 38 550 gr
M/L 40 575 gr
L 42 600 gr
XL 46 660 gr
XXL 48 690 gr
3XL 50 730 gr
4XL 52 780 gr
Measurements required
- Hip circumference (*take it exactly where you want the top to end or bottom edge)
- Shoulder to armpit (the distance from the shoulder to 3 in (7.5 cm) below the armpit)
- Total length (from shoulder to hip)*
- Sleeve length (from the armpit towards the elbow or the wrist)
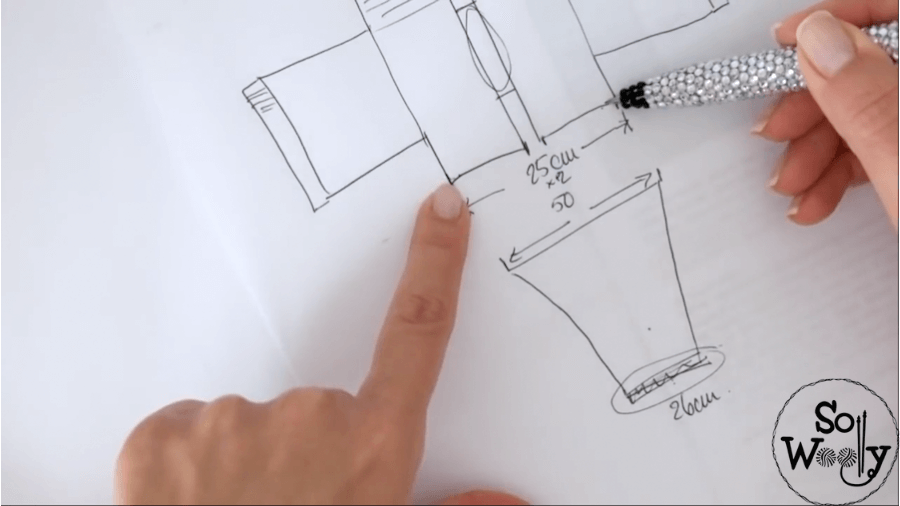
Size and measurements for this 3/4 sleeve sweater
I’m knitting a size 42.
- Hip circumference (*take it exactly where you want the top to end or bottom edge): 41 1/4 in (105 cm)
- Shoulder to armpit (the distance from the shoulder to 3 in (7.5 cm) below the armpit): 9 3/4 in (25 cm)
- Total length (from shoulder to hip)* 21 3/4 in (55 cm)
- Sleeve length (from the armpit towards the elbow or the wrist): 8 1/4 in (21 cm)
My Gauge
A square 4 x 4 in (10 x 10 cm) knitted in Stockinette stitch, using two strands and the larger needles, equals 12 stitches and 14 rows.
Your gauge could be different, that’s not a problem, but please take the time to knit a swatch. Its measurements are indispensable for the success of your sweater 😉
How many stitches to cast on?
Divide the hip circumference measurement by 2.
For me, it’s 20 3/4 in (52.5 cm approximately).
The hips don’t lie 😉
Now, let’s do a simple rule of 3:
If 4 in ————-> 12 stitches or If 10 cm ————-> 12 stitches
20 3/4 in —- ——> X or 52.5 cm ————> X
X = 12 * 20.75 / 4 or X = 12 * 52.5 / 10
X = 62.25 stitches or X = 63 stitches
Round up to an even number of stitches, so, I’m going to cast on 62 stitches.
Abbreviations
CO: Cast on
RS: Right side of the work
K: Knit
P: Purl
kfb: Knit one stitch front and back
BO: Bind off
How to knit a Sweater made to measure
Back and Front
Using the smaller needles, CO 62 st, and work 10 rows in 2 x 2 Rib stitch as follows:
If you have an even number of st which is not a multiple of 4, then every row will be:
*K2, P2*. Repeat from * to *, to end.
If you have a number of st multiple of 4, then every row will be:
*K2, P2*. Repeat from * to *, to last 2 st, K2.
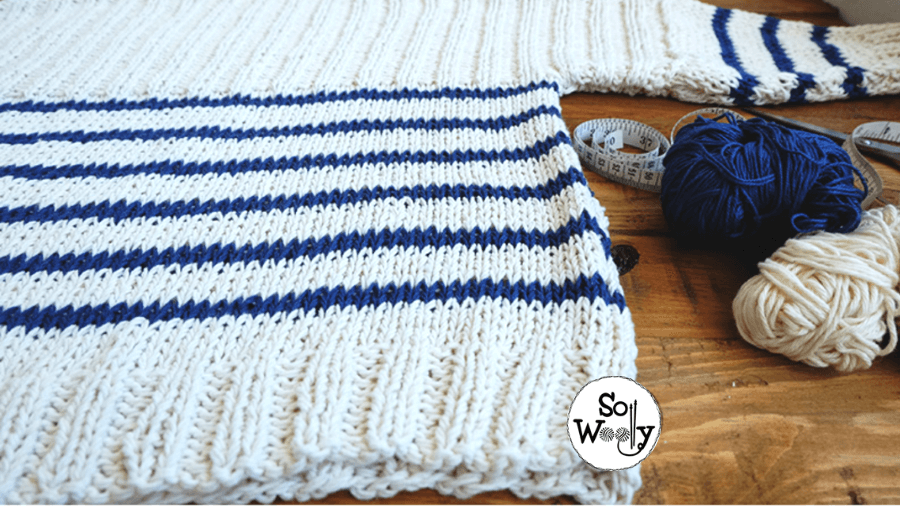
Stockinette stitch section
Next row:
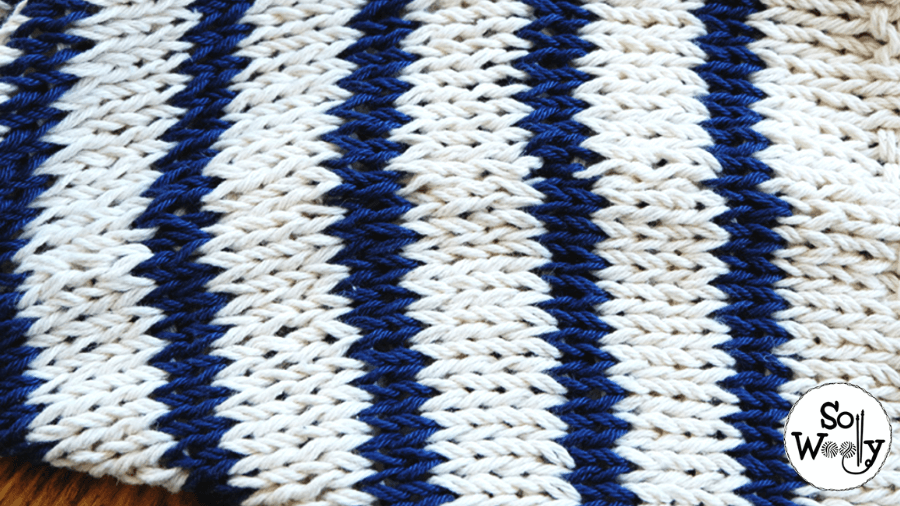
With larger needles work 4 rows in Stockinette st in color “A”, and 2 rows in color “B”
Rows 1 and 3 (RS): With color “A”, K across
Rows 2 and 4: P across
Row 5: With color “B”, K across
Row 6: P across
Repeat these 6 rows until the piece measures the distance from the hip to the armpit.
To calculate that distance, subtract the hip to underarm measurement 11 3/4 in (30 cm) in my sweater, from the total length 21 3/4 in (55 cm):
21.75 in (55 cm) – 11.75 in (30 cm) = 9 3/4 in (25 cm approx.)
Next row:
Facing the RS, CO 13 (those will be for the sleeve), and work the whole row in 2×2 Rib stitch.
Note that the Knitted Cast-On Method is perfect for this.
Next row:
CO 13, and continue working in 2×2 Rib stitch to the end.
Keep working in 2×2 Rib until the total length of the sweater is reached (23 1/4 in – (60 cm) for me.
Facing the RS, BO working each st as it presents.
How to knit a Sweater: Calculating the Sleeves
How many stitches to cast on?
First, decide what sort of sleeve you want to do: 3/4 or long sleeves.
Then, measure the circumference of the forearm (around 4 fingers below the elbow) 10 1/4 in (26 cm), or the wrist (7 3/4 in (20 cm), depending on the sleeve length of your preference, and add at least 1 in (2.5 cm) of ease.
Now, let’s make another rule of 3:
If 4 in ————-> 12 stitches or If 10 cm ————-> 12 stitches
10 1/4 in ———> X or 26 cm —————> X
X = 12 * 10.25 / 4 or X = 12 * 26 cm / 10
X = 30.75 = 31 stitches or X = 31 stitches
Round up to an even number of stitches, so, I’m going to cast on 30 stitches.
How many stitches to increase?
The upper part of the sleeves is the sum of the shoulder to armpit measurement multiplied by 2.
For me it’s 9 3/4 in (25 cm) * 2 = 19 3/4 in (50 cm)
Let’s convert that measurement into stitches:
If 4 in ————-> 12 stitches or If 10 cm ————-> 12 stitches
19 3/4 in — ——> X or 50 cm ——> X
X = 12 * 19.75 in / 4 or X = 12 * 50 cm / 10
X = 59,25 (round up to 60 stitches) or X = 60 stitches
I’ll start the sleeve with 30 and I have to get to 60 stitches.
60 – 30 = 30.
So I have to increase 30 stitches.
How to increase?
The length of my 3/4 sleeve is 8 1/4 in or 21 cm [note that the increases made when knitting the body of the sweater belong to the sleeve’s length too, about 4 in – (10 cm)].
We have to convert that measurement into rows:
If 4 in ————-> 14 rows or If 10 cm ————-> 14 rows
8 1/4 in ———–> X or 21 cm ————-> X
X = 14 * 8.25 / 4 or X = 14 * 21 cm / 10
X = 28, 87 = 29 rows. or X = 29, 4 rows.
Round up to an even number of stitches, so, I’m going to knit 30 rows.
It means that I have to increase 30 stitches in 30 rows, and I’m going to increase 2 stitches per row (1 at the beginning, and 1 at the end).
The increases will take place in every odd row (the even rows are “rest” rows).
That’s half of the rows available: 30 / 2 = 15 rows.
How to knit the Sleeves
With smaller needles and “color A”, CO 30 st.
Work 8 rows in 2 x 2 Rib.
Change to larger needles and work the Stockinette stitch section as for the front and the back: 4 rows in color “A”; 2 in color “B”.
The only difference is that we’re going to increase 2 stitches in every odd row, after the ribbing, as follows:
Row 1: With color “A”, kfb, K across until there’s 1 stitch left, kfb.
Row 2: P across
Row 3: kfb, K across until there’s 1 stitch left, kfb.
Row 4: P across
Row 5: With color “B”, kfb, K across until there’s 1 stitch left, kfb.
Row 6: P across
For a 3/4 sleeve sweater (3 in – 7.5 cm below the elbow):
Repeat these 6 rows until there are 60 st in total, and then, stop increasing.
If more rows are needed to obtain the total length, work the last rows in color “A” (I worked 6 more rows).
Next row:
Facing the RS, BO knitwise.
For a long-sleeve sweater:
When there are 60 st in total, keep knitting without increasing until the desired length is reached.
Please note that the increases made when knitting the body of the sweater belong to the sleeve’s length too, about 4 in – (10 cm).
So if I were to make a long-sleeve sweater, I’d substract that part from the total length of 60 cm from my shoulder to wrist measurement:
23 3/4 in (60 cm) – 4 in (10 cm) = 19 3/4 in (50 cm). This should be the length of my sleeves.
Work the last rows (around 6 -8) in color “A”.
Facing the RS, BO knitwise.
Now it’s time to join the sweater, but before, block the pieces.
I explain the whole process in the video tutorial, you’ll learn how to do the invisible seams for the shoulders, sleeves, and body of the sweater.
Enjoy the step-by-step video tutorial:
How to knit a Sweater made to measure with straight needles
Hugs and happy made-to-measure knitting 🙂
xoxo
Carolina – So Woolly
“As an Amazon Associate, I earn from qualifying purchases.”