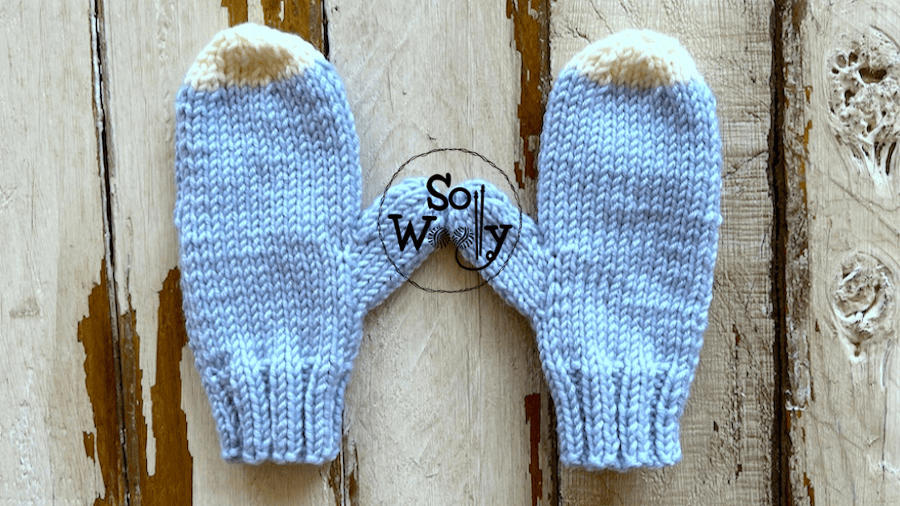
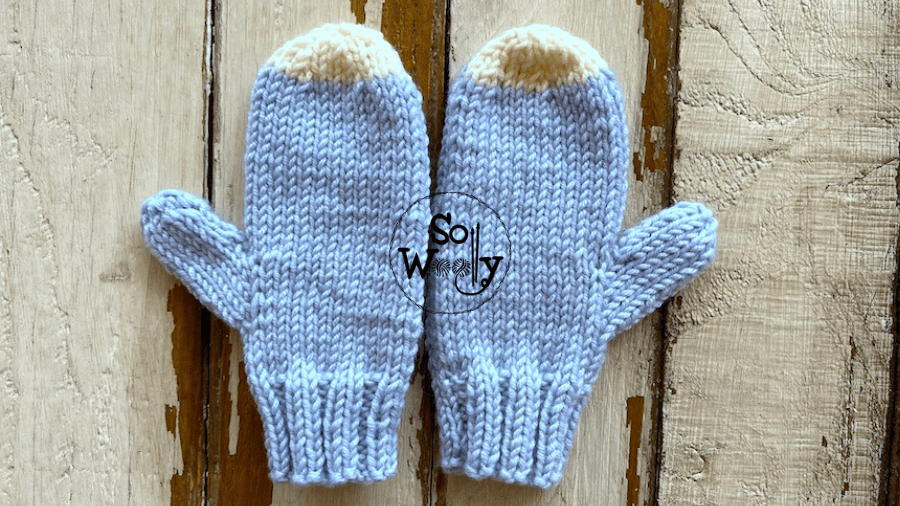
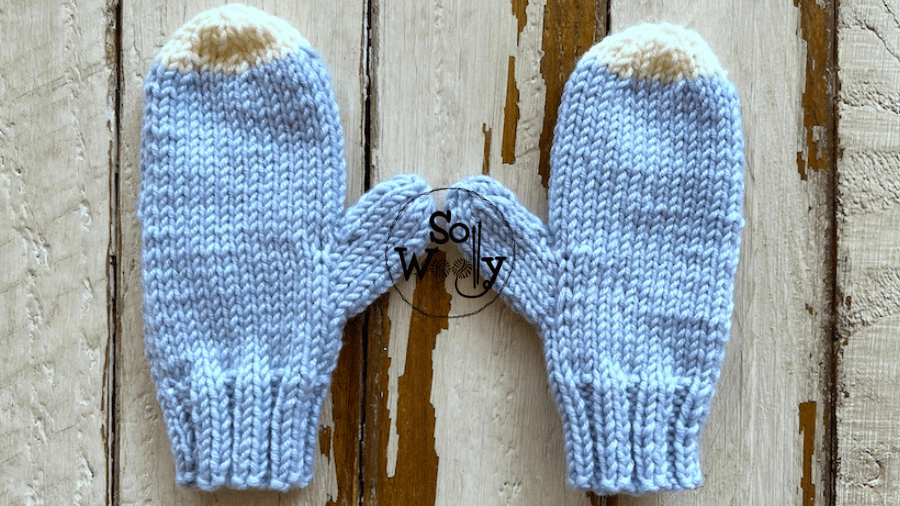
How to knit Easy Mittens for beginners (3 sizes!)
Today, I’m sharing how to knit mittens in 3 different sizes (toddler, children, and adult).
Honestly, this pattern is pretty easy to do; no matter if the only stitches you know are knit and purl 😉
In addition, it’s customizable: Knit the thumb in a different color, use another Rib stitch, add a new color for the top, or just make a lovely motif using the duplicate stitch.
There are many possibilities 😉
Moreover, they are quick and fun to knit, and you’ll need just a little bit of yarn.
So, it’s time to knit some pairs of pretty mittens!
Grab your needles and some yarn, and let’s get started!
Materials
Merino wool yarn (nº 4 or worsted weight) in the following quantities (approximately) #ad
Toddler size: 50 gr (105 m /115 yd)
Child size: 70 gr
Adult size: 90 gr
(For the top you’ll need just a couple of grams, so it’s included)
Tapestry needle, rule, or measurement tape
US 7 (4.5 mm) knitting needles #ad
“As an Amazon Associate, I earn from qualifying purchases”
How to knit Easy Mittens: The Gauge
A 4 x 4 in (10 x 10 cm) square knitted in Stockinette stitch equals 20 stitches and 30 rows.
Sizes
Toddler (S): 2 – 4 years
Child (M): 8 – 10 years
Adult (L): Women’s size
Measurements of the finished mittens
Size Hand Circumference Hand length
(the distance around the palm) (from the wrist to the top of the longest finger)
Toddler 5.5 in or 14 cm 4 1/2 in or 11.5 cm
Child 6 3/4 in or 17 cm 5 1/2 in or 14 cm
Adult 7 1/2 in or 19 cm 6 1/2 in or 16.5 cm
Abbreviations
CO: Cast on
Stitch: st
RS: Right side
K: Knit
P: Purl
RLI: Right Lift Increase. Take the right “leg” of the next stitch from the row below, place it onto the left-hand needle, and knit it. Then knit the next stitch from the current row. 1 stitch has been increased.
k2tog: Knit two stitches together
RS: Right side of the work
WS: Wrong side of the work
BO: Bind off
How to knit Easy Mittens: Important notes before starting
The instructions are written for the smallest size (S); the rest of the sizes are shown in parentheses (M-L).
The odd rows form the RS of the work, and the increases will be made always facing the RS.
The first part (the cuff and the Stockinette stitch section) is the same for both, right and left mittens.
The second part (the increases to shape the thumb), has a different stitch count for each mitten.
The last part (the thumb, the Stockinette stitch section, and the shaping of the top) is the same for both mittens.
How to knit Easy Mittens
Right and Left Mitten
The Cuff
CO 30 (38-42) st.
Work 6 (8-8) rows in 2 × 2 Rib, as follows:
1º and every odd row (RS): K1 (edge), *K2, P2*. Repeat from * to *, to last st, K1 (edge)
2º and every even row: P1 (edge), *K2, P2*. Repeat from * to *, to last st, P1 (edge).
Stockinette stitch section
Work 1 1/2 (2 1/4-2 1/2) in or 4 (5.5-6.5) cm, ending with a WS row, as follows:
1º and every odd row (RS): K across
2º and every even row: P across
Right Mitten only
Increases Section (to shape the thumb)
All sizes:
Row 1 (RS): K15 (19-21). RLI twice, K to end. 32 (40-44) st remain.
Row 2 and every even row: P across
Row 3: (RS): K15 (19-21). RLI, K2, RLI, K to end. 34 (42-46) st remain.
Row 5: (RS): K15 (19-21). RLI, K4, RLI, K to end. 36 (44-48) st remain.
Row 6: P across
Sizes M and L only:
Row 7: (RS): K15 (19-21). RLI, K6, RLI, K to end. (46-50) st remain.
Row 9: K15 (19-21). RLI, K8, RLI, K to end. (48-52) st remain.
Row 10: P across
Size L only:
Row 11: K15 (19-21). RLI, K10, RLI, K to end. 54 st remain.
Row 12: P across
Left Mitten only
Increases Section (to shape the thumb)
All sizes:
Row 1 (RS): K13 (17-19). RLI twice, K to end. 32 (40-44) st remain.
Row 2 and every even row: P across
Row 3: (RS): K13 (17-19). RLI, K2, RLI, K to end. 34 (42-46) st remain.
Row 5: (RS): K13 (17-19). RLI, K4, RLI, K to end. 36 (44-48) st remain.
Row 6: P across
Sizes M and L only:
Row 7: (RS): K13 (17-19). RLI, K6, RLI, K to end. (46-50) st remain.
Row 9: K13 (17-19). RLI, K8, RLI, K to end. (48-52) st remain.
Row 10: P across
Size L only:
Row 11: K13 (17-19). RLI, K10, RLI, K to end. 54 st remain.
Row 12: P across
Right and Left Mittens
How to Knit the Thumb
36 (48-54) st remain.
Next row all sizes: Facing the RS, K23 (31-35) st.
Turn the work, CO 3 st. Turn again (RS), and slip the remaining st from the left-hand needle onto a piece of scrap yarn.
Turn the work (WS), P13 (17-19) st, and slip the remaining st from the left-hand needle onto a piece of scrap yarn.
Now, turn again and work in Stockinette stitch on these 13 (17-19) st, until the thumb measures 1 (1 1/2 – 2) in or 2.5 (4-5) cm from the CO row, ending with a WS row.
Next row (RS): k2tog across, 7 (9-10) st remain, K1.
Cut the yarn, leave a nice tail, and pass it through the stitches. Close to secure.
(You can sew up the thumb now or do it later on. I prefer to finish my knitting and then sew up everything at once).
Now, facing the WS, slip the stitches from both pieces of scrap yarn onto your knitting needle.
Turn, join a new ball of yarn, and knit until you get to the base of the thumb.
Pick up and knit 2 st at each side, and K to end. 30 (38-42) st remain.
Continue in Stockinette stitch until the mitten measures 5 3/4 (7 3/4 – 9) in or 14.5 (19.5-23) cm in total (from the CO edge).
This is the place where you can add more rows or work fewer rows, depending on the length of your hand (from the wrist to the top of the longest finger).
Decrease Section (to shape the top)
Row 1 RS): Change color and decrease 6 (6-6) st, as follows:
Size S: *k2tog, K3*. Repeat from * to *, to end. 24 st remain.
Size M:K1, *k2tog, K4*. Repeat from * to *, to last st, K1. 32 st remain.
Size L:*k2tog, K5*. Repeat from * to *, to end. 36 st remain.
Row 2: P across
Row 3: Decrease 6 (6-6) st, as follows:
Size S: *k2tog, K2*. Repeat from * to *, to end. 18 st remain.
Size M: K1, *k2tog, K3*. Repeat from * to *, to last st, K1. 26 st remain.
Size L:*k2tog, K4*. Repeat from * to *, to end. 30 st remain.
Row 4: P across
Sizes M and L only
Row 5: Decrease (7-6) st, as follows:
Size M: *k2tog, K2*. Repeat from * to *, to last 2 st, k2tog. 19 st remain.
Size L: *k2tog, K3*. Repeat from * to *, to end. 24 st remain.
Row 6: P across
Size L only
Row 7: Decrease 6 st, *k2tog, K2*. Repeat from * to *, to end. 18 st remain.
Row 8: P across
18 (19-18) st remain.
Next row:
Sizes S and L only: *k2tog, K1* across.
Size M: *k2tog, K1*. Repeat from * to *, to last st, K1.
12 (13-12) st remain.
Next row:
Sizes S and L only: *k2tog* to end.
Size M: *k2tog*. Repeat from * to *, to last st, K1.
6 (7-6) st remain.
Then, cut the yarn leaving a nice tail, and pass it through the remaining stitches. Close to secure.
Finally, sew up the thumb, and join both sides of the mittens using the mattress stitch.
I hope you are proud to know how to mittens!
Below, you’ll find the step-by-step process:
How to knit Easy Mittens for beginners
If you enjoyed this tutorial, join me for personal notes, thoughtful lessons, and calm knitting guidance — delivered straight to your inbox.
No overwhelm. No pressure. Just clarity and steady progress.
Hugs, and happy mittens knitting 🙂
Carolina – So Woolly