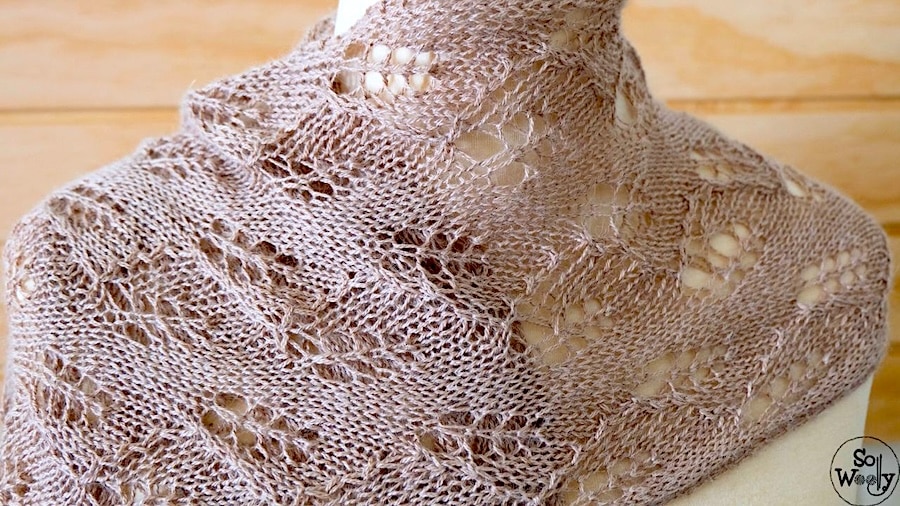
How to Knit a Leaf Lace Wrap (Free Pattern + Video)
Some knitting projects stay with you long after you’ve finished them. This Leaf Lace Wrap is one of mine.
Prefer a printable, ad-free version of this pattern — complete with the full charts? The PDF is available and is designed to sit beautifully on your knitting table without a screen in sight. → Get it here
I first made it back in 2015 — in a silk and alpaca blend so light it felt like knitting with air. I wore it for years. And then, as knitters know all too well, a moth had other ideas. Gone.
But here’s the thing: the moment I started going through the old photos to write this tutorial, I remembered exactly why I loved it so much:
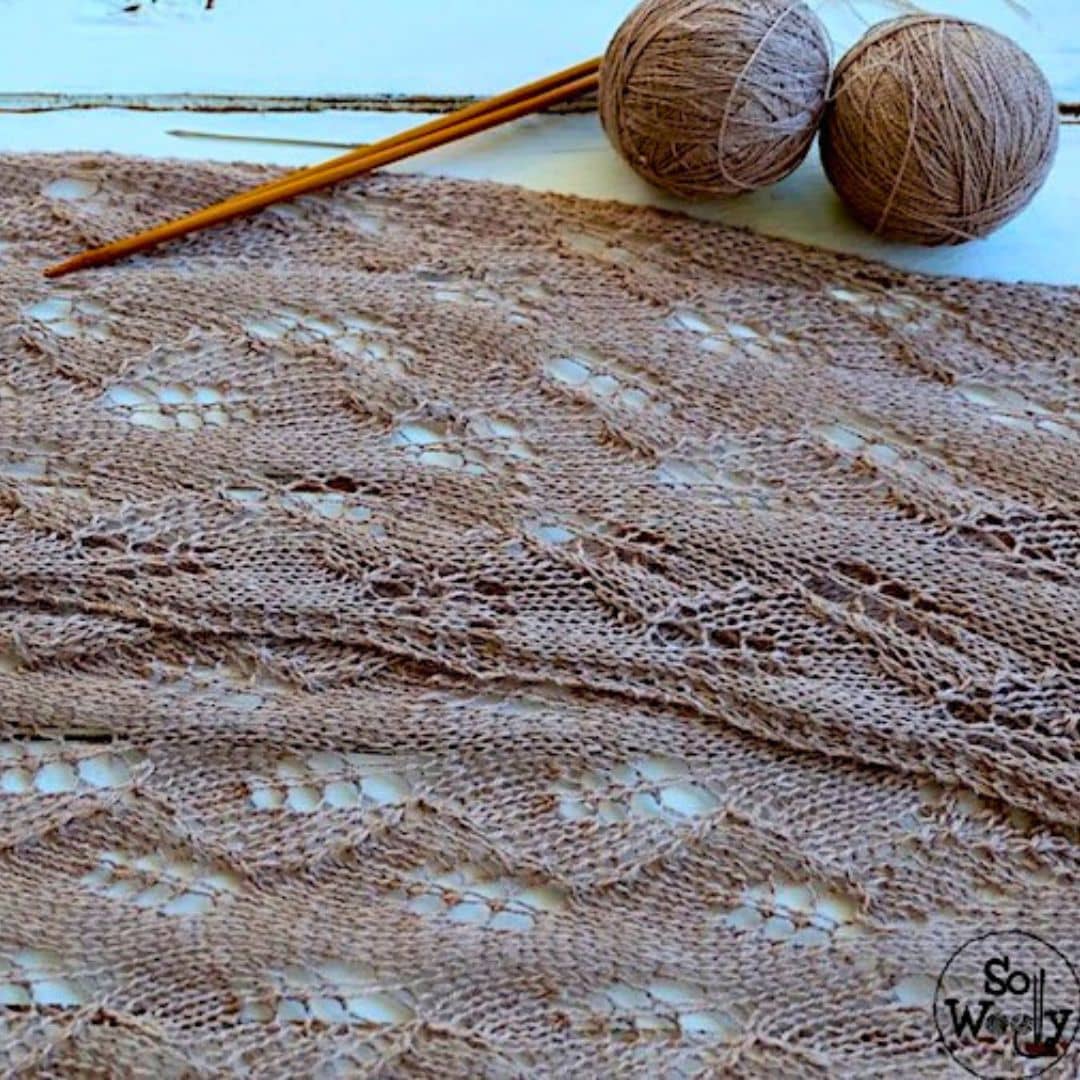
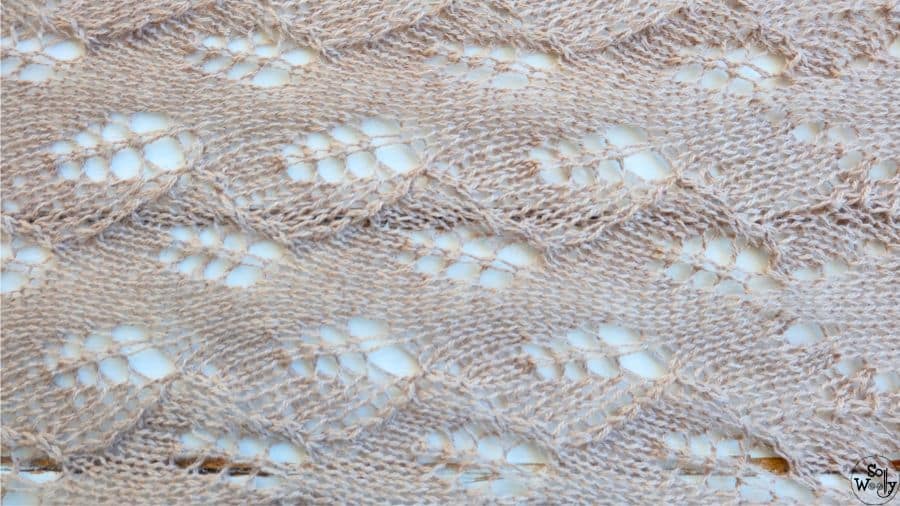
How intuitive the leaf lace stitch. The way the fabric transforms after blocking. That first time you hold the finished wrap up to the light…
So I decided it deserved a tutorial.
This is not a quick knit — and I’m not going to pretend it is. It’s a 16-row repeat worked over 240 rows, and every single one of them is worth it.
If you’re comfortable with yarn overs, basic decreases, you’re ready for this.
And if lace knitting has always felt a little intimidating? This is the pattern that will change your mind.
Let’s make something beautiful. 🧶
Understanding This Leaf Lace Wrap Construction
This wrap has a garter border on each side and it’s worked flat in three parts, from the bottom up:
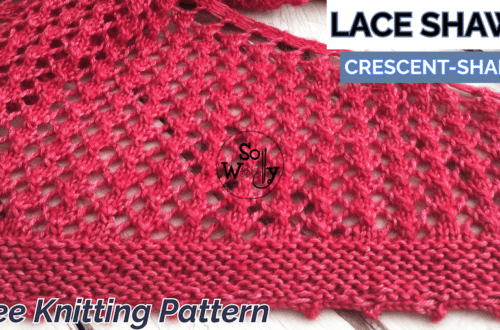
- Part 1: The Bottom Border. A delicate wavy picot edge that sets the tone for everything that follows.
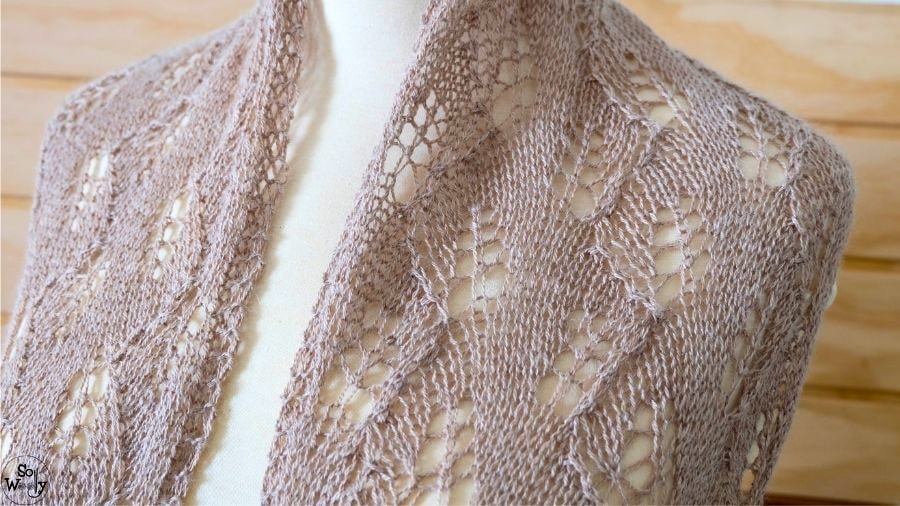
- Part 2: The Body. The star of the show: the Leaf Lace stitch, worked in a 16-row repeat until your wrap reaches your desired length.
- Part 3: The Top Border. A mirror of the bottom border, creating that same wavy finish and giving the wrap a polished, intentional look at both ends.
Finding Your Perfect Wrap Size
Both the border and the body stitch patterns work over multiples of 15 stitches, which means you can make yours as wide or as narrow as you like — as long as your stitch count is a multiple of 15.
To that, add 3 stitches on each side for the garter stitch border that keeps your edges neat and prevents curling.
So your cast-on formula is simply:
(Multiple of 15) + 6 stitches
For example: 45 + 6 = 51 sts, or 60 + 6 = 66 sts, and so on.
Yarn and Needles
Here’s where this wrap has a little secret: I used 1 skein of fingering weight yarn 70% Alpaca – 30% silk (one skein has 3.53oz / 100g and 875yd / 800m)— the kind you’d normally knit with US 2-3 (3mm) needles — but I worked it held double on US 8 (5mm) needles .
The result? A fabric with beautiful drape and a lovely halo, but with more body and warmth than a single strand of lace weight would give you. It also makes the knitting feel surprisingly relaxed for a lace project — no squinting at thread-thin yarn required.
Gauge
20 sts and 16 rows = 4 in / 10 cm (after blocking).
That said, you’re not locked into my exact yarn and needle combination. Lace is wonderfully forgiving when it comes to gauge — different yarn weights and needle sizes will simply give you a larger or smaller wrap.
As long as your stitch pattern is working out and your fabric has that light, airy quality lace needs, you’re doing it right.
One thing I would recommend regardless of your yarn choice: natural fibres block beautifully, synthetic fibres don’t.
For lace, blocking isn’t optional — it’s the moment your wrap goes from “hmm” to “wow.” Choose wool, silk, alpaca, or a blend of these and you won’t regret it.
(Full blocking tutorial coming soon — I’ll link it here the moment it’s live!).
Measurements After Blocking
Width: 10 1/4 in (26 cm)
Length: 59 in (150 cm)
Abbreviations
CO: cast on
st (s) = stitch (es)
RS: right side of the work
K: knit
PM: place marker
SM: slip marker
P: purl
k2tog: knit two stitches together (right-leaning simple decrease)
k3tog: knit three stitches together (right-leaning double decrease)
yo: yarn over
sl1kw: slip one stitch knitwise
psso: pass the slipped stitch over the last one
WS: wrong side
BO: Bind off
Prefer a printable, ad-free version of this pattern — complete with the full charts? The PDF is available and is designed to sit beautifully on your knitting table without a screen in sight. → Get it here
How to Knit a Leaf Lace Wrap Step-By-Step
Instructions
Bottom Edge
CO multiples of 15 + 6 (3 edge/selvedge sts on each side). For example: 15 * 3 = 45 + 6 = CO 51 sts.
Row 1 (RS): K3 (edge), PM, *K1, yo, K5, sl1kw, k2tog, psso, K5, yo, K1*. Repeat from * to *, to last 3 sts, PM, K3 (edge)
Row 2 and all even rows: K3 (edge), SM, P to last 3 sts, SM, K3 (edge)
Row 3: K3 (edge), SM, *K2, yo, K4, sl1kw, k2tog, psso, K4, yo, K2*. Repeat from * to *, to last 3 sts, SM, K3 (edge)
Row 5: K3 (edge), SM, *K3, yo, K3, sl1kw, k2tog, psso, K3, yo, K3*. Repeat from * to *, to last 3 sts, SM, K3 (edge)
Row 7: K3 (edge), SM, *K4, yo, K2, sl1kw, k2tog, psso, K2, yo, K4*. Repeat from * to *, to last 3 sts, SM, K3 (edge)
Row 9: K3 (edge), SM, *K5, yo, K1, sl1kw, k2tog, psso, K1, yo, K5*. Repeat from * to *, to last 3 sts, SM, K3 (edge)
Row 11: K3 (edge), SM, *K6, yo, sl1kw, k2tog, psso, yo, K6*. Repeat from * to *, to last 3 sts, SM, K3 (edge)
Row 12: K3 (edge), SM, P to last 3 sts, SM, K3 (edge).
Body (Leaf Lace Stitch Pattern)
Row 1 (RS): K3 (edge), SM, *K10, k3tog, yo, K1, yo, K1*. Repeat from * to * to last 3 sts, SM, K3 (edge)
Row 2 and all even rows: K3 (edge), SM, P to last 3 sts, SM, K3 (edge)
Row 3: K3 (edge), SM, *K8, k3tog, K1, yo, K1, yo, K2*. Repeat from * to * to last 3 sts, SM, K3 (edge)
Row 5: K3 (edge), SM, *K7, k3tog, K1, yo, K1, yo, K3*. Repeat from * to * to last 3 sts, SM, K3 (edge)
Row 7: K3 (edge), SM, *K4, k3tog, K3, yo, K1, yo, K4*. Repeat from * to * to last 3 sts, SM, K3 (edge)
Row 9: K3 (edge), SM, *K1, yo, K1, yo, sl1kw, k2tog, psso, K10*. Repeat from * to * to last 3 sts, SM, K3 (edge)
Row 11: K3 (edge), SM, *K2, yo, K1, yo, K1, sl1kw, k2tog, psso, K8*. Repeat from * to * to last 3 sts, SM, K3 (edge)
Row 13: K3 (edge), SM, *K3, yo, K1, yo, K2, sl1kw, k2tog, psso, K6*. Repeat from * to * to last 3 sts, SM, K3 (edge)
Row 15: K3 (edge), SM, *K4, yo, K1, yo, K3, sl1kw, k2tog, psso, K4*. Repeat from * to * to last 3 sts, SM, K3 (edge)
Row 16: K3 (edge), SM, P to last 3 sts, SM, K3 (edge).
These 16 rows create the pattern. Repeat them until the desired length is reached (I worked them 15 times total = 240 rows).
A Note About the Borders
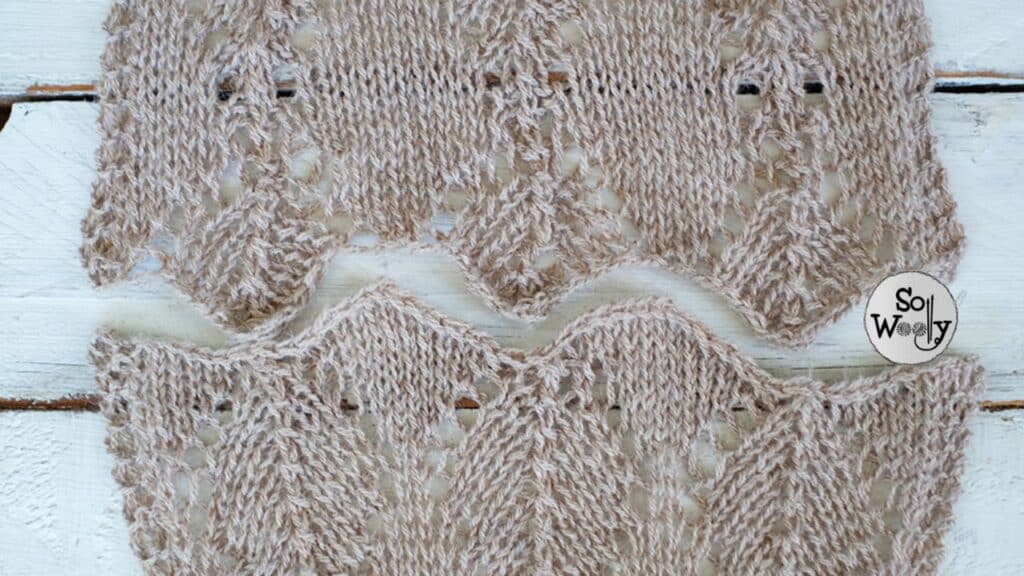
Take a look at the photo above. Both edges share the same wavy, picot-style effect — but they’re not constructed in exactly the same way. You have two options:
Option A — Simpler (taught in this tutorial) The bottom border is cast on first, the body follows, and the top border is worked to create the same wavy finish. Both edges are complementary rather than identical — like a matching set. As you can see in the photo, they work beautifully together.
Option B — (For symmetry lovers) Do you want both edges truly identical? Work the Leaf Lace stitch until row 16 of your final repeat. Then knit the bottom border separately — exactly as you did at the start — and join both pieces with a 3-needle bind-off (click here for the video tutorial).
Choose the option that suits your knitting personality. Both produce a beautiful wrap.
Top Edge
Row 1 (RS): K3 (edge), SM, *K6, yo, sl1kw, k2tog, psso, yo, K6*. Repeat from * to *, to last 3 sts, SM, K3 (edge)
Row 2 and all even rows: K3 (edge), SM, P to last 3 sts, SM, K3 (edge)
Row 3: K3 (edge), SM, *K5, yo, K1, sl1kw, k2tog, psso, K1, yo, K5*. Repeat from * to *, to last 3 sts, SM, K3 (edge)
Row 5: K3 (edge), SM, *K4, yo, K2, sl1kw, k2tog, psso, K2, yo, K4*. Repeat from * to *, to last 3 sts, SM, K3 (edge)
Row 7: K3 (edge), SM, *K3, yo, K3, sl1kw, k2tog, psso, K3, yo, K3*. Repeat from * to *, to last 3 sts, SM, K3 (edge)
Row 9: K3 (edge), SM, *K2, yo, K4, sl1kw, k2tog, psso, K4, yo, K2*. Repeat from * to *, to last 3 sts, SM, K3 (edge)
Row 11: K3 (edge), SM, *K1, yo, K5, sl1kw, k2tog, psso, K5, yo, K1*. Repeat from * to *, to last 3 sts, SM, K3 (edge)
Row 12: BO purlwise, and your leaf lace wrap is finished!
Leaf Lace Wrap Video Tutorial
Tips For Success When Knitting Your Leaf Lace Wrap
Lace knitting has a reputation for being difficult. And honestly? It’s not — but it does ask something of you that stocking stitch never does: your full attention. Here’s how to make sure this wrap goes smoothly from cast-on to cast-off.
- Use a lifeline — seriously, use one. A lifeline is a thin piece of smooth contrasting yarn threaded through your live stitches at the end of a complete pattern repeat. If something goes wrong — and occasionally something does, even for experienced knitters — you can rip back safely to your lifeline instead of all the way to the beginning. Thread one every 3-4 repeats and sleep soundly. You’ll thank yourself later.
- Count your stitches after every right side row. Lace lives and dies by stitch count. A missed yarn over or an extra decrease in row 3 won’t show itself until row 9 — by which point unpicking is a serious commitment. A quick count after each RS row catches problems early, when they’re still easy to fix.
- Use a row counter. Every. Single. Row. A 16-row repeat sounds easy to track mentally. It isn’t — especially past repeat number four. Whether you use a physical clicker, a phone app, or a pencil and paper, mark every row as you finish it. This is non-negotiable for lace.
- Mark your right side. When you cast on, place a locking stitch marker or a small piece of yarn on the right side of your work.
- Don’t knit your lace leaf wrap during a thriller. I’m only half joking. Lace needs your eyes on the work, not on the screen. Save the binge-watching for your garter stitch projects — this wrap deserves a podcast at most 😄
- Work in good light. Yarn overs are small. Mistakes are smaller. Natural daylight is ideal, but a good craft lamp works perfectly well in the evenings.
- Check your yarn overs. The most common mistake in leaf lace — and lace in general — is accidentally dropping a yarn over on the following wrong side row. Before you purl across, make sure every yarn over from the previous row is still sitting on the needle. They can be sneaky little things. However, if you drop one (or forget one), do this.
- Block it. Please. Unblocked lace looks like a crumpled, slightly confused piece of fabric. Blocked lace looks like something from a museum. The transformation is genuinely dramatic — and this wrap will not reach its full potential without it. Full blocking tutorial coming soon — I’ll link it right here.
Frequently Asked Questions
Is this leaf lace wrap suitable for beginner knitters?
This pattern is best suited to knitters who are comfortable with the basics — knit, purl, yarn overs, and simple decreases like k2tog and ssk. If you’ve knitted a few scarves or dishcloths and want to try your first lace project, this is a great next step. Complete beginners might want to practice yarn overs and decreases on a smaller swatch first before casting on.
Can I use a different yarn weight?
Absolutely. A heavier yarn will give you a larger, cosier wrap; a finer yarn will give you something more delicate and drapey. Just make sure whatever you choose is a natural fibre that will block well — wool, silk, alpaca, or a blend of these are all excellent choices. Avoid 100% acrylic for lace, as it won’t block into shape.
Do I really need to block it?
Yes. I know I keep saying this — but yes. Blocking is not optional for lace. It’s the step that opens up the leaf motifs, evens out the stitches, and transforms your wrap from a slightly confusing bundle of loops into something genuinely beautiful. The full blocking tutorial is coming soon — I’ll link it here the moment it’s live.
Can I make it longer or shorter?
Absolutely — just work more or fewer repeats of the 16-row body pattern. This lace leaf wrap is easily customisable to any length you like. Keep in mind that a longer wrap will require more yarn.
Can I make it wider or narrower?
Yes — remember the formula: (multiple of 15) + 6 stitches. Simply cast on more or fewer multiples of 15 to adjust the width. A wider wrap will also require more yarn per row, so factor that into your yarn calculation.
Before you Leave: Join the So Woolly Community!
If you enjoyed this tutorial, join me for personal notes, thoughtful lessons, and calm knitting guidance — delivered straight to your inbox.
No overwhelm. No pressure. Just clarity and steady progress.
A big hug, and happy knitting,
Carolina – So Woolly
PS: if you enjoy working with texture, you’ll find more inspiration in the Easy Lace Stitch Patterns Collection.