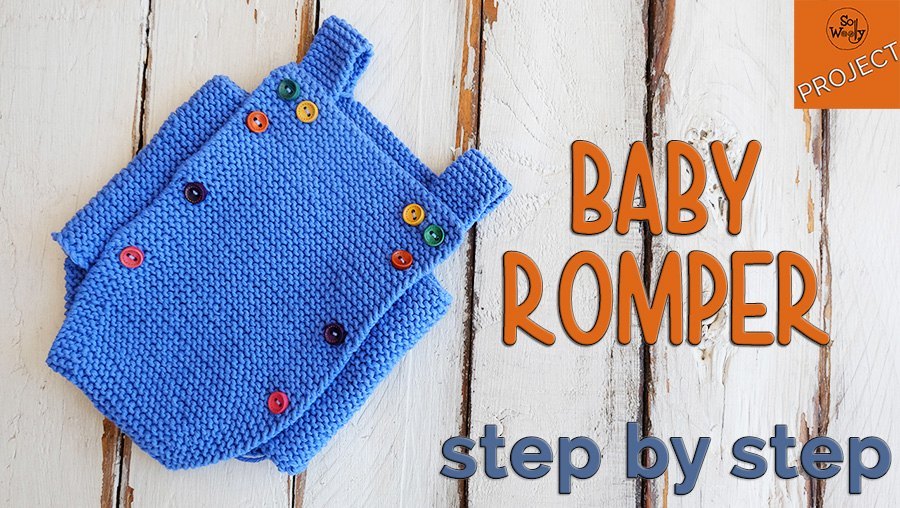
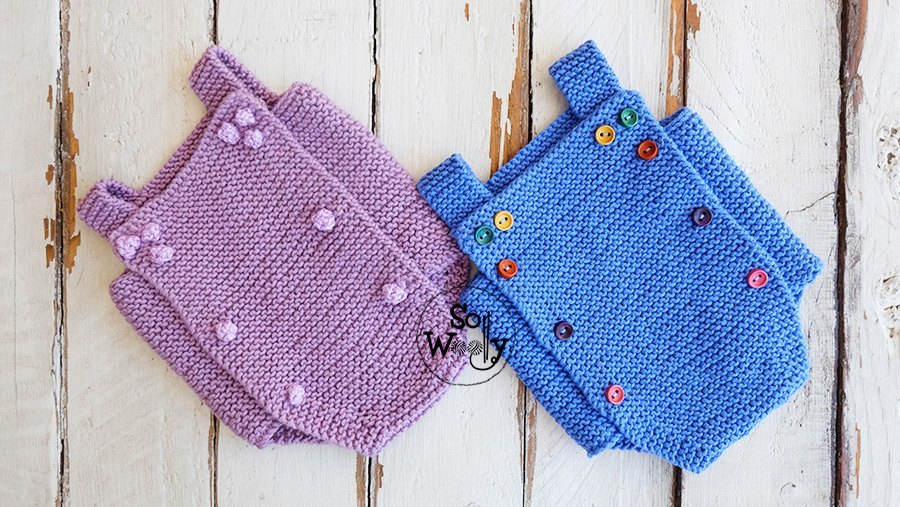
How to knit a Baby Romper for beginners
In this tutorial you will learn how to knit a Baby Romper: An easy pattern that includes a video tutorial, explaining the whole process, step by step.
This is a fun project, quick to knit, ideal for beginners. A great garment for gifting, along with many of the projects we’ve made before: The Mittens, the Cardigan, the Blanket, the Booties, the Diaper Covers…you choose!
Materials
60 gr. of cotton yarn (or Merino wool) Sport weight or Number 2.
10 small buttons (0.40 in / 1 cm diameter)
Scissors, measurement tape or a ruler #ad
Sewing needle and sewing thread #ad
Stitch holder #ad
Size
0 to 1 month of age (Baby’s height: 16.53 – 17.32 in / 42 – 44 cm approx.)
Gauge
25 stitches and 47 rows in Garter stitch equals 4 x 4 in / 10 x 10cm.
(Please note that for this pattern the stitch gauge is more important than the row gauge).
N.B.:
The odd rows form the right side of the work.
Button holes, increases and decreases are always made on an odd row.
The Baby Romper will be made starting from the front, up to the decrease section, then we will increase to shape the back, ending with the straps.
Abbreviations
CO: Cast on
WS: Wrong side of the work
RS: Right side of the work
st: Stitch
k: Knit
p: Purl
kfb: Knit one stitch front and back (Knit one stitch, don’t take it off the left-hand needle, knit the same stitch through the back loop)
ssk: Slip one stitch as if to knit, slip the next, put them back onto the left -hand needle, knit them together
yo: Yarn over
BO: Bind off
Front
CO 30 st.
1º to 4º rows: Knit across
5º row (4 button holes): K1, k2tog, yo, K1, k2tog, yo. K until there are 6 st left, yo, k2tog, K1, yo, k2tog, K1.
6º row: K across
Keep knitting every row until the piece measures 1.18 in (3 cm) from the CO, ending with a WS row. On the following row, make 1 button hole at the beginning and at the end of the row, as follows:
Button hole row: K1, k2tog, yo. K until there are 3 st left, yo, k2tog, K1. 2 button holes have been made.
K every row and repeat the buttonhole row 2 more times, every 2 in, until the piece measures 5.9 in (15 cm), ending with a WS row. There are 3 button holes on each side.
Decrease Section
On the following (RS), decrease 1 st at the beginning and at the end of the row, every 4 rows, 5 times, as follows:
1º, 5º, 9º, 13º and 17º (decrease rows): K3, k2tog. K until there are 5 st left, ssk, K3.
K every even row.
There are 20 st in total at the end of row 17.
10 st have been decreased.
18º row (WS): K across.
Now, decrease 1 st on each side, every 2 rows, 2 times:
19º and 21º rows: K3, k2tog. K until there are 5 st left, ssk, K3.
20º and 22º rows: K across. There are 16 st in total, 4 st have been decreased.

Back
We will start increasing 1 st on each side, every 2 rows, 12 times in total.
Increase section
23º, 25º, 27º, 29º, 31º, 33º, 35º, 37º, 39º, 41º, 43º and 45º rows: K3, kfb. K until there are 4 st left, kfb, K3. There are 40 st (24 st have been increased).
24º, 26º, 28º, 30º, 32º, 34º, 36º, 38º, 40º, 42º and 44º rows:
K across.
46º and 47º rows: CO 12 st and K every st to the end.
Keep knitting until the back measures 6.3 in (16 cm) in total, ending with a WS row. (Measure from the row where the first increases were made).
On next row (RS), BO 17 st knit-wise. K to end.
On next row, (WS), BO 17 st purl-wise. K to end.
Keep knitting 1.57 in (4 cm) more, ending with a WS row.
Straps
K7 p (RS) and slip them onto a stitch holder.
BO every st until there are only 7 st left (including the st on the right hand needle). K until the strap measures 3.15 in (8 cm).
BO knit-wise.
Facing the WS, pass the st from the stitch holder onto the knitting needle, attach the yarn and K until the second strap measures 3.15 in (8 cm).
BO knit-wise.
Sew on the buttons and the Baby Romper is finished!
Congratulations!

Hope you enjoy this tutorial… and don’t forget to share the love!
Hugs and happy knitting,
Carolina – So Woolly.
PS: Searching for more Baby knits? You can find all of them on this list, take a look! #ad
As an Amazon Associate I earn from qualifying purchases