How to knit the Seed Diamond stitch (knit and purl)
Today, you’ll learn how to knit the Seed Diamond stitch; another knit and purl pattern (because we knitters love them).
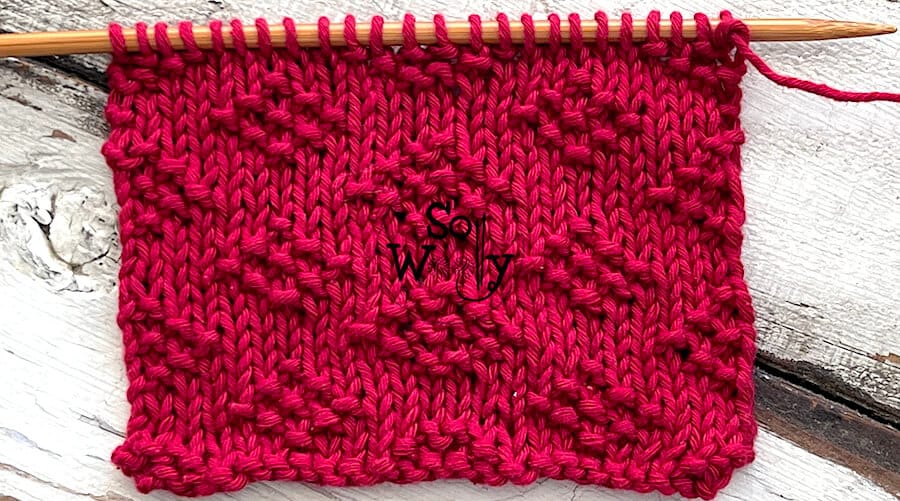
It reminds me of the classic Diamond Brocade stitch we practiced a while ago, but this one is a bit “busier” 😉
It has a lovely texture to it (I believe that the Seed texture is always kind of cute).
In fact, the Seed Diamond stitch is great for baby stuff, yet it will also work for a blankie, or a cushion.
Honestly, it’s easy to knit; there is no need to increase or decrease (nor cross stitches).
I’m sure that if you can knit and purl, you can do it!
And you can use wool or cotton yarn, or their blends.
However, I’d stay away from Mohair, Angora, and any kind of fuzzy yarns, because they won’t show the pattern properly.
Last but not least, don’t forget to “pay attention to your tension”…
This little trick will make your work with knit and purl stitches shine! Simple yet super effective 🙂
So, grab your needles, and some yarn, and let’s get started.
Abbreviations
CO: Cast on
RS: Right side of the work
st: Stitch
K: Knit
P: Purl
BO: Bind off
N.B.:
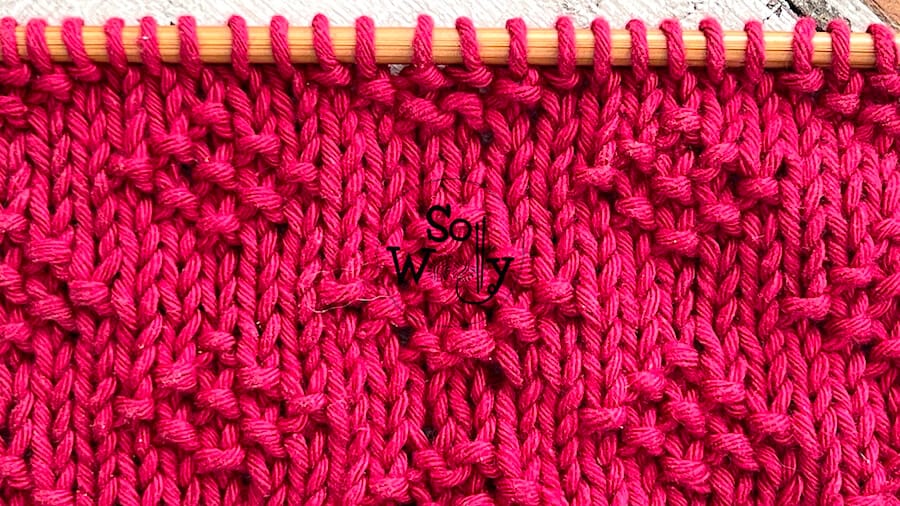
The odd rows form the right side of the work.
The first and the last are edge (selvage) stitches and will be knitted on every row.
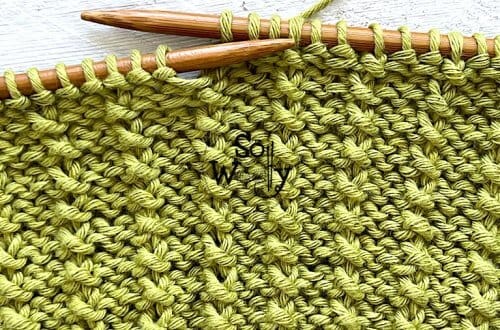
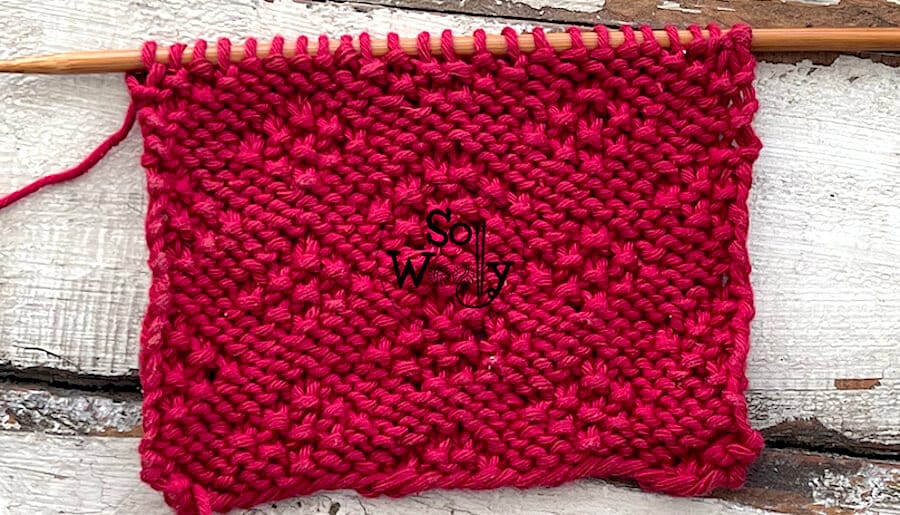
This swatch was made of 100% cotton yarn, smooth, easy to work with, and great for beginners #ad
With my US 8 / 5 mm bamboo needles (this set with case includes 18 pairs in the most used sizes) #ad
How to knit the Seed Diamond stitch pattern
CO multiples of 11 + 2 (edge st); i.e.: 11 * 2 = 22 + 2 = 24 st.
1º and 7º rows (RS): K1 (edge), *K1, P1, K7, P1, K1*. Repeat from * to *, to last st, K1 (edge)
2º and 6º rows: K1 (edge), *K1, P4, K1, P4, K1*. Repeat from * to *, to last st, K1 (edge)
3º and 5º rows: K1 (edge), *K4, P1, K1, P1, K4*. Repeat from * to *, to last st, K1 (edge)
4º row: K1 (edge), *P3, K1, P1, K1, P1, K1, P3*. Repeat from * to *, to last st, P1 (edge)
8º row: K1 (edge), *K1, P1, K1, P5, K1, P1, K1*. Repeat from * to *, to last st, K1 (edge).
These eight rows create the pattern. Repeat them until the desired length is reached.
When finished, BO as if you were to knit row 1 (RS).
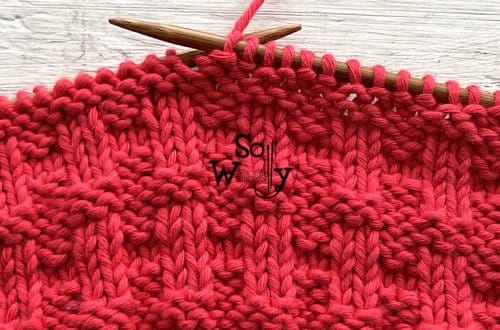
This is the wrong side of the work:
Enjoy the video tutorial:
Seed Diamond knitting pattern
I hope you like it 😉
Hugs, happy knitting and remember to pay attention to your tension 😉
xoxo
Carolina – So Woolly
PS: If you like the Diamond patterns, don’t miss this beauty 😉
“As an Amazon Associate, I earn from qualifying purchases.”