How to knit the Basketweave stitch (2 versions!)
In today’s tutorial, I’m showing how to knit two versions of the Basketweave stitch.
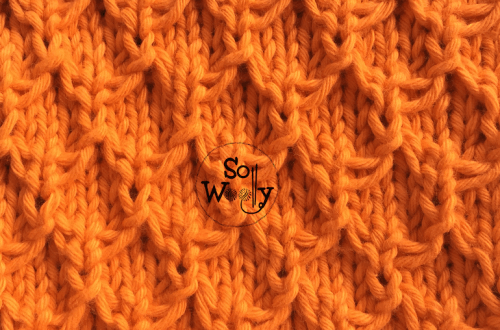
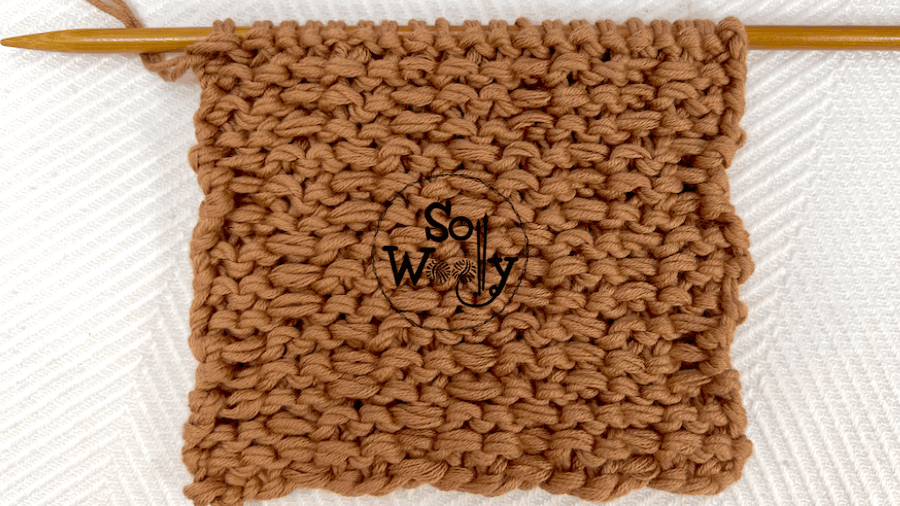
It’s a lovely stitch, it has a pretty texture to it, and you can make the check pattern as large as you prefer.
This is why I’m sharing two versions: The shorter one, (an eight-row repeat pattern), and the larger one, which has 12 rows, yet both are easy-pease!
It’s so easy, that there are only two steps to memorize, and the even rows are plain purl rows.
Additionally, it’ll work for a wide range of projects: From hats, socks, and scarves, to sweaters, cardigans, blankets, etc.
Furthermore, it doesn’t curl!
Nevertheless, the sides look a little bit irregular…
So, if you are knitting a scarf, a blanket, or any piece that should have nice borders, I would think of adding a nice edge on each side of the garment 😉
Without further ado, grab your needles and some yarn, and let’s get busy!
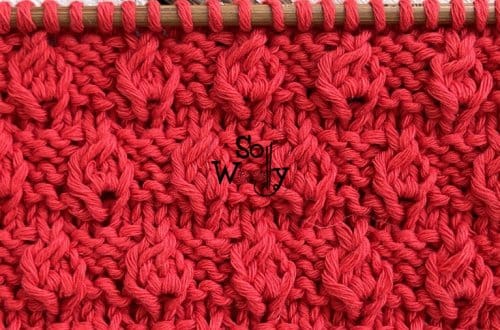
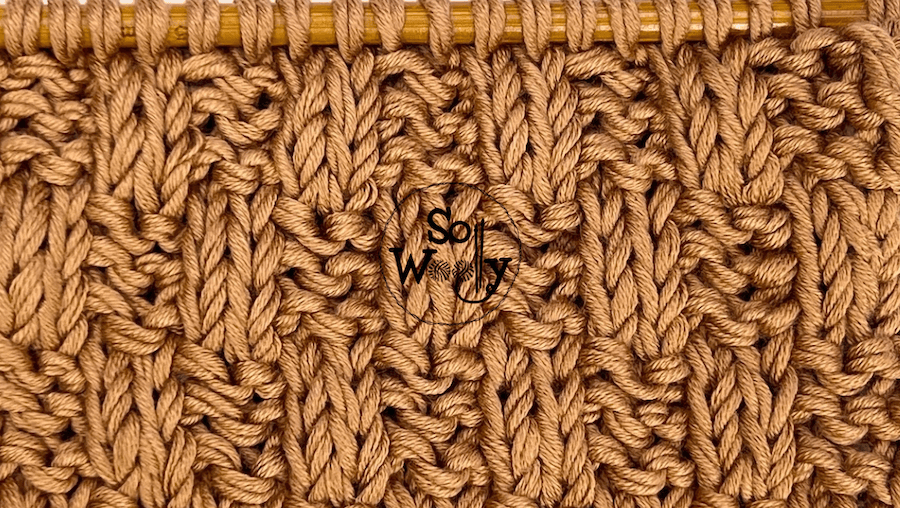
The bronze swatch was made out of 100% Peruvian Pima cotton yarn (using 2 strands at a time) #ad

Using one of my favorite bamboo double-pointed needles (US 10 / 6 mm) #ad
“As an Amazon Associate, I earn from qualifying purchases.”
Abbreviations
CO: Cast on
st: Stitch
RS: Right side of the work
K: Knit
wyif: With yarn in front
P: Purl
wyif: With yarn in front
sl1pw: Slip one stitch purlwise (pass one stitch onto the right-hand needle as if to purl)
BO: Bind off
WS: Wrong side of the work
N.B:
The odd rows form the right side of the work.
The selvage (edge) stitches (the first and the last), will knitted on each odd row, and purled on every even row.
How to knit the Basketweave stitch pattern
CO multiples of 4 + 2 (edge); i.e.: 4 * 3 = 12 + 2 = 14 st
Hot to knit the short version:
Rows 1 and 3 (RS): K1 (edge), *wyif, P2, wyib sl1pw (twice)*. Repeat from * to *, to last st, K1
Rows 2, and 4: P across
Rows 5 and 7: K1 (edge), *wyib sl1pw (twice), wyif P2*. Repeat from * to *, to last st, K1
Rows 6 and 8: P across
These eight rows create the pattern. Repeat them until the desired length is reached.
When finished, BO purlwise, after row 7 (WS).
How to knit the larger version:
Rows 1, 3, and 5 (RS): K1 (edge), *wyif, P2, wyib sl1pw (twice)*. Repeat from * to *, to last st, K1
Rows 2, 4, and 6: P across
Rows 7, 9, and 11: K1 (edge), *wyib sl1pw (twice), wyif P2*. Repeat from * to *, to last st, K1
Rows 8, 10, and 12: P across
These twelve rows create the pattern. Repeat them until the desired length is reached.
When finished, BO purlwise, after row 11 (WS).
This is the other side of the work:
Enjoy the video tutorial:
How to knit the Basketweave stitch
Thank you for watching, and don’t forget to share the love <3
Wishing you the very best in 2024…
Hugs, and happy knitting!
Carolina – So Woolly
PS: If you like the Basket stitch patterns, I have more for you!
How to knit the Basket stitch
How to knit the Braided Basket stitch