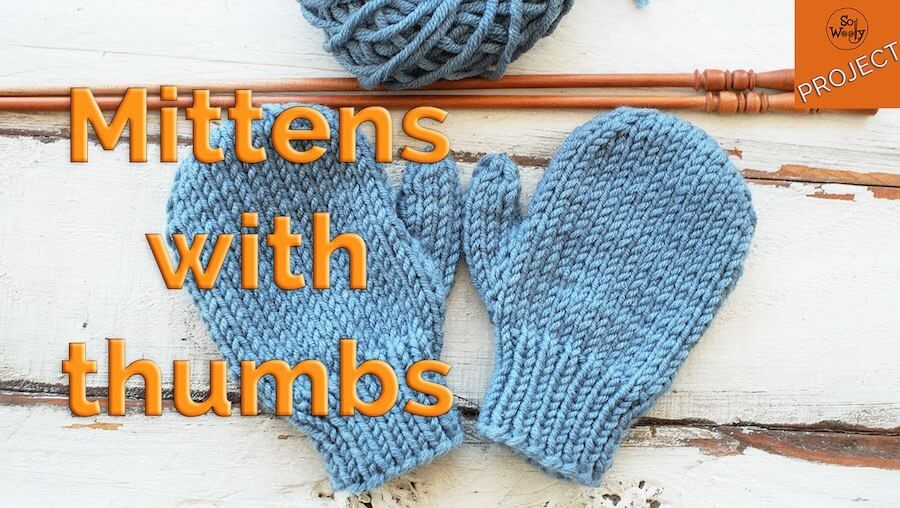
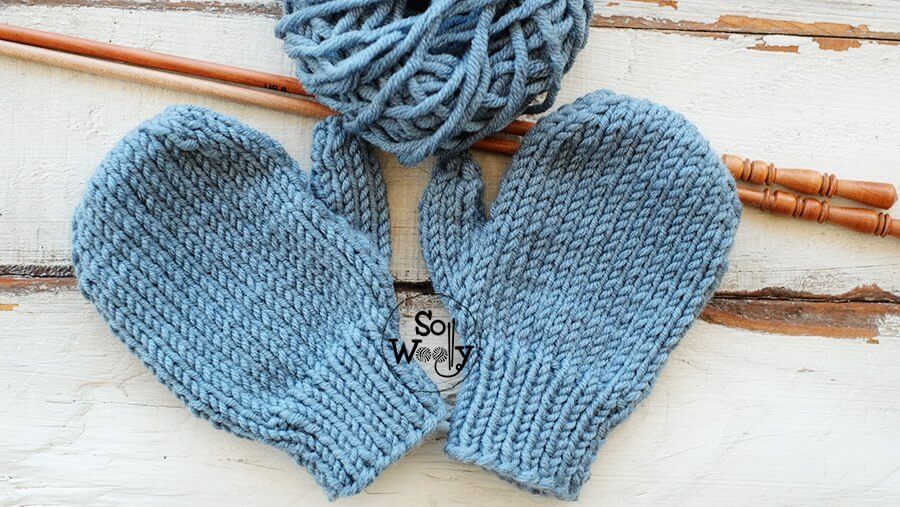
How to knit Mittens with Thumbs for Children 2-3 years
In this tutorial we’ll learn how to knit mittens with thumbs, using straight needles. If you know how to knit and purl, you can do it!
The pattern is simple and you can even make some small alterations to customize them… there are so many options:
Knit them in a Garter stitch, change colors where the decreases start, or just make a lovely motif using the duplicate stitch… set your creative side free!
Materials
2 x 5 mm – US 8 knitting needles #ad
2 x 4 mm – US 6 knitting needles #ad
30-35 gr of wool Worsted, Afghan, Aran (Medium or number 4) #ad
1 x Tapestry needle This set is very handful: from socks yarn weight up to bulky yarn, you can sew up every project you knit!) #ad
Gauge
20 stitches and y 28 rows in Stockinette stitch = 10 cm / 4 in.
Note that every odd row forms the wrong side of the work.
Measurements
Total length 13,5 cm – 5.31 in
Wide: 8 cm – 3.15 in
Thumb length: 6,5 cm – 2.56 in
Abbreviations
st: stitch
K: Knit
P: Purl
k2tog: Knit two stitches together
ssk: slip one stitch knitwise, slip the next, put them both back onto the left hand needle, knit them together.
m1r: right leaning increase (take the strand between two stitches and place it onto the left hand needle from front to back, knit this stitch).
m1l: left leaning increase (take the strand between two stitches and place it onto the left hand needle from back to front, knit this stitch through the back loop).
Watch the video to see how both increases are done.
RS: Right side of the work
WS: Wrong side of the work
BO: Bind off
How to knit Mittens with thumbs for children, step by step
Left Mitten
Cuff
CO 30 st with smaller needles.
Knit 11 rows in 1×1 Rib, as follows:
1º Row (and every row): *P1, K1*. Repeat from* across the row.
IMPORTANT: I made a mistake when recording the video…I think I cast on 31 stitches, instead of 30, and that’s why I ended up with 2 different rows. No worries, you just need to knit this row mentioned above and repeat it until you have 11. Sorry!
Change to the bigger needles and knit every st in row 12; purl every stitch in row 13.
Increases
14º Row: K13, m1r, k1, m1l, k16.
15º and every odd row: Purl across.
16º Row: K13, m1r, k3, m1l, k16.
18º Row: K13, m1r, k5, m1l, k16.
20º Row: K13, m1r, k7, m1l, k16.
Thumb
21º Row: k22, turn.
22º Row: P9, turn.
Repeat the last two rows 3 times more (6 rows in total for the thumb).
27º Row: K2tog (four times) ending with k1.
Cut the yarn leaving a 10 cm – 4 in tail, thread your tapestry needle, pull the yarn through the remaining stitches and secure.
Rest of the Mitten
Facing the RS of the work, join the yarn to the base of the thumb, picking and knitting one stitch each side of the base. Knit across until the end of this row.
On the next row, purl across, and keep knitting in Stockinette stitch for 8 more rows (this one is the first row of 9 rows).
Top of the Mitten
1º Row: K1, ssk, K10, k2tog, k1, ssk, k10, k2tog, k1.
3º Row: K1, ssk, K8, k2tog, k1, ssk, k8, k2tog, k1.
5º Row: K1, ssk, K6, k2tog, k1, ssk, k6, k2tog, k1.
7º Row: BO knitwise.
Right Mitten
Cuff
CO 30 st with smaller needles.
Knit 11 rows in 1×1 Rib, as follows:
1º Row (and every row): *P1, K1*. Repeat from* across the row.
IMPORTANT: I made a mistake when recording the video…I think I cast on 31 stitches, instead of 30, and that’s why I ended up with 2 different rows. No worries, you just need to knit this row mentioned above and repeat it until you have 11. Sorry!
Change to the bigger needles and knit every st in row 12; purl every stitch in row 13.
Increases
14º Row: K16, m1r, k1, m1l, k13.
15º and every odd row: Purl across.
16º Row: K16, m1r, k3, m1l, k13.
18º Row: K16, m1r, k5, m1l, k13.
20º Row: K16, m1r, k7, m1l, k13.
Thumb
21º Row: k25, turn.
22º Row: P9, turn.
Repeat the last two rows 3 times more (6 rows in total for the thumb).
27º Row: K2tog (four times) ending with k1.
Cut the yarn leaving a 10 cm – 4 in tail, thread your tapestry needle, pull the yarn through the remaining stitches and secure.
Rest of the Mitten
Facing the RS of the work, join the yarn to the base of the thumb, picking and knitting one stitch each side of the base. Knit across until the end of this row.
On the next row, purl across, and keep knitting in Stockinette stitch for 8 more rows (this one is the first row of 9 rows).
Top of the Mitten
1º Row: K1, ssk, K10, k2tog, k1, ssk, k10, k2tog, k1.
3º Row: K1, ssk, K8, k2tog, k1, ssk, k8, k2tog, k1.
5º Row: K1, ssk, K6, k2tog, k1, ssk, k6, k2tog, k1.
7º Row: BO knitwise.
Seams
First, join the top of the mitten, then the thumb, and last, the sides.
And you are now ready to get knitting mittens!
Enjoy the video:
How to knit Mittens with thumbs for children step by step
I hope you enjoyed this tutorial, don’t forget to subscribe to my email list, to receive all the patterns + videos in your email… and
Hugs, and happy knitting 🙂
So Woolly – Carolina
PS: If you want to learn how to knit mittens for the whole family, take a look at this new pattern
“As an Amazon Associate I earn from qualifying purchases“