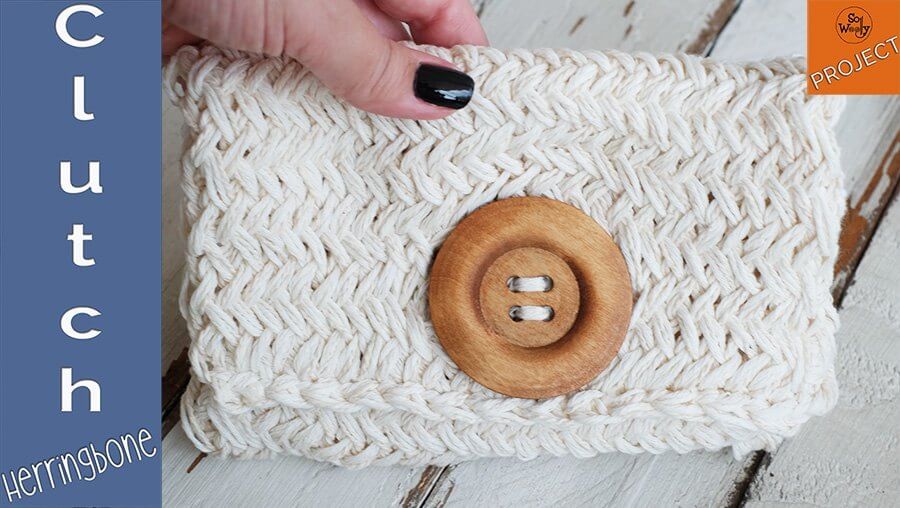
How to knit a Clutch Bag in Herringbone stitch, step by step
In this tutorial, you’ll learn how to knit a clutch bag, step by step. Easy and quick to knit, it’s a great project for beginners.
I’m giving you the instructions for the size and the stitch pattern that I chose, but on the video tutorial, you’ll see how to adapt it to any size, with the yarn and needles you have, using your own preferred/favorite stitch.
Despite how complicated it can seem, the Herringbone stitch is pretty easy: It’s a two-row repeat pattern, and there are no increases nor decreases involved.
You’ll also learn how to make the buttonhole and a new and much more accurate way to bind off the stitches.
I’ve been rushing to finish this bag because it’s a surprise for someone special. And even though I wanted to knit in T-shirt yarn, there was none left in my stash. So today we are using 3 strands of a lovely cotton yarn leftover from another project.
Ok, let’s get started!
Materials
100 gr of cotton yarn for 4 – 4,5 mm knitting needles (US 6 – 7 ) (Number 3 or DK weight), #ad
Or
T-shirt yarn for 12 mm needles (US 17) #ad
A great set that includes jumbo sizes: 2 x needles 15 mm (US 19) #ad
This is the one I used: 1 wooden button of 2.3 in / 5,8 cm diameter #ad
Scissors (Beautiful and sharp) #ad
Tapestry needle (For different yarn weights) #ad
Measuring tape (or rule) (Retractable, dual side) #ad
Measurements of the finished Clutch Bag (folded)
Width : 8.2 in / 21 cm
Height: 5.5 in / 14 cm
Before sewing, the rectangle measures 8.7 in / 22 cm width, and 15.3 in / 39 cm height.

Gauge
13 p = 4 in /10 cm (in Herringbone stitch)
Abbreviations
CO: Cast on
st: Stitch
k: Knit
p: Purl
k2togtbl: Knit two stitches together through the back loop
p2tog: Purl two stitches together
s1: slip one stitch
passo: Pass the slipped stitch over
RS: Right side of the work
WS: Wrong side of the work
BO: Bind off
How to knit a Clutch Bag in Herringbone stitch
CO 28 st
1º and every odd row (RS): *K2togtbl, drop the first stitch only*. Repeat from * to *, until there is one st left, k1.
2º and every even row (WS): *P2tog, drop the first st only*. Repeat from * to *, until there is one st left, p1.
Repeat these two rows until the rectangle measures 13 in / 33 cm from the CO row, finishing with a WS row.
Buttonhole (RS): Maintaining the pattern, K 11 st, BO 6 st, K 11 st.
On next row, maintaining the pattern, k 11 st, CO 11 st, k 11 st.
If your button has a different size, it’s important to put it on the rectangle now, to see how many more rows need to be knitted.
In my clutch bag, two more rows were enough.
How to Bind Off: On next row (RS), K1, sl 1 purlwise, passo. *K1, passo, sl 1 purlwise, passo*. Repeat from * to *, to the end.
When there is one st left, cut the yarn (leaving a tail long enough to sew on this side of the bag), and pass it through that last st.
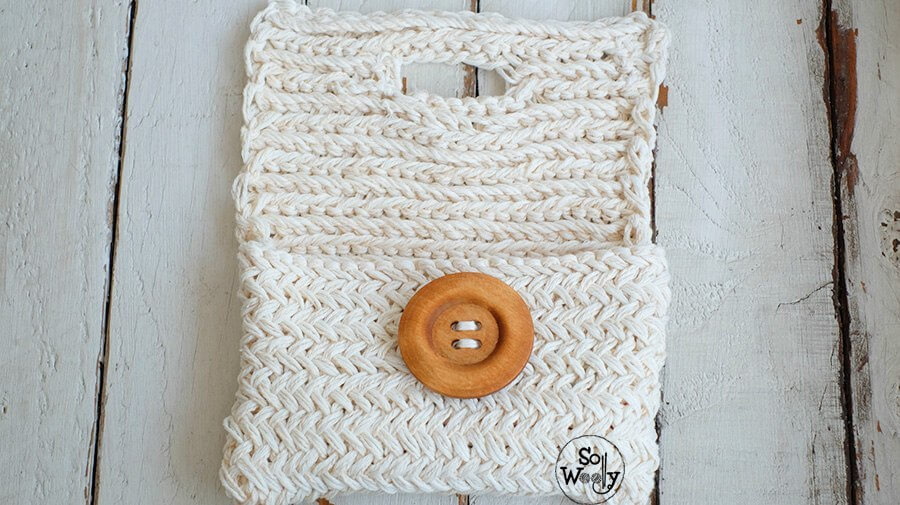
How to sew on the Clutch Bag: Fold the rectangle at 5.5 in / 14 cm from the bottom edge, and sew on both sides.
Sew on the button, and voila! It´s finished! Enjoy your new Clutch Bag!
Enjoy the video tutorial:
How to knit a Clutch Bag in Herringbone stitch
Hugs and happy knitting!
XXX
Carolina
As an Amazon Associate I earn from qualifying purchases