How to Knit a Beautiful Ribbing (2 rows only!) + Video
Today, you’ll learn how to knit a beautiful ribbing in just two rows.
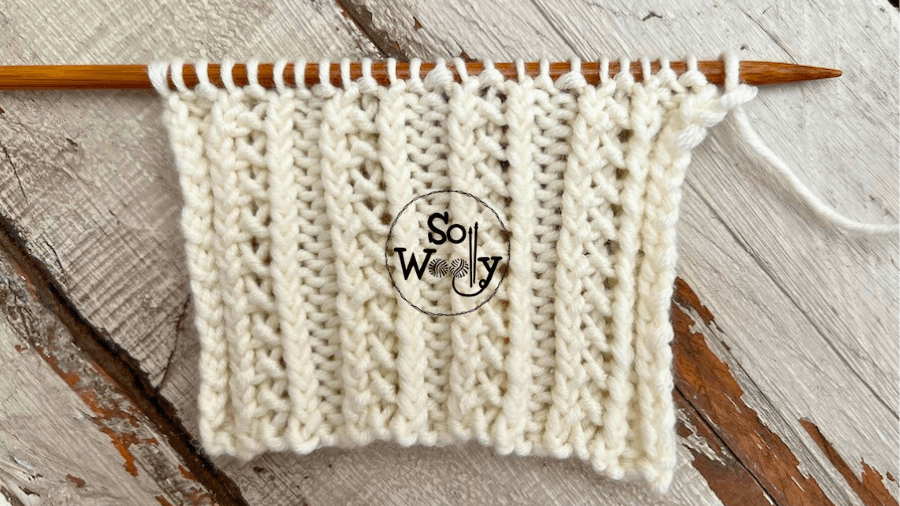
Honestly, this one is a very special Rib stitch, easier than the Double Braided Rib we practiced a while ago, and it doesn’t curl.
Actually, the only techniques required are knit and purl, so if you already mastered the classic 2 x 2 Rib stitch, you can do it 😉
What makes it unique, is the combination of knitting/purling some stitches through the back loop.
It creates this braided texture, without crossing stitches… YAY!
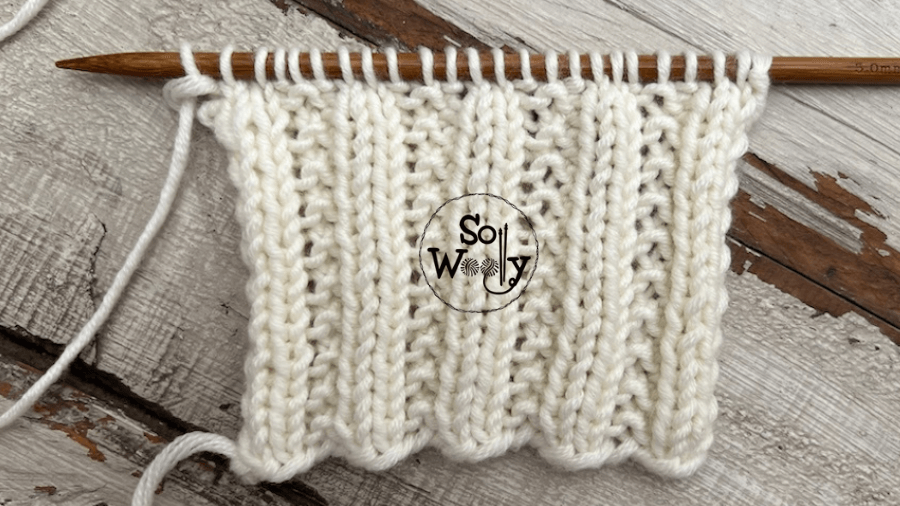
Although it’s not identical on both sides, they look pretty, so to me, it’s a reversible stitch.
In addition, this beauty can be used not only for the cuffs and hems of sweaters, cardigans, hats, and socks but also as a main pattern for a larger piece, such as a scarf, blanket, wrap, etc.
Enough chatting. Grab your needles, and some yarn, and let’s knit a lovely swatch 🙂
Abbreviations
CO: Cast on
RS: Right side of the work
st: Stitch
K: Knit
k3tbl: Knit three stitches through the back loop (one by one, not together)
P: Purl
p1tbl: Purl one stitch through the back loop
BO: Bind off
N.B.:
The odd rows form the right side of the work.
The edge (selvage) stitches will be knitted on every odd row, and purled on every even row.
With one of my favorite double-pointed bamboo needles (US 8 – 5 mm) #ad
“ As an Amazon Associate, I earn from qualifying purchases.”
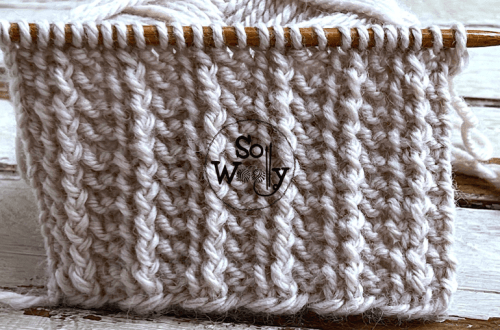
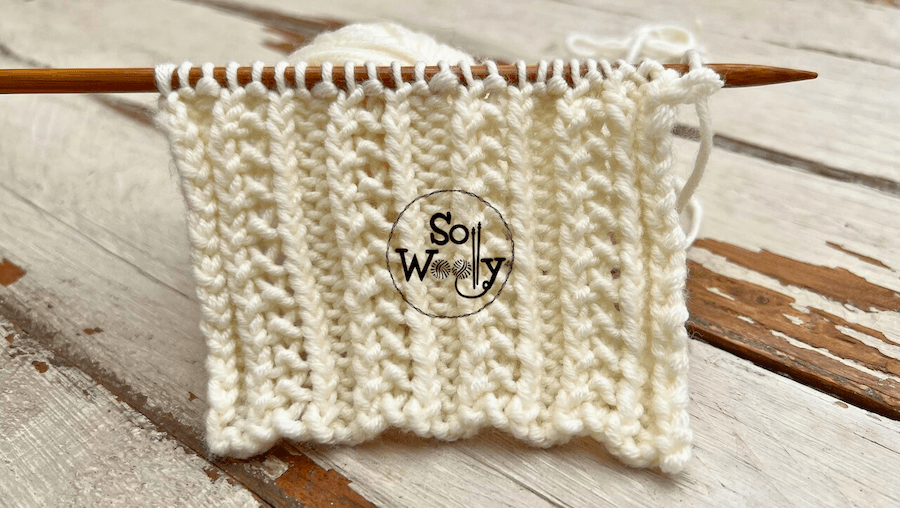
How to knit a beautiful ribbing
CO multiples of 5 + 2 + 2 (edge st).
For example: 5 * 3 = 15 + 2 = 17 + 2 = 19 st.
1º and every odd row (RS): K1 (edge), *P2, k3tbl*. Repeat from * to *, to last 3 st, ending with P2, K1 (edge)
2º and every even row: P1 (edge), K2, *p1tbl, K1, p1tbl, K2*. Repeat from * to *, to last st, P1 (edge).
These two rows create the pattern. Repeat them until the desired length is reached.
When finished, BO after row 2 (RS), working each st as it presents.
This is the wrong side of the work:
Enjoy the video tutorial:
How to knit a beautiful ribbing (2 rows only!)
If you like it, don’t forget to share the love!
Hugs, happy knitting 🙂
xoxo
Carolina – So Woolly
PS: Not a fan of the purl stitch? Click here and learn how to knit a 2 x 2 rib pattern without purling!