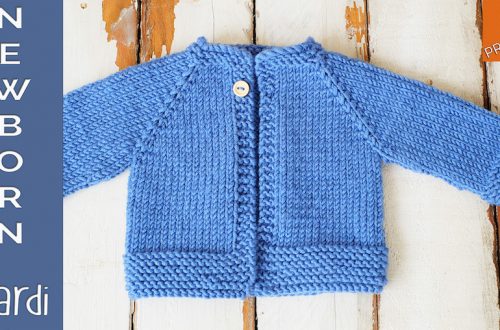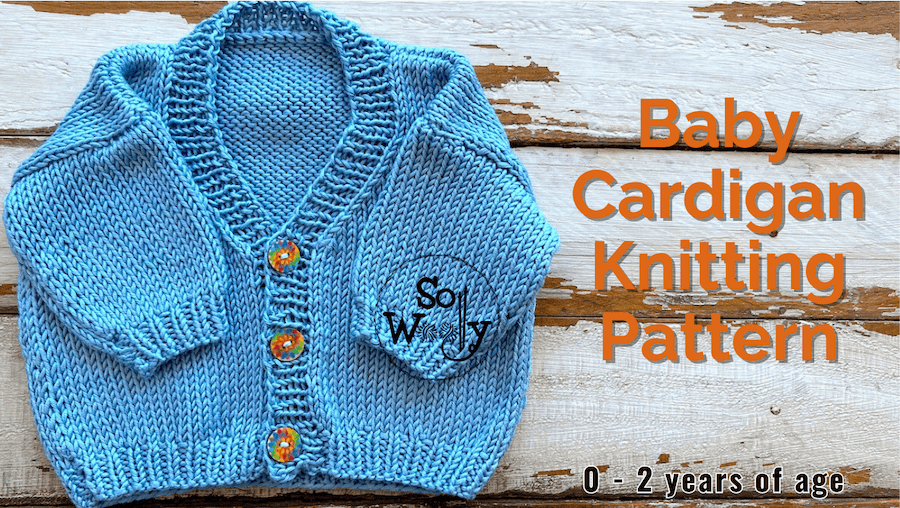
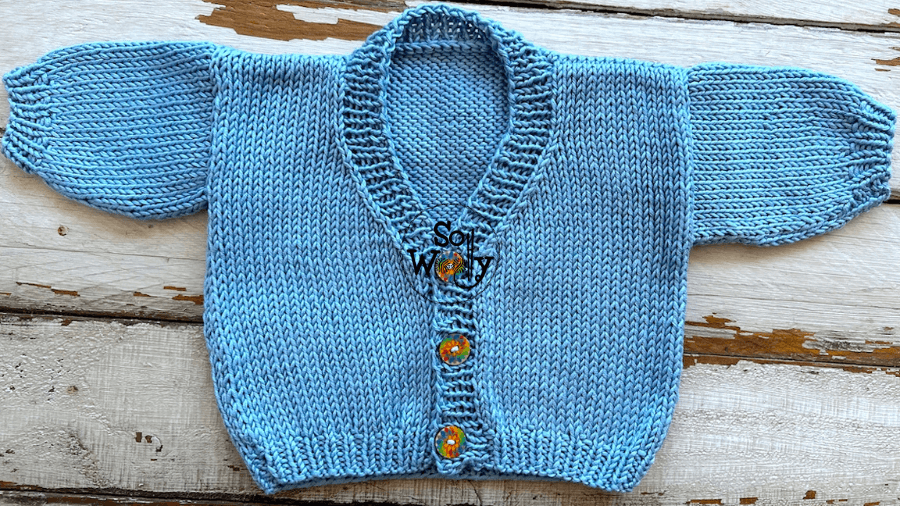
How to Knit a Baby Cardigan (0-3 months to 2 years)
Today, I’m sharing how to knit a Baby Cardigan (flat / back and forth).
It’s a 5-piece bottom-up construction, super easy to knit, ideal for beginners.
Actually, the only techniques required are knit and purl, pick up and knit, and bind off.
Besides, the Baby Cardigan is knitted in Stockinette stitch, except for the hem, cuffs, and buttonhole edge, where will be doing the 1×1 Rib stitch.
However, if you are not a fan of purling, you can change the Stockinette stitch sections for Garter stitch 😉
Finally, I’ll show you in the video tutorial how to join the pieces (right front, left front, back, and sleeves) using the mattress stitch (or invisible seaming).
Without further ado, read the pattern, get the materials, and let’s knit an adorable baby cardigan!
Materials for the Baby Cardigan
Number 4, Medium, or Worsted weight yarn, in the following quantities:
Size 0-3 months: 100 gr
Size 3-6 months: 125 gr
Size 6-12 months: 150 gr
Size 12- 24 months: 175 gr
I used mercerized cotton yarn (each skein has 50 gr. and 100 m / 109 yds) #ad
You can use the yarn of your preference, as long as the same gauge is obtained.
US 6 (4 mm) and US 7 (4.5 mm) knitting needles #ad
Scissors
3 to 5 buttons (1.5 cm diameter) #ad
Measurement tape or rule
Tapestry needle #ad
“As an Amazon Associate, I earn from qualifying purchases”
Abbreviations
CO: Cast on
st: stitch
K: Knit
P: Purl
kfb: Knit one stitch front and back
inc1: Increase 1 stitch
k2tog: Knit two stitches together
ssk: Slip 1 stitch as if to knit, slip the next same way, put both back onto the left-hand needle, and knit the together
BO: Bind off
RS: Right side of the work
WS: Wrong side of the work
Gauge swatch
A square 10 x 10 cm / 4 x 4 in knitted in Stockinette stitch, using the larger needles = 22 stitches and 26 rows.
If you are getting more stitches per cm/in, go up a needle size; if you are getting less stitches, go down a needle size.
Please note that if your gauge is different, the size of the finished cardigan will be different too.
To be successful, it’s indispensable to obtain the same gauge 😉
Baby Cardigan finished measurements (after blocking and seaming)
Size 0 – 3 months
Full length: 23 cm / 9 in
Chest Circumference: 48 cm / 19 in
Sleeve length (from armhole): 11 cm / 4 1/4 in
Size 3 – 6 months
Full length: 25 cm / 9 3/4 in
Chest Circumference: 54 cm / 21 1/4 in
Sleeve length (from armhole): 13 cm / 5 1/4 in
Size 6 – 12 months
Full length: 28 cm / 11 in
Chest Circumference: 59 cm / 23 1/4 in
Sleeve length (from armhole): 14 cm / 5 1/2 in
Size 12 – 24 months
Full length: 30 cm / 11 3/4 in
Chest Circumference: 65 cm / 25 1/2 in
Sleeve length (from armhole): 15 cm / 6 in
Notes before starting:
The pattern has been designed for the smallest size (0-3 months).
Instructions for larger sizes (3-6 months, 6-12 months, 12-24 months) are between parenthesis, in the same order.
The odd rows form the right side of the work.
How to knit a Baby Cardigan
Back
Ribbing
Using the smaller needles, CO 45 (51-55-59) st.
Work 6 (6-8-8) rows in 1 x 1 Rib stitch pattern, as follows:
1º and every odd row (RS): K1, *P1, K1*. Repeat from * to *, to end.
2º and every even row: P1, *K1, P1*. Repeat from * to *, to end.
Next row: Change to larger needles and increase 8 (8-10-12) st evenly. 53 (59-65-71) st remain.
Stockinette stitch section
Row 1 and every odd row (RS): K across
Row 2 and every even row: P across
Repeat these two rows until the piece measures 23 (25-28-30) cm / 9 (9 3/4-11-11 3/4) in, ending with a WS row.
Next row: BO knitwise.
Sleeves
Ribbing
Using the smaller needles, CO 25 (27-31-33) st.
Work 6 (6-8-8) rows in 1×1 Rib stitch pattern, as follows:
1º and every odd row (RS): K1, *P1, K1*. Repeat from * to *, to end.
2º and every even row: P1, *K1, P1*. Repeat from * to *, to end.
Next row: Change to larger needles and increase 9 (7-9-7) st evenly. 34 (34-40-40) st remain.
Stockinette stitch section
Row 1 and every odd row (RS): K across
Row 2 and every even row: P across
Keep working in pattern while increasing one stitch one each side of the piece on the following rows:
Increases
For the smallest size:
Rows 3 and 9: K2, inc 1, K to last 2 st, inc 1, K2. 38 st remain.
For the 3-6 months size:
Rows 3, 7, 11, and 15: K2, inc 1, K to last 2 st, inc 1, K2. 42 st remain.
For the 6-12 months size:
Rows 3, 7, and 11: K2, inc 1, K to last 2 st, inc 1, K2. 46 st remain.
For the 12-24 months size:
Rows 3, 7, 9, 11, 13, and 15: K2, inc 1, K to last 2 st, inc 1, K2. 52 st remain.
Work in pattern until the piece measures 4 1/4 (5 1/4 – 5 1/2 – 6) in / 11 (13-14-15) cm, ending with a WS row.
Next row: BO knitwise.
Left Front
Ribbing
Using the smaller needles, CO 21 (23-25-27) st.
Work 6 (6-8-8) rows in 1 x 1 Rib stitch pattern, as follows:
1º and every odd row (RS): K1, *P1, K1*. Repeat from * to *, to end.
2º and every even row: P1, *K1, P1*. Repeat from * to *, to end.
Next row: Change to larger needles and increase 4 (5-6-7) st evenly. 25 (28-31-34) st remain.
Stockinette stitch section
Row 1 and every odd row (RS): K across
Row 2 and every even row: P across
Repeat these two rows until the piece measures 11 (13-14-15) cm / 4 1/4 (5 – 5 1/2 -6) in, ending with a WS row.
V-shape
Keep in pattern while decreasing 1 st at front edge every 2 rows, until 16 (19-21-23) st remain, as follows:
Next row (RS): K to last 3 st, k2tog, K1.
Next row: P across
Work straight until the piece measures 23 (25-28-30) cm / 9 (9 3/4-11-11 3/4) in, ending with a WS row.
Next row: BO knitwise.
Right Front
Ribbing
Using the smaller needles, CO 21 (23-25-27) st.
Work 6 (6-8-8) rows in 1 x 1 Rib stitch pattern, as follows:
1º and every odd row (RS): K1, *P1, K1*. Repeat from * to *, to end.
2º and every even row: P1, *K1, P1*. Repeat from * to *, to end.
Next row: Change to larger needles and increase 4 (5-6-7) st evenly. 25 (28-31-34) st remain.
Stockinette stitch section
Row 1 and every odd row (RS): K across
Row 2 and every even row: P across
Repeat these two rows until the piece measures 11 (13-14-15) cm / 4 1/4 (5 – 5 1/2 -6) in, ending with a WS row.
V-shape
Keep in pattern while decreasing 1 st at front edge every 2 rows, until 16 (19-21-23) st remain, as follows:
Next row (RS): K1, ssk, K to end.
Next row: P across
Work straight until the piece measures 23 (25-28-30) cm / 9 (9 3/4-11-11 3/4) in, ending with a WS row.
Next row: BO knitwise.
Rule of thumb: Don’t forget to block your pieces before joining them!
How to sew up the Baby Cardigan
First, join the shoulders (front and back), then, the sleeves to the front and back.
Now, sew the sides from the hem to the armhole, and finish closing the sleeves, from the armhole to the cuff.
Watch the video to see how to do the mattress stitch or invisible seaming.
Finally, weave in the ends.
The Buttonhole Edge
Facing the RS, and starting on the corner of the right front (the most exterior spot of the ribbing), with smaller needles, pick up and knit 3 every 4 st (knit 3, skip 1), until the neckline at the back.
Then, pick up and knit 1 st of each “v” column of Stockinette stitch (1 st for every knit stitch we see).
Continue working on the left front, picking up and knitting 3 every 4 st, until the other corner of the ribbing.
The total number of stitches varies depending on your tension, just take into account that it should be an odd number. For the smallest size, I ended up with 113 stitches.
As an orientation, the number of stitches for the other sizes could be 123-137-147.
Work 2 rows in 1×1 Rib stitch, as follows:
WS row: *K1, P1*. Repeat from * to *, ending with K1
RS row: *P1, K1*. Repeat from * to *, ending with P1
Next row: Place 3 (or more) buttons on the right front edge, starting on the cast-on edge to the point where the v-neck curve starts, leaving the same space between them.
My buttons measure 1.5 cm in diameter, which is equivalent to 2 st; this is the number of st I’ll BO to make the buttonholes.
I have 21 st available to place 3 buttons, so the space between buttons is 3 st, buttonhole (2 st), 6 st, buttonhole (2 st), 6 st, buttonhole (2 st).
Buttonhole row (WS): K1, P1, K1, *BO 2 st (P1, K1, passo, P1, passo), K1, P1 [3 times]*. Repeat from * to * once more, BO 2 st.
Complete the row working in pattern.
Next row (RS): *P1, K1*. Repeat from * to *, until the buttonhole. Turn the work and cast on 2 st. Turn the work.
Keep working in pattern until the next buttonhole. Repeat two times more, and finish the row.
Next row (WS): *K1, P1*. Repeat from * to *, ending with K1.
Next row: BO in pattern.
Et voilà, your baby cardigan is finished! Congratulations 🙂
Enjoy the video tutorial:
How to knit a Baby Cardigan, step-by-step
Don’t forget to share your knits on Instagram and mention me (@sowoolly), so I can see your work!
Happy knitting 🙂
Carolina – So Woolly