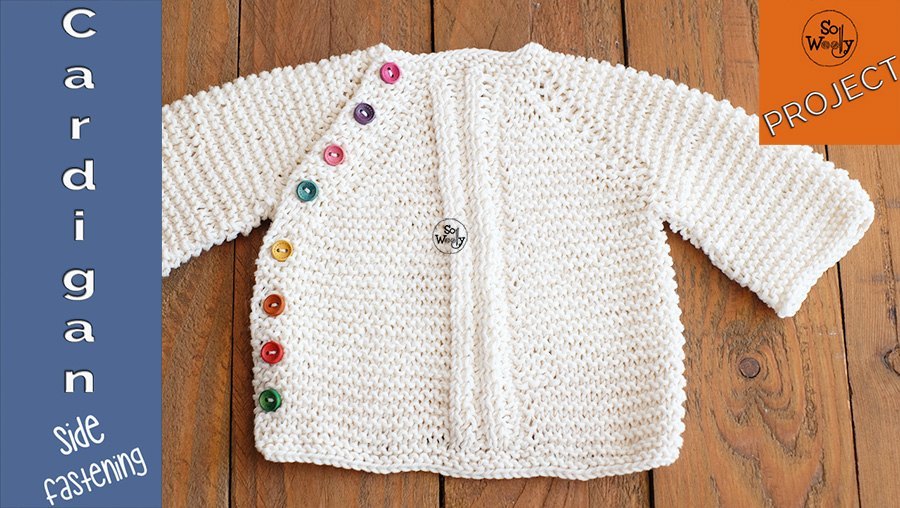
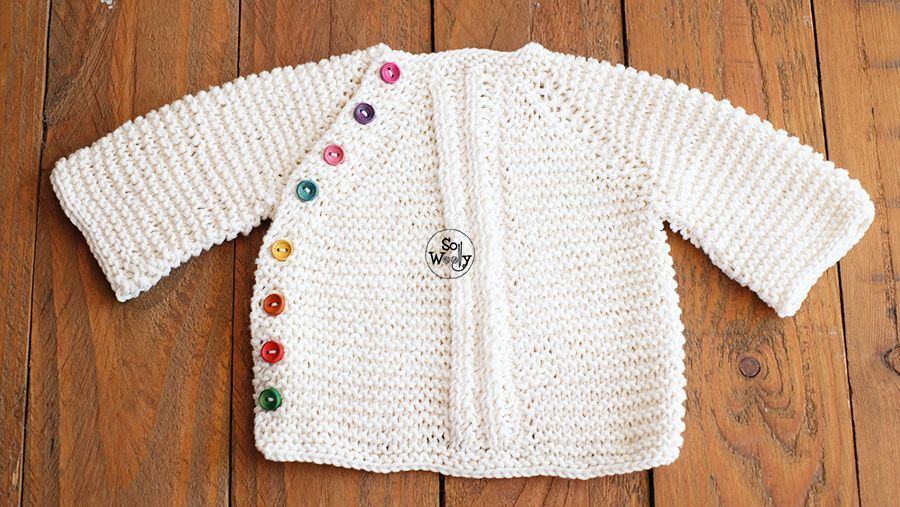
Round Neck Baby Cardigan with a side fastening knitting pattern
In today’s tutorial, you’ll learn to knit a Baby Cardigan, with a side opening, in four sizes. The cardigan is knitted in one piece (seamless).
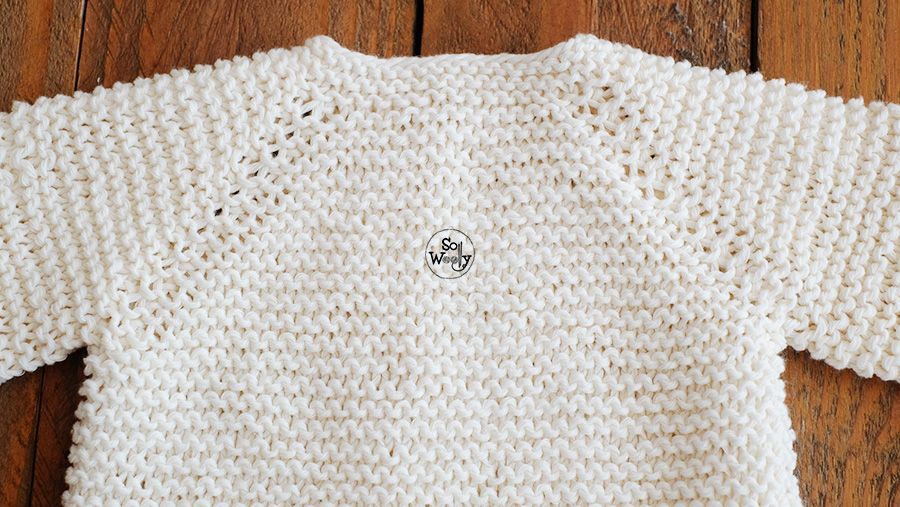
The Raglan jacket is knitted in Garter stitch, and it’s a top-down construction: We start from the neck, separate the sleeves, and knit down to the hemline. Then we knit the sleeves and sew on the buttons.
I’ve divided the instructions into four sections. In the title each of section, you’ll find the minute it starts clearly marked on the video.
Materials
US size 6 / 4 mm circular knitting needle (32 in / 80 cm cable length). #ad
US size 7 / 4.5 mm circular knitting needle (32 in / 80 cm cable length). #ad
Cotton yarn or Merino wool for 4 mm needles (number 3, DK, light worsted)
Size L (12-18 months): 150 gr
Size M (6-12 months): 120 gr
Size S (3-6 months): 90 gr.
Size XS (newborn baby): 90 gr
Size L: 13
Size M: 12
Size S: 11
Size XS: 8
5 markers of the same color. We’ll call them color A #ad
2 markers of another color. We’ll call them color B #ad
Scissors
Darning needle #ad
Ruler or measurement tape
2 pieces of scrap yarn (around 20 in / 50 cm long) in a contrasting color (cotton yarn is a great choice).
Gauge
4 in / 10 cm in Garter stitch = 22 stitches.
Sizes and Measurement of the finished Cardigan
XS – Chest circumference: 15.75 in / 40 cm.
Armhole to hemline: 4. 5 in / 11,5 cm.
Sleeve length (from the armhole): 4 in / 9 cm
S – Chest circumference: 17.75 in / 45 cm.
Armhole to hemline: 7 in / 18 cm.
Sleeve length: 6 in / 15 cm
M – Chest circumference: 18.75 in / 48 cm.
Armhole to hemline: 8 in / 20 cm.
Sleeve length: 7 in / 18 cm
L – Chest circumference: 20.75 in / 53 cm.
Armhole to hemline: 8.5 in / 21,5 cm.
Sleeve length: 8 in / 20 cm
If you love knitting for babies…don’t miss these beautiful patterns! #ad
Abbreviations
CO: Cast on
WS: Wrong side of the work
st: Stitch
RS: Right side of the work
k: Knit
p: Purl
k2tog: Knit two stitches together
yo: Yarn over
M: Marker
PMA: Place marker color A
PMB: Place marker color B
SMA: Slip marker color A
SMB: Slip marker color B
m1L: Make one left-leaning increase. Pick up the bar between the stitch you knit and the one you’re about to knit, bringing the needle from front to back. Then knit into the back of the stitch.
kfb: Knit one stitch front and back (Knit one stitch, don’t take it off the left-hand needle, knit the same stitch through the back loop)
ssk: Slip one stitch as if to knit, slip the next, put them back onto the left -hand needle, knit them together
N.B.:
1) The even rows create the right side of the pattern
2) Increases and buttonholes always will be made in an even row. The odd rows are rest rows (neither buttonholes nor increases will be made). 8 stitches will be increased in every increase row.
3) The central panel of 10 stitches is knitted in Lace Rib stitch: A reversible, one-row stitch pattern. We repeat this one row on both sides of the work.
You can substitute the Lace Rib by knitting the central panel in Stockinette (knitting the even rows and purling the odd rows). You could also avoid the panel and keep knitting in Garter stitch, like the rest of the jacket.
4) The pattern is written for size XS (newborn baby). The instructions for sizes S, M and L, are given within parentheses, in descending order, from left to right.
Round Neck Baby Cardigan with a side
fastening knitting pattern
Part 1: Starting with the neckline, we’ll increase stitches to
form the sleeves, front and back, down to the armhole.
With smaller needles, CO, 46 (49, 53, 55) st
1º, 2º & 3º rows: K across
4º row (RS) – First Buttonhole: K2, yo, k2tog, K to the end.
5º row (WS): K4 (part of the front), PMA, K6 (first sleeve), PMA, K14 (16, 18, 19) (back), PMA, K6 (second sleeve), PMA, K1 (2, 3, 3), PMB, K10, PMB (central panel), K1 (1, 2, 3), PMA, K4 (rest of the front).
6º row: Change to larger needles. K4, SMA, kfb, K to next M, SMB, K1, ssk, m1R, P2, ssk, m1R, P2, K1, SMB, K to 1 st before M, (*kfb, SMA, kfb, K to 1 st before M*) Repeat from * to *3 times, kfb, SMA, K4. 8 stitches have been increased.
7º row: K4, SMA, K to the central panel, SMB, K1, ssk, m1R, P2, ssk, m1R, P2, K1, SMB, K to end (slip every M).
Repeat 6º and 7º rows, 2 times more.
8º row – Second Buttonhole: K2, yo, k2tog, SMA, kfb, K to next M, SMB, K1, ssk, m1R, P2, ssk, m1R, P2, K1, SMB, K to 1 st before M, (*kfb, SMA, kfb, K to 1 st before M*) Repeat from * to *3 times, kfb, SMA, K4. 8 stitches have been increased.
9º row = 7º row.
Work 6º and 7º rows, 3 times more
Work 8º and 9º rows, 1 time more (third buttonhole)
Work 6º and 7º rows, 3 times more
Work 8º and 9º rows, 1 time more (fourth buttonhole)
For XS size: Work 6º and 7º rows, 1 time more
For S size: Work 6º and 7º rows, 2 times more
For M size: Work 6º and 7º rows, 3 times more
For L size: Work 6º and 7º rows, 3 times more, then, 8º and 9º, 1 time more (fifth buttonhole).
There are 150 (161, 173, 183) st
Part 2 (min 16:55 of the video): Separating the sleeves
On next row, all MA will be removed. Keep the MB for the central panel.
Thread the darning needle with one piece of the scrap yarn.
From now on, no increases will be made. Knit every row, keeping the central panel, and working the buttonholes when necessary.
10º row (RS): K to central panel, SMB, K1, ssk, m1R, P2, ssk, m1R, P2, K1, SMB, K to M, remove M, pass 32 (34, 36, 38) st to scrap yarn (first sleeve), remove M, K to M, remove M, pass 32 (34, 36, 38) st to scrap yarn (second sleeve), remove M, K to end.
There are 86 (93, 101, 107) st left.
11º, 12º, 13º and 15º rows: K to the central panel, SMB, K1, ssk, m1R, P2, ssk, m1R, P2, K1, SMB, K to end.
14º row (Buttonhole row: K2, yo, k2tog, K to the central panel, SMB, K1, ssk, m1R, P2, ssk, m1R, P2, K1, SMB, K to end.
Part 3 (min 21:05 of the video): Knitting the body, working
more buttonholes, to the hemline.
For XS size:
Work rows 12 and 13: 3 times more
Work 14 and 15: 1 time more
Work rows 12 and 13: 3 times more
Work 14 and 15: 1 time more
Work rows 12 and 13: 3 times more
Work 14 and 15: 1 time more
Work rows 12 and 13, one time more.
Change to smaller needles, K 4 rows in Garter stitch (we won’t work the central panel anymore, the MB can be removed).
BO knitwise on row 5.
For S, M and L sizes, work rows 12 and 13 3 times more, and rows 14 and 15 1 time more, until the Cardigan measures 6.5 in / 16, 5 cm – 7.3 in /18, 5 cm – 7.8 in /20 cm from the armhole.
Size S: 11 buttonholes
Size M: 12
Size L: 13
Change to smaller needles, K 4 rows in Garter stitch (we won’t work the central panel anymore, the MB can be removed).
BO knitwise on row 5.
Part 4 (min 24:32 of the video): Knitting the sleeves
Pass 32 (34, 36, 38) st on the scrap yarn to the larger needle, and using the Magic Loop technique, K 1 row and P the next row, until the sleeve measures 3 in / 7,5 cm (5.3 in / 13,5 cm – 6.5 in / 16,5 cm – 7.3 in / 18,5 cm) from the armhole.
Leave a 6 in tail to close the holes under the armhole, using the darning needle.
Change to smaller needles, K 4 rows in Garter stitch (we won’t work the central panel anymore, the MB can be removed).
BO knitwise on row 5.
Work the second sleeve, sew the buttons and weave in the ends…and…
It’s time to celebrate! You have just finished your Round Neck Baby Cardigan with a side fastening! Congratulations!!!
Enjoy the video tutorial:
Round Neck Baby Cardigan with a side fastening
Don’t forget to share the love ;-)!
Hugs and happy knitting,
Carolina – So Woolly
As an Amazon Associate I earn from qualifying purchases