How to knit the Textured Ribbons stitch pattern
Today, I’m sharing how to knit the Textured Ribbons stitch… another classic of the knitting world.
It has a lovely texture to it, perfect for large pieces, such as sweaters, cardigans, vests, blankets, etc., yet suitable for accessories too, such as hats, mittens, and socks.
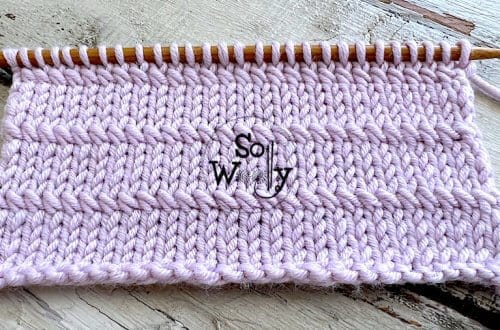
Actually, it’s a way to create little rectangles, divided by slipped stitches; it reminds me of one of the Waffle stitch patterns we’ve practiced in the past.
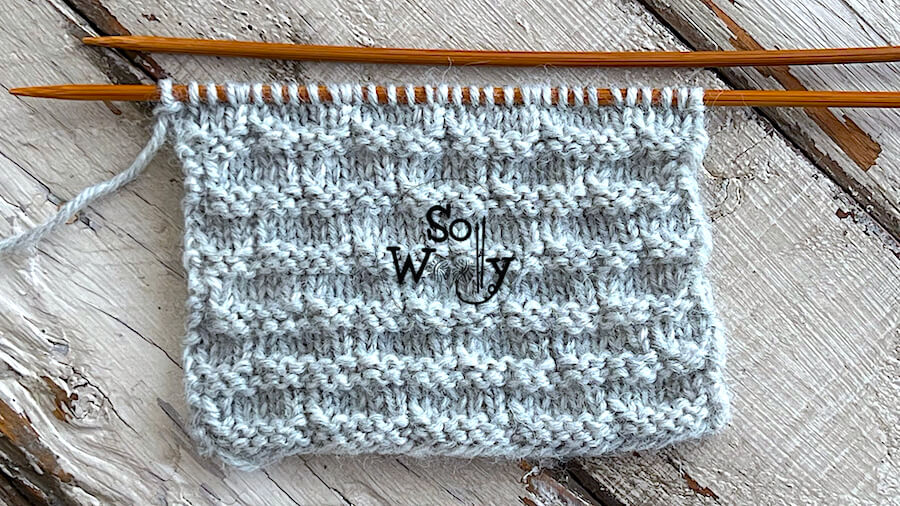
Although it’s not identical on both sides, they look pretty, so I’d say it’s a reversible stitch.
Furthermore, it doesn’t curl! So if you want to knit a scarf, go ahead!
In addition, the Textured Ribbons stitch looks like the Brick stitch, but it’s slightly different (more even and smooth… more sophisticated if you ask me 😉
Finally, it’s easy and fun to do: It’s a twelve-row repeat pattern, and the techniques required are knit, purl, and slip stitches, that’s it.
So, no excuses!
Grab your needles and some yarn, and let’s get busy 🙂
This swatch was knitted using 100% wool yarn (light, superwash, and great to work with) #ad
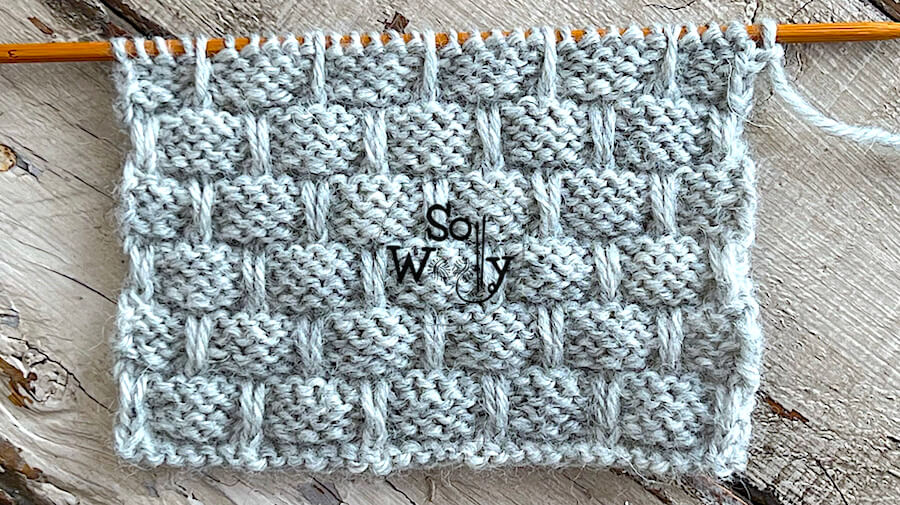
With one of my favorite bamboo needles US 6 / 4 mm #ad
“As an Amazon Associate, I earn from qualifying purchases.”
Abbreviations
CO: Cast on
st: Stitch
RS: Right side of the work
K: Knit
P: Purl
wyib: With yarn in back
sl1pw: Slip one stitch as if to purl (purlwise)
wyif: With yarn in front
BO: Bind off
WS: Wrong side of the work
N.B:
The odd rows form the right side of the work.
The selvage (edge) stitches will knitted on all odd rows and purled on all even rows.
How to knit the Textured Ribbons stitch pattern
CO multiples of 6 + 1 + 2 (edge or selvage st). For example: 6 * 3 = 18 + 1 = 19 + 2 = 21 st.
1º and 7º rows (RS): K across
2º and 8º rows: P across
3º and 5º rows: K1 (edge), *wyib sl1pw, P5*. Repeat from * to *, to last 2 st, ending with sl1pw wyib, K1 (edge)
4º and 6º rows: P1 (edge), wyif sl1pw, *K5, wyif sl1pw*. Repeat from * to *, to last st, P1 (edge)
9º and 11º rows: K1 (edge), *P3, wyib sl1pw, P2*. Repeat from * to *, to last 2 st, ending with P1, K1 (edge)
10º and 12º: P1 (edge), K1, *K2, wyif sl1pw, K3*. Repeat from * to *, to last st, P1 (edge).
These twelve rows create the pattern. Repeat them until the desired length is reached.
When finished, BO knitwise, after row 1 (WS).
This is the other side of the work:
Enjoy the video tutorial:
How to knit the Textured Ribbons stitch
Thank you for watching 🙂
Hugs, and happy knitting,
Carolina – So Woolly