How to Knit the Gorgeous Chain Stitch: Raised Texture + Video
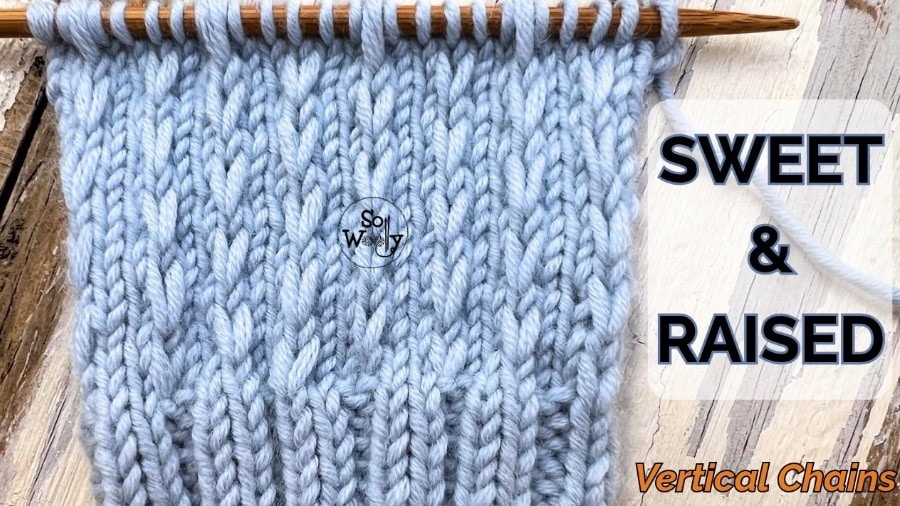
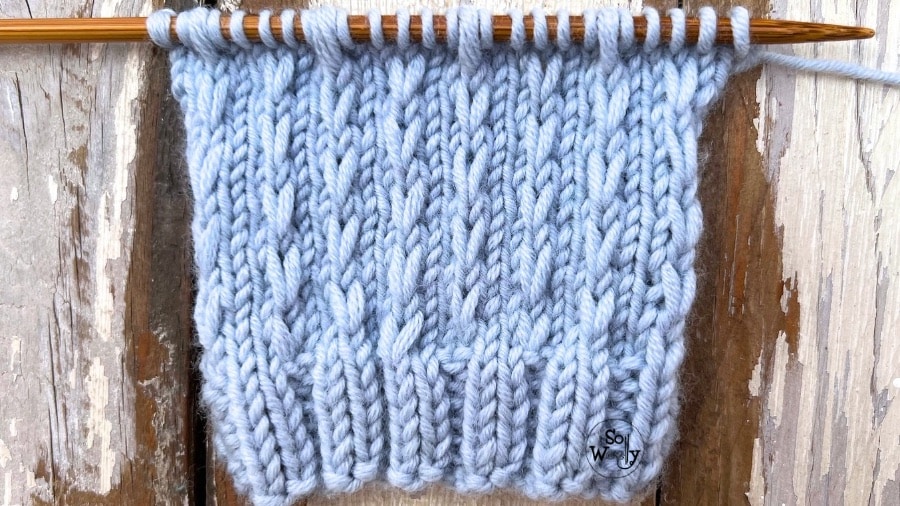
This Chain Stitch knitting pattern creates beautiful, raised columns that look like little embossed Vs.
✨ Prefer to knit this without ads or scrolling?
👉 Click on this line if you want to download the printable PDF pattern
It’s another easy way to dress up your stockinette stitch 😊!
The texture stands out from the fabric, giving classic stockinette a whole new look.
And the best part? It’s easier to knit than it looks!
Ready to start knitting?
In the video tutorial below, I’ll show you how to work this stunning Chain stitch step by step:
The pattern uses just knit stitches, purl stitches and slipped stitches. No increases, no decreases, and no complicated techniques to worry about.
It’s a simple 4-row repeat, making it a lovely choice when you want something more interesting than plain stockinette without having to concentrate on every single stitch.
How the Chain Stitch Creates Its Raised Texture
The secret is in the slipped stitches and the way they’re arranged over the four-row repeat.
Instead of creating a completely smooth stockinette surface, the alternating chain effect forms raised columns that resemble little V’s standing proud of the fabric.
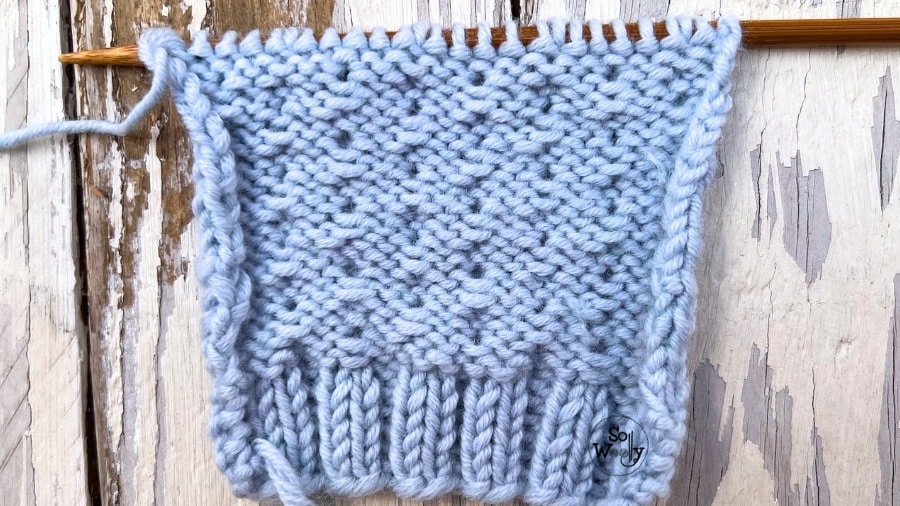
Although the right side has a distinctive raised design, the wrong side looks different, so this isn’t a reversible stitch.
It’s a great example of how a few basic knitting techniques can transform an ordinary fabric into something much more interesting.
What Can You Knit with the Chain Stitch Pattern
Think of this Chain Stitch as a way to dress up plain stockinette stitch whenever you feel like trying something different!
Its raised, embossed columns add texture and make the fabric more eye-catching, without requiring complicated techniques.
It would look gorgeous on sweaters, cardigans, socks, mittens and hats. You can also combine it with stockinette stitch, working one section in each pattern to add an interesting textural detail to a garment.
And if you’re planning to knit something that needs to lie flat, such as a scarf, blanket, throw or wrap, you can use this stitch there, too.
Just remember to add borders along both sides to help prevent the edges from curling.y recommend trying it with a smooth, solid-colored yarn. That way, those raised columns can really shine!
Tips for Knitting the Chain Stitch
Add borders to keep your work flat. Like stockinette stitch, this pattern tends to curl at the edges. If you’re knitting a scarf, blanket, throw or wrap, work a border along each side. Garter stitch or seed stitch would be good options.
Mix it with stockinette stitch. You don’t have to use this pattern throughout an entire project. Try alternating sections of stockinette with sections of Chain Stitch to introduce a raised texture and give a simple garment an extra touch of interest.
Keep your tension even. When slipping a stitch, don’t pull the working yarn too tightly behind or in front of your work. This can cause the fabric to pucker or scrunch up. Keep the yarn relaxed so the slipped stitches lie smoothly and the texture stays even.
So although you’re simply knitting and purling, the finished fabric looks much more elaborate than the techniques used to make it.
✨ Want to knit this without ads or scrolling?
👉 Click on this line if you want to download the printable pattern (PDF file)
Materials
For this swatch I used:
US 7 (4.5 mm) bamboo knitting needles (lightweight, smooth and easier to hold) #ad
And 100% Merino wool yarn (smooth, soft, structured and machine washable) #ad
This is the other side of the work:
“As an Amazon Associate, I earn from qualifying purchases.”
More Knitting Stitches With a Chain Effect
Love the look of raised chains in knitting? Explore these related stitch patterns, including horizontal chains and other textured designs that give classic stockinette a fresh new look.
Horizontal Double Chain Stitch
Abbreviations
CO: Cast on
st(s): Stitch(es)
RS: Right side of the work
WS: Wrong side of the work
K: Knit
wyib: with yarn in back
wyif: with yarn in front
P: Purl
sl1pw: Slip stitch one stitch purl-wise (pass it onto the right-hand needle as if to purl)
BO: Bind off
How to Knit the Chain Stitch
Stitch Multiple
CO multiples of 6 + 2 (edge sts).
For example: 6 * 4 = 24 + 2 = 26 sts.
Instructions
Row 1 (RS): K1 (edge), *K1, wyib sl1pw, K4*. Repeat to last st, K1 (edge)
Row 2: P1 (edge), *P4, wyif sl1pw, P1*. Repeat to last st, P1 (edge)
Row 3: K1 (edge), *K4, wyib sl1pw, K1*. Repeat to last st, K1 (edge)
Row 4: P1 (edge), *P1, wyif sl1pw, P5*. Repeat to last st, P1 (edge).
Repeat rows 1 – 4.
When finished, BO purl-wise after row 3 (WS).
✨ Prefer to knit this without ads or scrolling?
👉 Click on this line if you want to download the printable PDF pattern
💌 Before you Leave: Join the So Woolly Community
If you enjoyed this tutorial, join me for personal notes, thoughtful lessons, and calm knitting guidance — delivered straight to your inbox.
No overwhelm. No pressure. Just clarity and steady progress.
A big hug, and happy knitting,
Carolina – So Woolly