How to knit the Beaded Rib (two rows, reversible, and doesn’t curl!)
In this post, I’m sharing how to knit the Beaded Rib stitch; an adorable two-row repeat pattern, perfect for beginners!
Why?
Firstly, it’s a super easy knit and purl stitch pattern (no need to cross, increase, or decrease stitches).
Secondly, it doesn’t curl, so we don’t need to think of adding edges or borders.
Actually, this is a great pattern for edges…
As you already know, every time you are working on a pattern that bends or rolls, you need a nice edge to prevent the garment from curling.
And as knitters, we are used to the Garter or Seed stitch for those edges.
Well, you can add this one to your list (as well as the last one we practiced, don’t forget it 😉
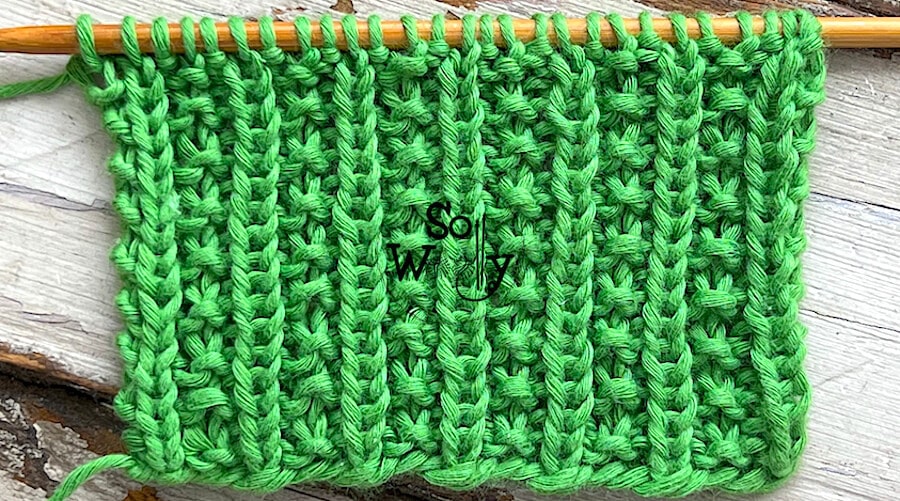
Although the Beaded Rib stitch is not identical on both sides, they look pretty, so I’d classify it as a reversible pattern.
Finally, it’s a great stitch not only for the cuffs of your tops, sweaters, and cardigans, but you can also use it as a main stitch for socks, hats, scarves, blankets, cushions, placemats, table runners, etc.
Ok, enough chat for now.
Grab your needles, and some yarn, and let’s get ribbing!
Abbreviations
CO: Cast on
RS: Right side of the work
st: Stitch
K: Knit
P: Purl
BO: Bind off
N.B.:
The odd rows form the right side of the work.
The first and the last are edge (selvage) stitches, and will be knitted on every row.
With my US 7 / 4.5 mm dpn bamboo needles (perfect for swatches and small garments) #ad
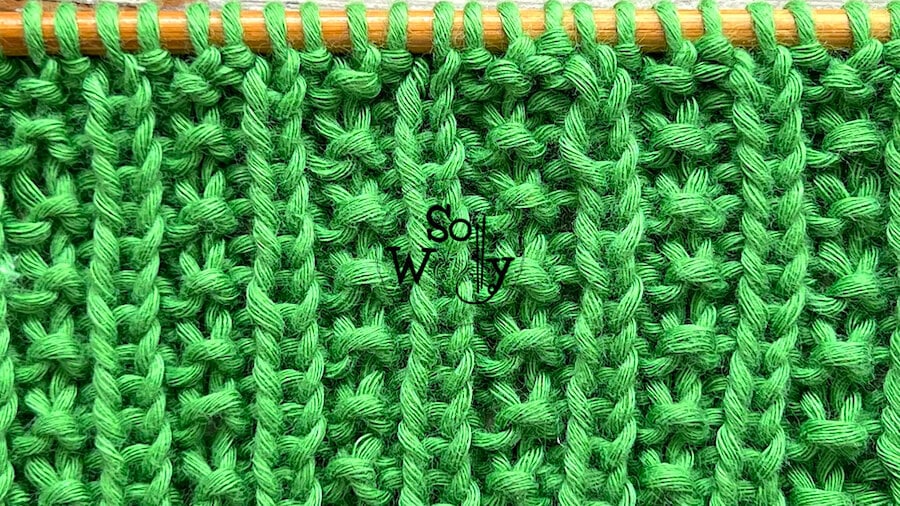
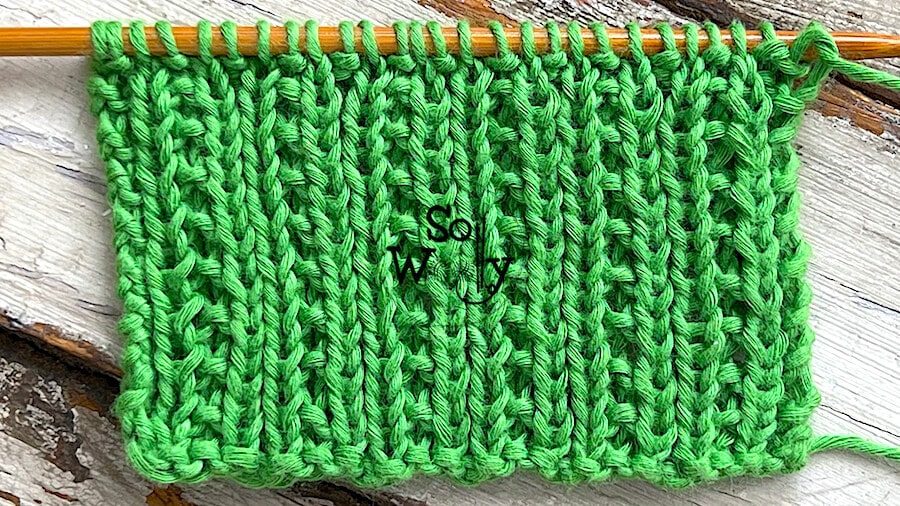
How to knit the Beaded Rib stitch pattern
CO multiples of 4 + 1 + 2 (edge st). I.e.: 4 * 3 = 12 + 1 = 13 + 2 = 15 st.
1º and every odd row (RS): K1 (edge), *P1, K3*. Repeat from * to *, to last 2 st, ending with P1, K1 (edge)
2º and every even row: K1 (edge), K1, *P1, K1*. Repeat from * to *, to last st, K1 (edge).
These two rows create the pattern. Repeat them until the desired length is reached.
When finished, BO working each stitch as it presents, after row 1 (WS).
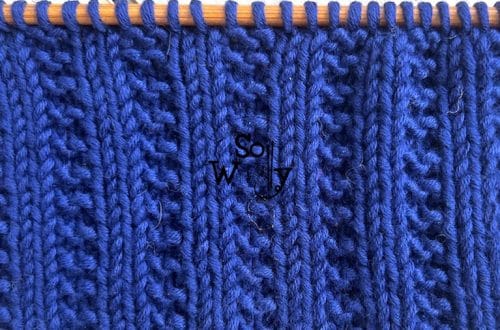
This is the wrong side of the work:
Enjoy the video tutorial:
How to knit the Beaded Rib stitch
I hope you like it 😉
Hugs, happy ribbing!
xoxo
Carolina – So Woolly
PS: Searching for special Ribbing patterns? Take a look!
“As an Amazon Associate, I earn from qualifying purchases.”