How to knit an adorable Two-Color Lattice stitch pattern
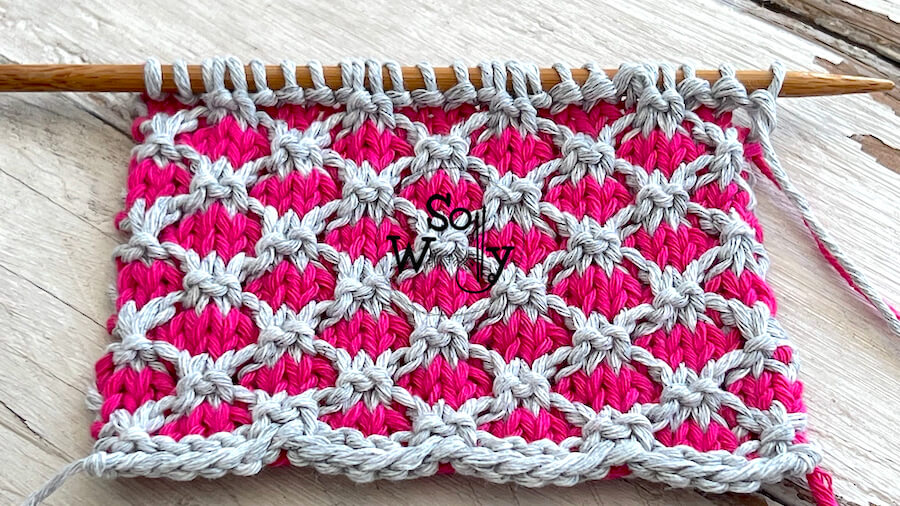
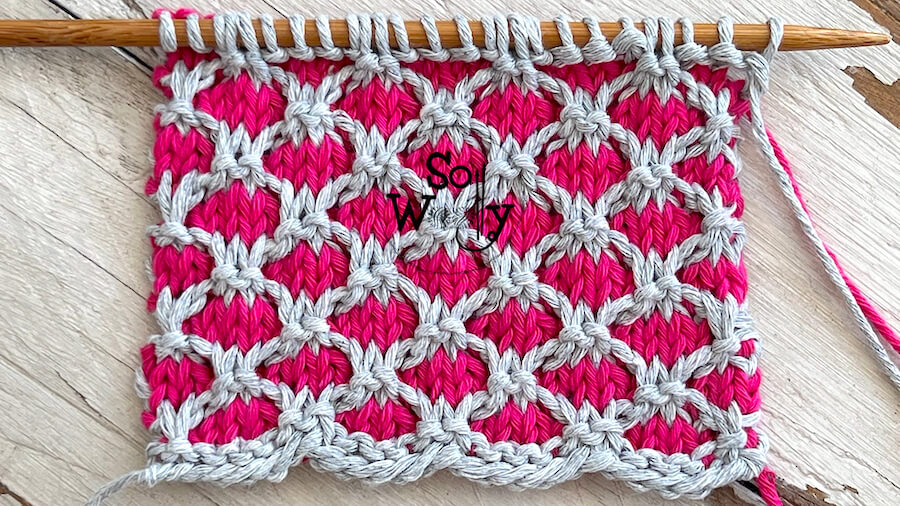
In this tutorial, I’ll show you how to knit with two colors; we’ll learn how to knit a gorgeous two-color Lattice stitch.
It’s an eight-row repeat pattern, and surprisingly, much easier to do than it looks (I always thought it was complicated)…
Honestly, for years I have been wanting to do it, but I don’t know why, I never put my mind to it.
So, today is the day!
Before we start, I’d like to give you a couple of tips when knitting with colors:
Firstly, use contrasting colors, especially if you are a beginner. This will help you to see where you are pretty quickly.
Secondly, try to work with fibers of the same thickness, quality, and brand, when possible (preferably worsted weight or thicker; get away from too-thin yarns).
Thirdly, when talking about fibers, wool yarn should be your first option. It’s very forgiving, elastic, and durable.
Finally, when finished, don’t forget to block your garment! The process of blocking will improve the tension of the stitches because it “calms” the fibers 🙂
So, without further ado, grab your needles and two beautiful colors of yarn, and let’s get busy (but you can try it using just one color, the result will be pretty too).
Abbreviations
CO: cast on
CA: Color “A”
CB: Color “B”
K: Knit
P: Purl
sl1: Slip one stitch purlwise (pass one stitch onto the right-hand needle as if to purl)
sl2: Slip two stitches purlwise (pass two stitches onto the right-hand needle as if to purl)
yfwd: Yarn forward (bring the yarn to the front of your work)
ybk: Yarn back (bring the yarn to the back of your work)
BO: Bind off
RS: Right side of the work
WS: Wrong side of the work
N.B.:
Slip the stitches purlwise (as if to purl).
The even rows form the right side of the work.
The color “A” is the first one we’ll use; it will create the lattice; the color “B” is the background color.
How to knit a Two-Color Lattice stitch
With CA, CO multiples of 6 + 2 st; i.e.: 6 * 3 = 18 + 2 = 20 st.
1º row (WS) using CA: K across. (This row is a setup row. Do it once and don’t repeat it again).
2º row using CB: K1, sl1, *K4, sl2*. Repeat from *to*, to last 6 st, K4, sl1, K1
3º row using CB: P1, sl1, *P4, sl2*. Repeat from *to*, to last 6 st, P4, sl1, P1
4º row using CA: K1, sl1, *K4, sl2*. Repeat from *to*, to last 6 st, K4, sl1, K1
5º row using CA: K1, yfwd, sl1, ybk, *K4, yfwd, sl2, ybk*. Repeat from *to*, to last 6 st, K4, sl1, K1
6º row using CB: K3, *sl2, K4*. Repeat from *to*, to last 5 st, sl2, K3
7º row using CB: P3, *sl2, P4*. Repeat from *to*, to last 5 st, sl2, P3
8º row using CA: K3, *sl2, K4*. Repeat from *to*, to last 5 st, sl2, K3
9º row using CA: K3, *yfwd, sl2, ybk, K4*. Repeat from *to*, to last 5 st, yfwd, sl2, ybk, K3.
Repeat rows 2 – 9 until the desired length is reached.
When finished, BO purlwise using color A, after row 9 (RS).
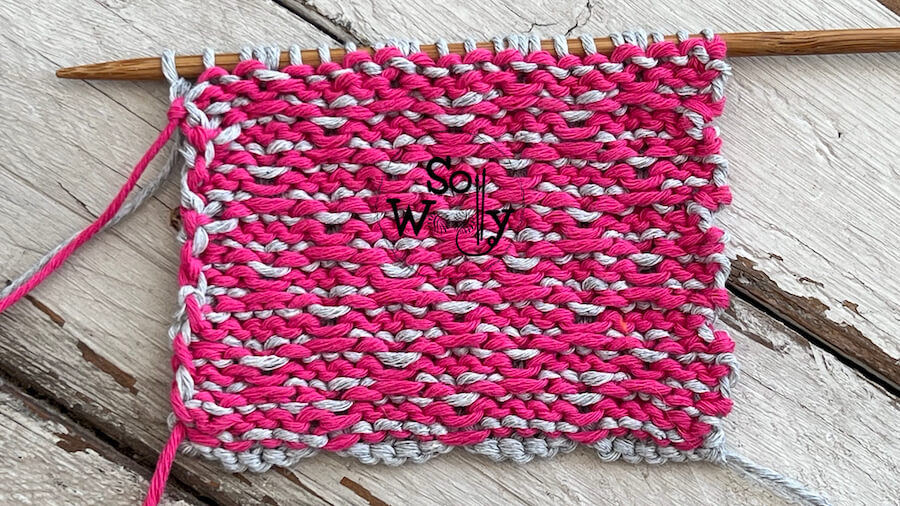
This is the other side of the work:
Click here to watch the video tutorial
I hope you like it, and don’t forget to spread the love <3
Hugs, and happy multicolored knitting!
xoxo
Carolina – So Woolly
PS: Searching for more “how to knit with colors” tutorials? Take a look!
“As an Amazon Associate, I earn income from qualifying purchases that meet the applicable requirements.”


