Acorn knitting stitch pattern: Reversible and unisex
In today’s tutorial, you’ll learn how to knit the Acorn stitch pattern, step by step. Another classic of the knitting world which I wanted to share a long time ago, but as with the Honeycomb stitch we learned last week, I never had the time, these days we all have a little extra.
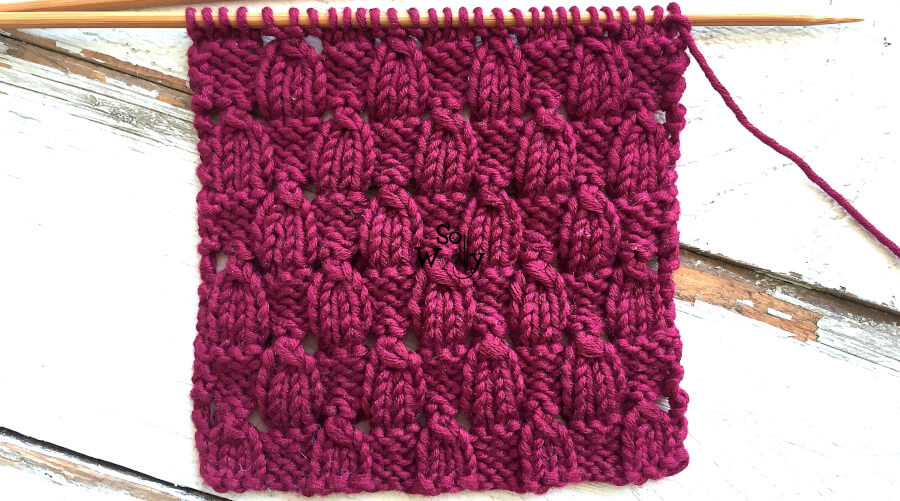
It’s a unisex, reversible pattern (although not identical on both sides), it doesn’t curl, so it’s a great choice when knitting women’s and men’s scarves, cowls and sweaters.
The Acorn knitting stitch creates a fabric that mixes density and subtlety and even includes lacey bits. It’s easy to knit, because it’s very intuitive: You can see clearly what the next step is in most of the rows. Furthermore, the same steps will be repeated time and time again.
Ok, grab your needles and let’s knit together!
Abbreviations
CO: Cast on
RS: Right side of the work
St: Stitch
K: Knit
P: Purl
Yo: Yarn over (bring the yarn forward)
SK2P: Slip 1 stitch knitwise (pass 1 st onto the right-hand needle as if to knit, but don’t work it), knit 2 stitches together, and pass the slipped stitch over.

This swatch was made using 100% cotton yarn and a pair of comfy carbonized bamboo needles #ad
N.B.:
The odd rows form the right side of the work.
If you decide to knit a cowl or a scarf, it would be nice to add 5 or 6 stitches on each side, to shape an edge using Garter or Seed stitch.
Acorn knitting stitch pattern
Cast on a multiple of 6 st, plus 5.
1º and 3º rows (RS): K4, *P3, K3*. Repeat from * to *, to last st, K1.
2º and 4º rows: P4, *K3, P3*. Repeat from * to *, to last st, P1.
5º row: K1, Yo, SK2P, Yo, *K3, Yo, SK2P, Yo*. Repeat from * to *, to last st, K1.
6º row: K4, *P3, K3*. Repeat from * to *, to last st, K1.
7º and 9º rows: P4, *K3, P3*. Repeat from * to *, to last st, P1.
8º and 10º rows: K4, *P3, K3*. Repeat from * to *, to last st, K1.
11º row: K4, *Yo, SK2P, Yo, K3*. Repeat from * to *, to last st, K1.
12º row: P4, *K3, P3*. Repeat from * to *, to last st, P1.
These 12 rows form the pattern. Repeat them until the desired length is reached. When finished, BO after a row 5 (“wrong side” of the work), working each stitch as it presents.
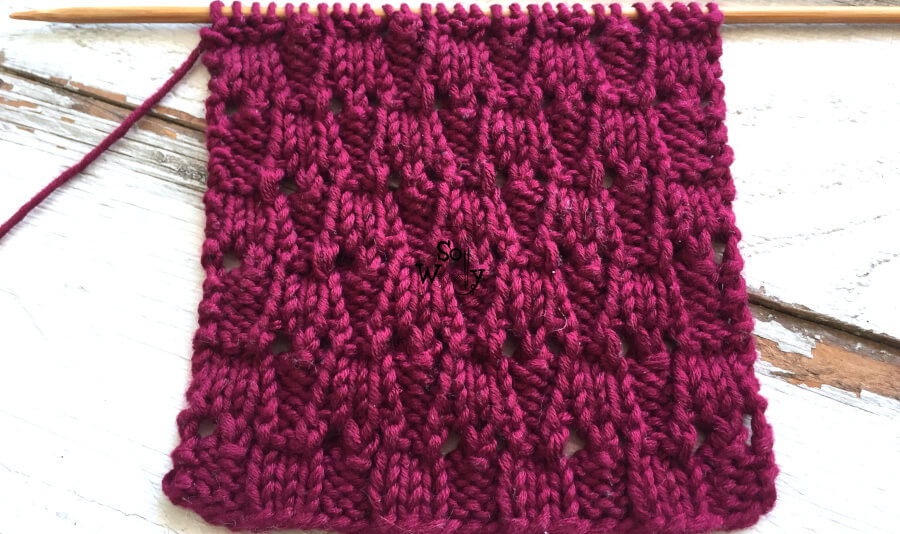
This is the other side of the work (“the wrong side”):

Enjoy the video tutorial:
I hope you like it!
And… don’t forget to share your swatches and projects on Instagram and mention me (@sowoolly), so all my little Woollies can see them 😉
Hugs, and happy knitting!
Carolina – So Woolly
“As an Amazon Associate I earn from qualifying purchases.”


