How to knit the Two-Color Reversible Ribbing stitch
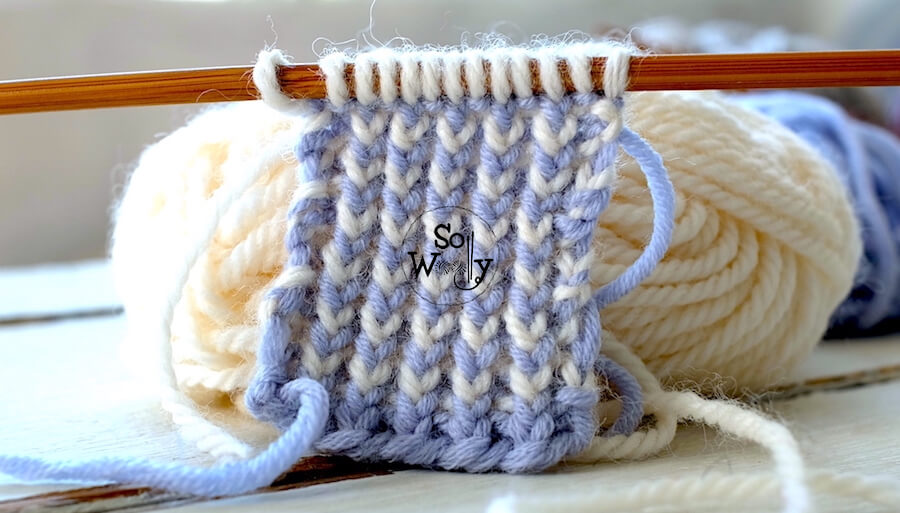
In today’s tutorial, I’m sharing how to knit the classic 1 x 1 Rib stitch, with a twist: Using two colors, we’ll create a solid reversible fabric, identical on both sides.
Certainly, I’m a fan of different kinds of Ribbing stitches, and we have practiced some of them in the past, like the adorable Feather Rib knitting pattern 😉
But I have to say that the Two-Color Reversible Ribbing is pretty special. It’s an eye-catching pattern because the columns of knit stitches appear clearly raised, alternating colors on each row.
In fact, it’s a lovely option for scarves; depending on the combination of colors chosen, the result can be subtle, chic, or screaming look at me, it’s up to you!
Actually, I’d love to knit a cowl horizontally, so the columns will show vertically, what do you think? Or for the cuffs of socks, gloves, and sweaters… even for the brim of a hat!
Finally, this Ribbing stitch is a two-row repeat pattern, but we’ll start knitting two set-up rows (which won’t be repeated again).
So, grab your needles + yarn and let’s get started 🙂
Abbreviations
CO: cast on
CA: Color “A”
CB: Color “B”
K: Knit
P: Purl
k1tbl: Knit one stitch through the back loop
p1tbl: Purl one stitch through the back loop
BO: Bind off
N.B.:
1.- Although the Two-Color Ribbing is worked flat (forth and back), we’ll need a pair of circular needles:
If you don’t have circulars, you can also use a pair of dpn’s (double pointed needles).
2.- You’ll also need two balls of yarn of the same quality, thickness, and brand, if possible, in two different colors.
3.- The selvedge stitches (first and last), will be knitted on each row.
4.- To be sure that we’re using the right color on each row, please check the last row: If it was made using color “A”, the next one should be made in color “B”, and viceversa.
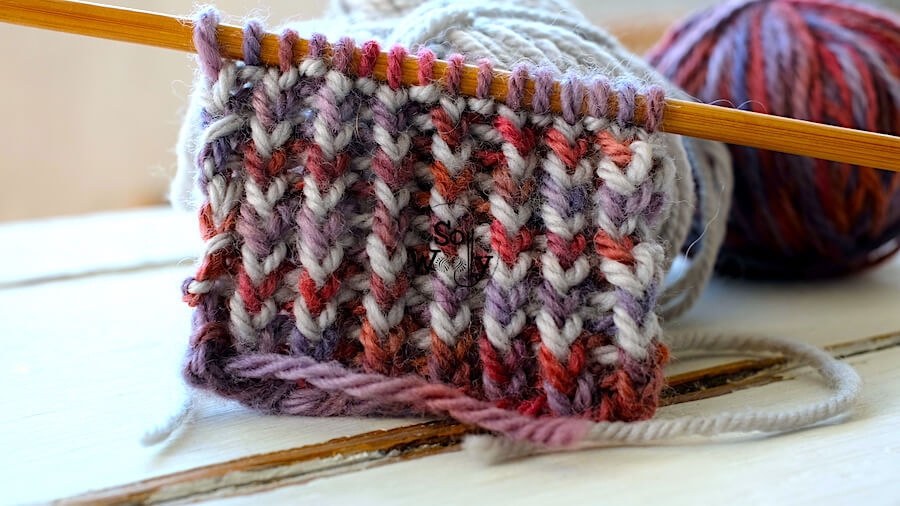
Two-Color Reversible Ribbing stitch pattern
With CA, CO an odd number of stitches (this number includes the selvedge stitches).
Set up rows:
1ª row (CA): K1 (edge) *K1, P1*. Repeat from * to *, ending with K2. Turn the work as usual.
2ª row (CB): K1, p1tbl, *k1tbl, p1tbl*. Repeat from * to *, ending with K1. Don’t turn the work, slide all the st to the other tip of the needle, to meet CA.
From now on, work rows 3 and 4 only:
3º row (CA): K1 (edge), *p1tbl, k1tbl*. Repeat from * to *, ending with K1. Turn the work as usual.
4º rows (CB): K1 (edge), *k1tbl, p1tbl*. Repeat from * to *, ending with K1.
These last two rows (3 and 4) create the pattern. Repeat them until the desired length is reached.
When finished BO working each st as it presents, using the applicable color for this row.
This is the other side of the work:

Click here to watch the video tutorial
I hope you like it, and don’t forget to spread the love 😉
Hugs, and happy multicolored knitting!
xoxo
Carolina – So Woolly
PS: Loving knitting in two colors? Then, please take a look of these patterns:
“As an Amazon Associate I earn from qualifying purchases.”


