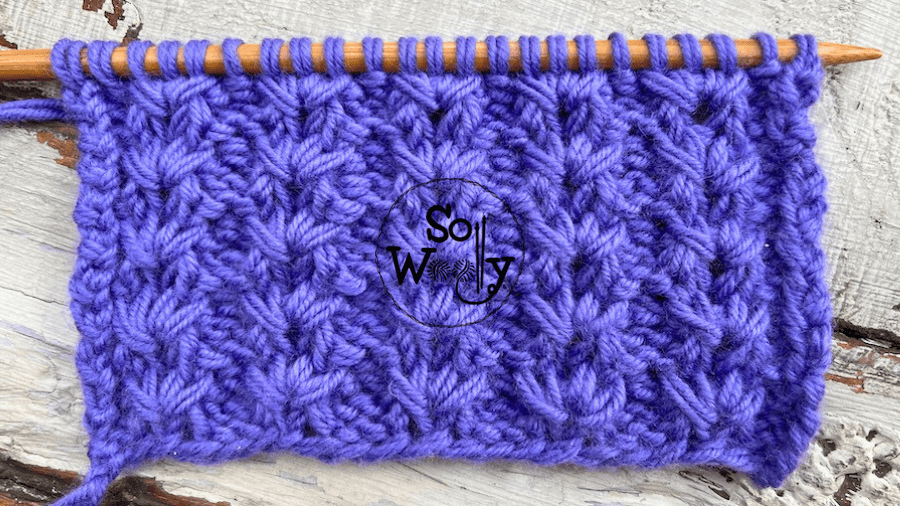
How to Knit the Little Flowers stitch (4 rows only!)
Today, I’m sharing how to knit, the Little Flowers stitch, an amazing four-row repeat pattern!
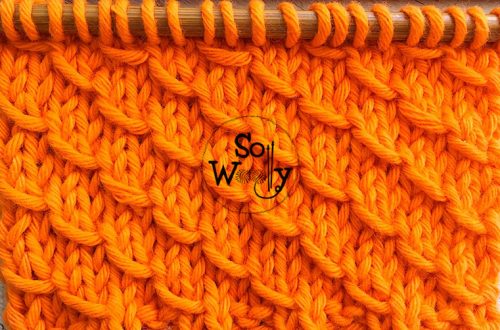
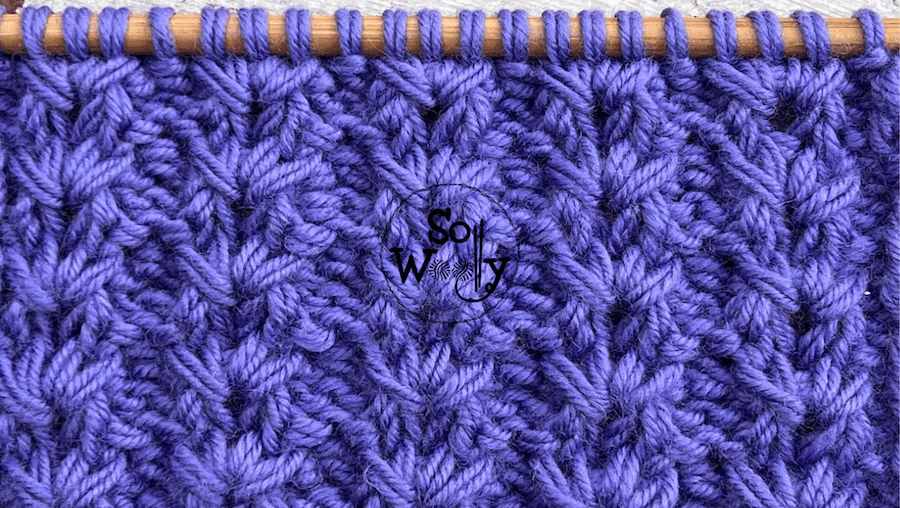
Its texture is simply spectacular; to me, this one is another pretty 3D knitting pattern, full of volume and texture.
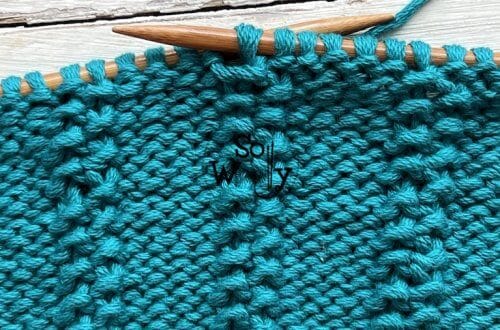
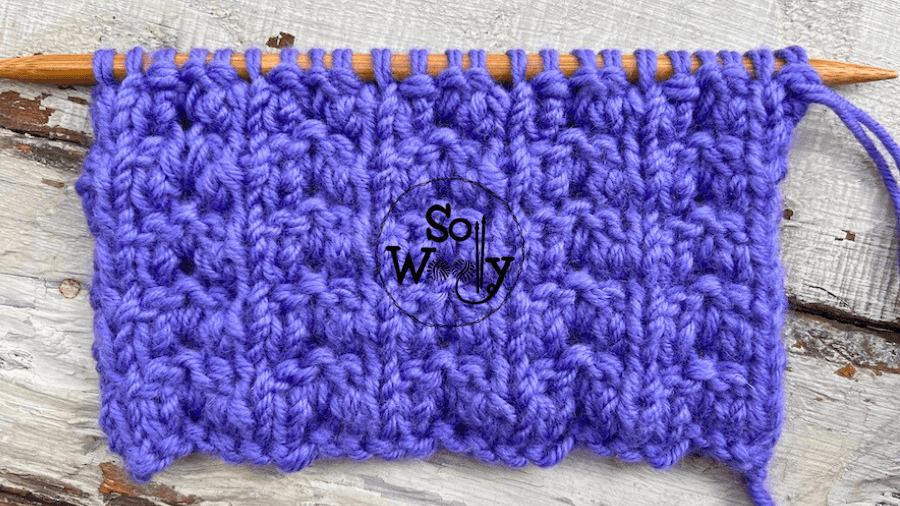
Besides, the so-called “wrong side” features an interesting design too, completely different, but also pretty.
In other words, you can classify the Little Flowers stitch as a reversible pattern.
Actually, I’d like to use it, not only for scarves, cowls, or blankets, but also for the sleeves of an oversized sweater or cardigan (just like the one I shared a couple of weeks ago).
Nevertheless, I have to say that the sides tend to bend a little bit, so if you’re knitting a piece that should stay flat, add a nice edge on each side.
Last but not least, take into account that using sharp tip needles, will save you time, effort, and maybe tears…
For example, the pointy needles are a big help when making the decreases; knitting three stitches together (through the front or through the back loop) won’t be a pain anymore!
These rosewood needles are a beauty 🙂 Plus their tips are truly sharp #ad
“As an Amazon Associate, I earn from qualifying purchases.”
Enough chatting. Grab your needles and some yarn, and let’s get down to work 🙂
Abbreviations
CO: Cast on
st: Stitch
RS: Right side
K: Knit
P: Purl
wyif: With yarn in front
sl1pw: Slip one stitch purlwise (pass one stitch onto the right-hand needle as if to purl)
sl2pw: Slip two stitches purlwise (pass two stitches onto the right-hand needle as if to purl)
yo: Yarn over
p3tog: Purl three stitches together
p3togtbl: Purl three stitches together through the back loop
k2tog: Knit two stitches together
k2togtbl: Knit two stitches together through the back loop
WS: Wrong side
BO: Bind off
N.B:
The even rows form the right side of the work.
The edge (selvage) stitches (the first and the last) will be knitted on every odd row, and purled on every even row.
After the first row, the number of stitches increases; after row 4, it will come back to the original number.
How to Knit the Little Flowers stitch
CO multiples of 4 + 1 + 2 (edge st); i.e.: 4 * 4 = 16 + = 17 + 2 = 19 st.
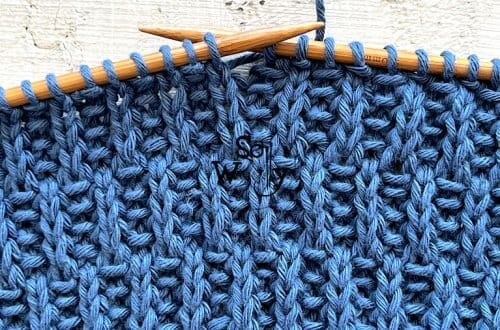
Row 1: P1 (edge), K2, yo, sl1pw, *K3, yo, sl1pw*. Repeat from * to *, to last 3 st, K2, P1 (edge)
Row 2 (RS): K1 (edge), P2, yo, sl2pw, *wyif P3, yo, sl2pw *. Repeat from * to *, to last 3 st, ending with wyif P2, K1 (edge)
Row 3: P1 (edge), K2, *p3tog, don’t drop it, yo, p3togtbl into the same st, K3*. Repeat from * to *, to last st, P1 (edge). Important note: The last repeat ends with K2, P1 (edge), instead of K3.
Row 4: K1 (edge), *P1, k2tog, K1, k2togtbl*. Repeat from * to *, to last 2 st, P1, K1 (edge).
These four rows create the pattern. Repeat them until the desired length is reached.
When finished, BO purlwise after row 4 (WS).
This is the other side of the work:
Enjoy the video tutorial:
How to Knit the Little Flowers stitch
Thank you for watching!
Hugs, and happy knitting 🙂
Carolina – So Woolly
PS: If you love this kind of patterns, take a look at how to knit the Hazelnut stitch here