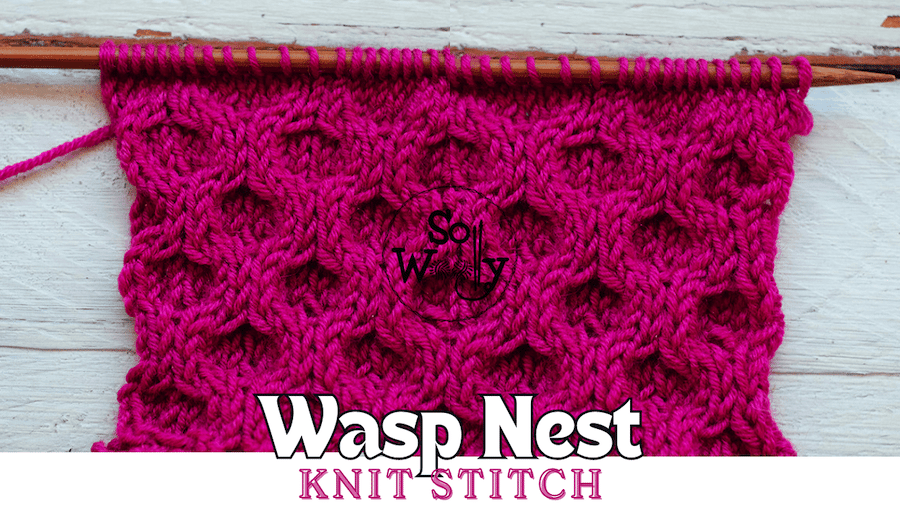
How to Knit the Wasp Nest Stitch: Free Pattern + Video
In today’s tutorial, I’m sharing how to knit the Wasp Nest Stitch, step by step (some knitters also call it Honeycomb).
This design is part of the Cable Stitch Patterns collection, where you’ll find classic and distinctive cables made easy to follow.
It’s an eight-row repeat pattern, full of texture, perfect for blankets, sweaters, and hats, among other knitting projects.
Although the Wasp Nest doesn’t look like a cable pattern, it requires the same technique:
We have to cross stitches (only in 2 rows for this pattern), to create the right/left leaning stitches, that form the little nests.
To do that, we’ll use a third needle of the same size, cable needle, stitch holder, or even a Bobby Pin (a hairpin) #ad
Whatever works for you.
Honestly, I prefer something short, because it makes the job a lot easier… A Bobby Pin would be my choice.
Enough chatting; grab your needles and some yarn, and let’s get busy 🙂
(And don’t forget to take a look at my favorite tips when knitting cables, so you always succeed).
“As an Amazon Associate, I earn from qualifying purchases.”
Abbreviations
CO: Cast on
st: Stitch
RS: Right side
K: Knit
P: Purl
C4B (Cable 4 Back): Slip 2 stitches onto the cable needle, and hold at back of work. K2 from the left-hand needle, and K2 from the cable needle
C4F (Cable 4 Front): Slip 2 stitches onto the cable needle, and hold at front of work. K2 from the left-hand needle, and K2 from the cable needle
BO: Bind off
Notes Before Starting
If you like to have edge/selvage stitches, add 2 stitches to your calculations because they’re not included in the pattern.
The odd rows form the right side of the work.
In the video tutorial, I worked 3 rows in Garter stitch (knitting every row), to make a bottom edge.
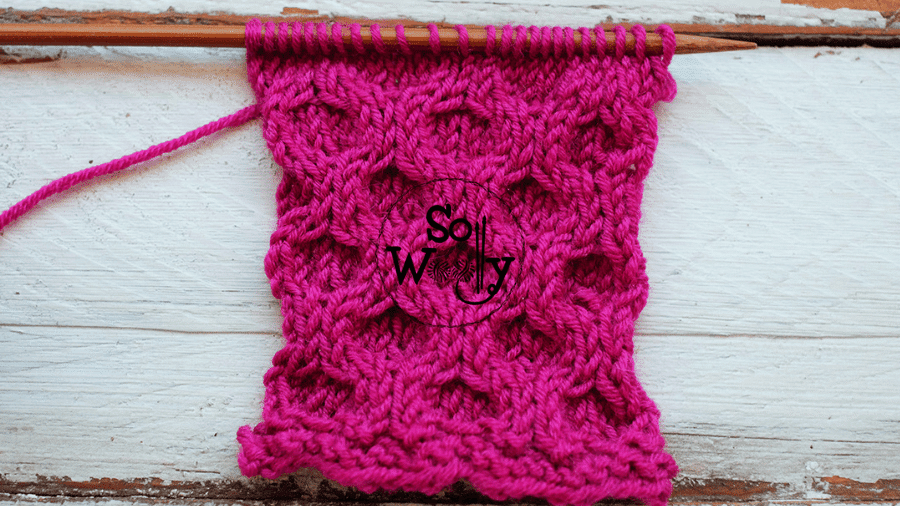
Wasp Nest Stitch Knitting Pattern
CO multiples of 8. For example 8 * 3 = 24 sts.
Row 1 (RS): *C4B, C4F*. Repeat from * to *, to end
Row 2 and every even row: P across
Rows 3 and 7: K across
Row 5: *C4F, C4B*. Repeat from * to *, to end
Row 8: P across.
These 8 rows create the pattern. Repeat them until the desired length is reached.
Please note that we have to repeat the pattern at least 3 times to better appreciate the design.
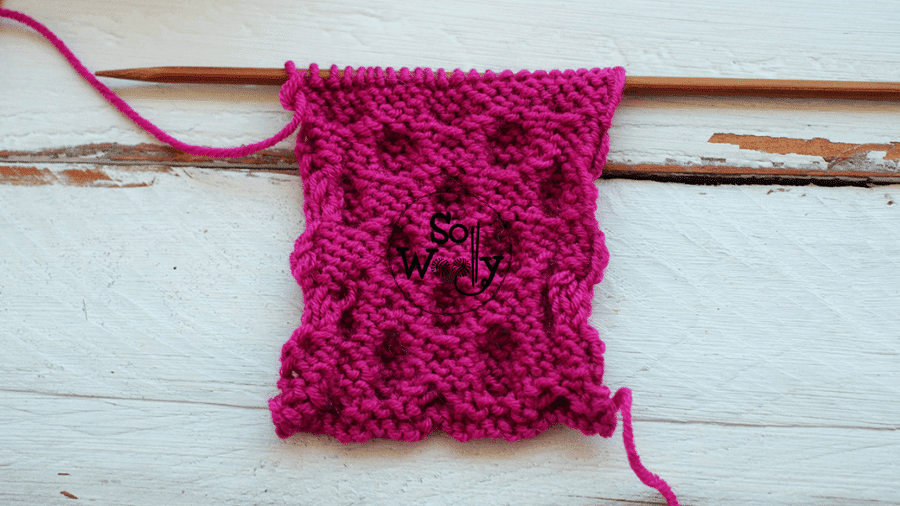
When finished, BO purlwise, after row 7 (WS).
This is the other side of the work:
Enjoy the video tutorial:
Thank you for watching, and don’t forget to share the love <3
Hugs, and happy knitting,
Carolina – So Woolly
PS: If you enjoy knitting cables, you’ll find more inspiration in the Cable Stitch Patterns collection.