How to Knit Reversible Braids: Wishbone Ribs Stitch + Video
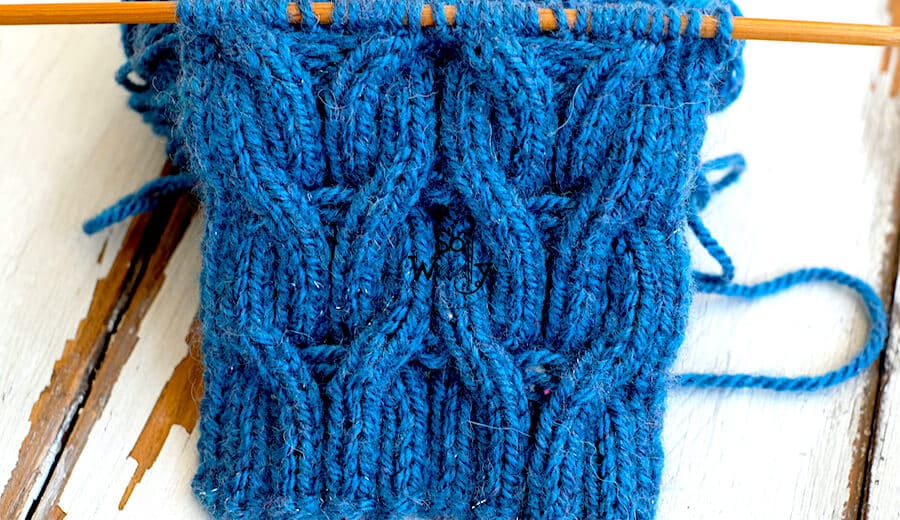
Today, I’m sharing a very special knitting pattern: The Wishbone stitch, which is nothing less than Reversible Braids!
You can explore more designs like this in the Cable Stitch Patterns collection.
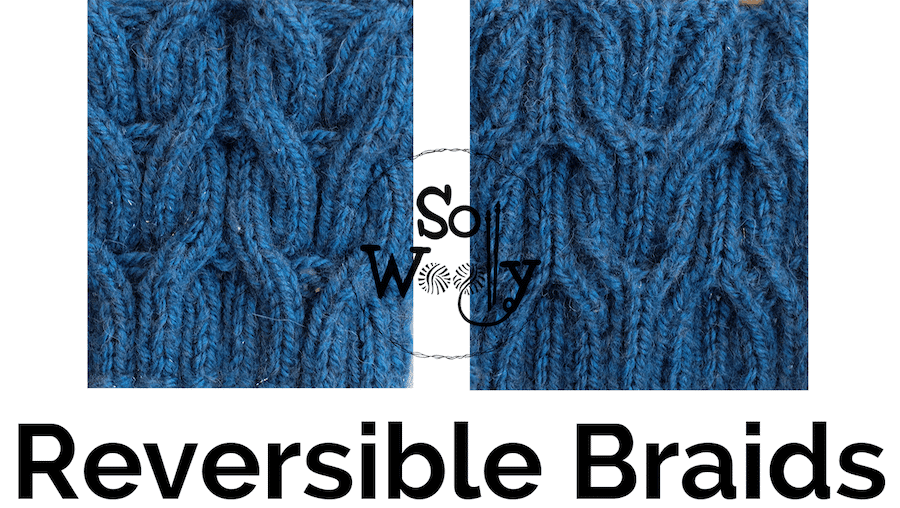
It’s a unique braid, pretty easy to knit. Normally cables and braids knitting patterns aren’t reversible (they look good on only one side of the fabric).
In this case, the pattern creates two beautiful sides, so you can choose which one you like the best 😉
This is why, the Wishbone stitch is the perfect pattern for a scarf, rectangular shawl or blanket.
So, what makes the Wishbone stitch pattern easy, is that we’ll use the cable needle every 10 rows only: The other 9 rows are just knitting and purling (it’s like knitting the 2 x 2 Rib stitch).
Ok, grab your needles + yarn, and let’s get busy!
Abbreviations
CO: Cast on
st: Stitch
K: Knit
P: Purl
cn: Cable needle
BO: Bind off
Before starting, four tips to succeed at cable/braid knitting, and not die trying:
Firstly, the right fiber to make your braids/cables shine: #ad
100% wool yarn, 100% cotton yarn, bamboo, Merino wool superwash, etc.,or any kind of yarn which ply don’t split easily, and it’s not hairy. I wouldn’t recommend Mohair, or Angora, for example.
Secondly:
In third place:
A cable needle that’s not slippery (especially if you’re a beginner) #ad
And last but not least, a vibrant (or light) color. Avoid dark colors, or variegated yarns, because the work fades into the background.
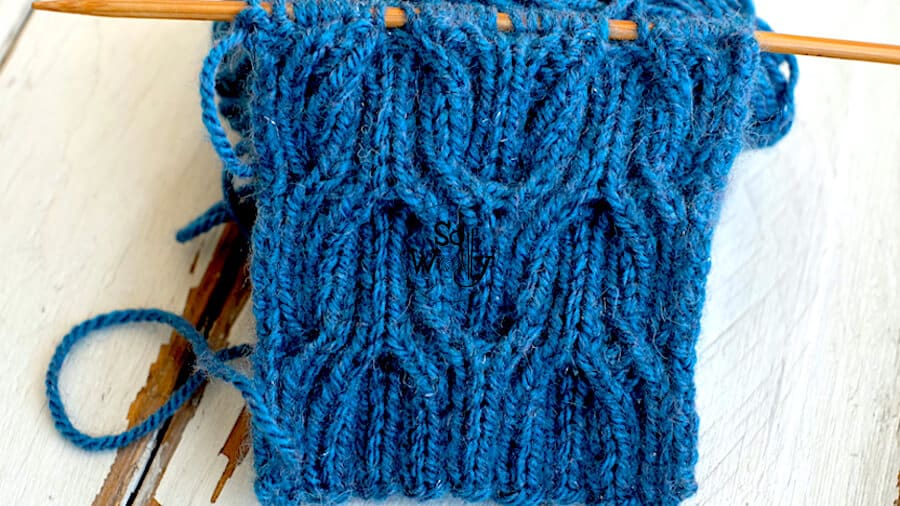
How to knit Reversible Braids: Wishbone Ribs Stitch
CO multiples of 16 + 4 stitches; i.e.: 16, 32, 48, etc. plus 4 = 20, 36, 52, etc. The swatch shown in the video has 20 st (16 + 4).
1º, 3º, 5º, 7º and 9º rows: K2, *P1, K2, P1*. Repeat from * to *, to last 2 st, K2.
2º, 4º, 6º and 8º rows: P2, *K1, P2, K1*. Repeat from * to *, to last 2 st, P2.
10º row: P2, *Slip the next 4 st onto cn and hold in front, [k1, p2, k1] from the left-hand needle, [k1, p2, k1] from the cn, slip the next 4 st onto cn and hold in back, [k1, p2, k1] from the left-hand needle, [k1, p2, k1] from the cn*. Repeat from * to *, to last 2 st, P2.
These 10 rows form the pattern. Repeat them until the desired length is reached.
When finished, BO working each stitch as it presents, after a row 9.
This is the other side of the work:
Enjoy the video tutorial:
I hope you like it!
Hugs, and happy knitting 😀
Carolina – So Woolly
PS: Looking for more timeless cables with clear guidance? Explore the full Cable Stitch Patterns collection here.