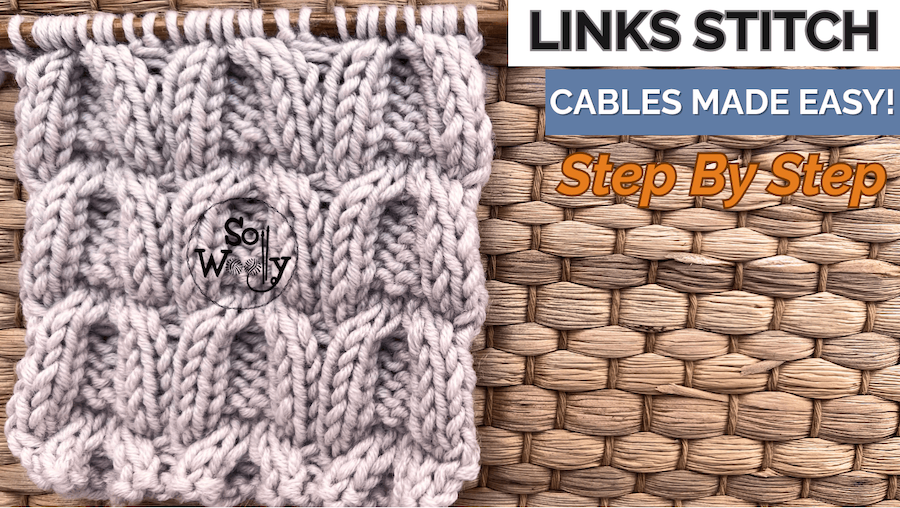
Cables Made Easy: How to Knit the Links Stitch + Video
In this tutorial, “cables made easy”, you’ll learn how to knit the Links stitch, step by step.
You can explore more designs like this in the Cable Stitch Patterns collection.
It’s an easy eight-row repeat pattern; we’ll make the cross in just one row.
The remaining seven rows are knit and purl rows. Easy as pie: If you can knit and purl, you can knit cables!
What’s a Good Beginner Project for Cables?
If I were starting to knit, a dishcloth would be my first option.
In general, I think that accessories are a good choice. For example, a hat would be great because it’s a quick project.
(I’m planning to share a Cable Hat Pattern this Winter 😉
A snug cowl like this one is also great.
Perhaps a pillow or cushion cover, something that doesn’t require hours and hours to complete.
However, if you have more experience, bigger or more involved projects such as blankets, sweaters, cardigans, and vests, are ideal to show off a lovely cable pattern.
Why Cables Made Easy?
Because I know that cable knitting can sound intimidating, but the truth is that it only takes 2 steps (apart from knitting and purling), to create the cable.
Using a tool like a third needle of the same size, a cable needle, a stitch holder, or even a Bobby Pin (a hair pin), will help us to “move” 2- 3 (or more) stitches at the front or at the back of the work #ad
When we move a couple of stitches to the front of the work, we make a left cross.
And when we move them to the back of the work, we make a right cross.
Those 2 steps (crosses), combined in different ways, create amazing designs that can be as simple as today’s pattern (the Link stitch), or as complex as an Aran sweater.
“As an Amazon Associate, I earn from qualifying purchases.”
Tips for Better Results
Before starting your swatch, take a look at my favorite tips when knitting cables.
If I can think of one more tip, I’d add that if your tension is tight, use a needle size larger than the recommended on the label for the yarn you’ll be working with.
Finally, don’t get nervous or stressed, just practice 😀
If the written instructions look complex to you, no worries, this why I make a video for every pattern I share.
You’ll find the link at the bottom of this post. Remember, I call it “cables made easy” for a reason!
And, practice makes perfect, my little Woolly! Maybe, the first intent doesn’t look as you wished, but if you persist, you’ll get there.
Abbreviations
CO: Cast on
st: Stitch
sts: Stitches
RS: Right side of the work
K: Knit
P: Purl
C4F – Cable 4 Front. Slip 2 stitches onto a cable needle (hold it at the front of the work). Knit the next 2 stitches from the left-hand needle, and knit the 2 stitches from the cable needle.
C4B – Cable 4 Back. Slip 2 stitches onto a cable needle (hold it at the back of the work). Knit the next 2 stitches from the left-hand needle, and knit the 2 stitches from the cable needle.
BO: Bind Off
WS: Wrong side of the work
I made this swatch using 100% Superwash Merino Wool (worsted weight, medium, or nº 4) #ad
And US 8 (5 mm) knitting needles (sharp tip needles are really helpful also when knitting cables) #ad
How to Knit the Links Stitch: Cables Made Easy
CO multiples of 8 + 2 (edge sts). For example: 8 * 2 = 16 + 2 = 18 sts.
Rows 1, 5, and 7 (RS): K1 (edge), *K2, P4, K2*. Repeat from * to *, to last st, K1 (edge)
Rows 2, 6, and 8: P1 (edge), *P2, K4, P2*. Repeat from * to *, to last st, P1 (edge)
Row 3: K1 (edge), *C4F, C4B*. Repeat from * to *, to last st, K1 (edge)
Row 4: P across
These 8 rows create the pattern. Repeat them until the desired length is reached.
When finished, BO purlwise after row 3 (WS).
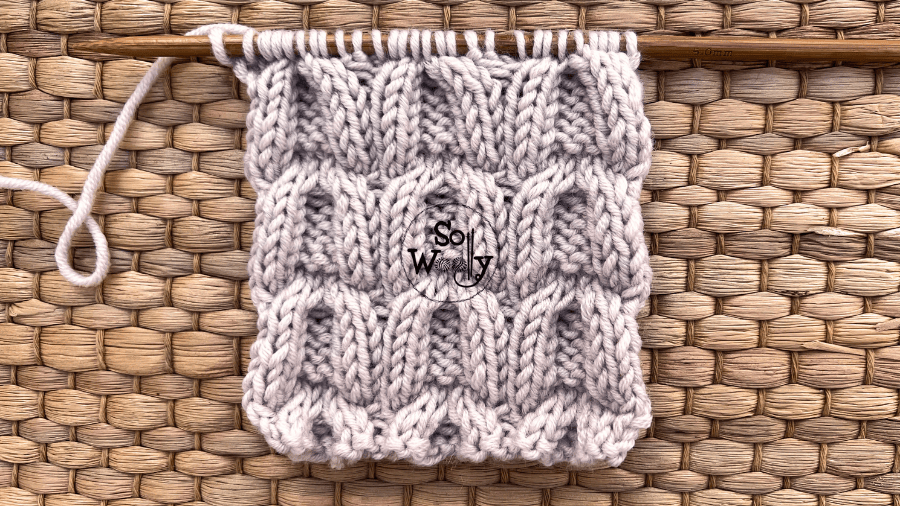
This is the other side of the work:

Enjoy the step-by-step video tutorial:
Thank you for reading and watching, and remember, sharing is caring 🙂
Hugs, and happy knitting,
Carolina – So Woolly
PS: If you enjoy knitting cables, you’ll find more inspiration in the Cable Stitch Patterns collection.