Lesson 7: How to Knit Seed Stitch + Video
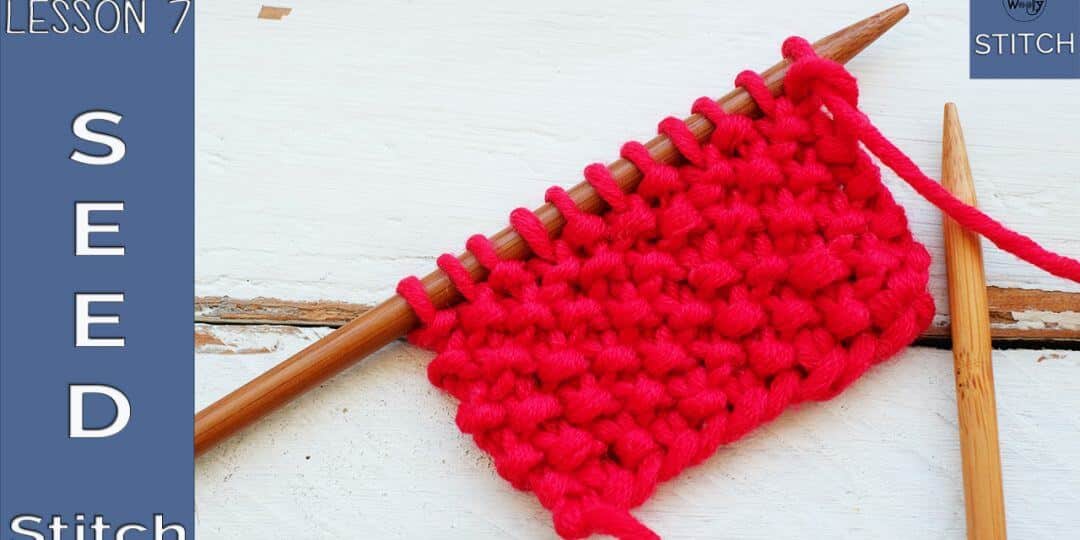
Share via: Facebook Twitter Email LinkedIn Copy Link More If you’re new here, start from the beginning: → [Learn to Knit] Now that you’ve worked with 1×1 rib stitch, it’s time to explore another simple pattern that creates texture in a different way. In this lesson, you’ll learn seed stitch — a combination of knit and purl stitches that makes a balanced, textured fabric. This is where your eye really starts to notice what your stitches are doing. 🎥 Video Lesson 6: How to knit the Seed stitch How to Knit Seed Stitch Abbreviations CO: cast on st (s) = stitch (es) RS: right side of the work K: knit P: purl Instructions CO an odd number of sts. 1º Row (RS): *K1, P1*. Repeat from * to * to the end of the row. Repeat row 1 until the desired length (from now on, we will knit the purls, and purl the knits). What You’re Doing Seed stitch is created by alternating knit and purl stitches — but with a twist: 👉 You knit the purl stitches👉 And purl the knit stitches This creates a pattern where the stitches alternate both horizontally and vertically. The result is a balanced fabric that looks the same on both sides. 🧶 Why Seed Stitch Matters Seed stitch is: This makes it ideal for: ✋ What You Learned 🧪 Practice Before moving on: This is where your knitting starts to feel more intuitive. 🧶 Why Seed Stitch Doesn’t Curl One of the most common frustrations in knitting is fabric that curls at the edges. Seed stitch behaves differently. Because knit and purl stitches are balanced, the fabric stays flat without needing special borders. If you’d like to explore more stitches that don’t curl, you can find them here: → [Knitting Stitches That Don’t Curl] ➡️ Next Lesson You’ve come a long way — now let’s build on ribbing with a slightly different variation. → Lesson 8 — How to Knit 2×2 Rib Stitch You’re no longer just following steps. You’re starting to read your knitting — and that changes everything. Happy knitting! Carolina