How to Knit the Diagonal to the Right Stitch + Video
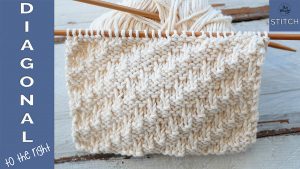
Share via: Facebook Twitter Email LinkedIn Copy Link More In this tutorial you’ll learn how to knit a Diagonal to the Right stitch, ideal for an extensive range of garments, such as blankies, cowls, sweaters, bags, cushions, and many more! You can explore more designs like this in the Textured Stitch Patterns collection. Moreover, the Diagonal to the Right pattern creates a textured reversible fabric that doesn’t curl, so it’s also great for scarves. It’s easy and fun to knit; similar to the “Little Boxes“, a stitch we learned some time ago. Grab your needles and some yarn, and let’s get busy 🙂 Abbreviations CO: Cast on st: Stitch K: Knit P: Purl WS: Wrong side RS: Right side BO: Bind off Diagonal Stitch to the Right Knitting Pattern CO multiples of 7 + 2 stitches (edge stitches); i.e.: 7*4 = 28 + 2 = 30 sts. 1º Row (RS): K1 (edge), *P4, K3*. Repeat from * to *, ending with K1 (edge). 2º and every even row (WS): Work each stitch in the manner that it presents. 3º Row: K1 (edge), *P2, K3, P2*. Repeat from * to *, ending with K1 (edge). 5º Row: K1 (edge), *K3, P4*. Repeat from * to *, ending with K1 (edge). 7º Row: K1 (edge), *K1, P4, K2*. Repeat from * to *, ending with K1 (edge). 9º Row: K1 (edge), *P3, K3, P1*. Repeat from * to *, ending with K1 (edge). 11º Row: K1 (edge), *P1, K3, P3*. Repeat from * to *, ending with K1 (edge). 13º Row: K1 (edge), *K2, P4, K1*. Repeat from * to *, ending with K1 (edge). 14º Row: as 2º row. Repeat rows 1 – 14 until the desired length is reached. BO in pattern after the 14th row. This is the other side of the work: Enjoy the video tutorial: Before I go: If you want to knit a scarf using the Diagonal to the Right stitch, and don’t know how many stitches to cast on, try the following steps: Happy knitting! Carolina – So Woolly PS: Looking for more textured designs that create depth without complexity? Explore the full Textured Stitch Patterns collection here.